Asset Texturing projects make it easy to apply textuers and materials to your 3D assets with an artist-friendly layering workflow. This article illustrates how to quickly get started creating your first Asset Texturing project in InstaMAT Studio. First, we'll begin by creating the project. Then, we'll cover how to bake mesh maps that can be used with InstaMAT's smart materials and masks. Finally, we'll provide a few examples on how to start texturing assets.
To dive deeper into the Layering UI, please view our dedicated section here.
¶ Creating an Asset Texturing Project
To create a new Asset Texturing project, click Create a new InstaMAT Project from the Welcome Screen or the (New Project) button from the main toolbar. Then choose Asset Texturing from the list of available project types.
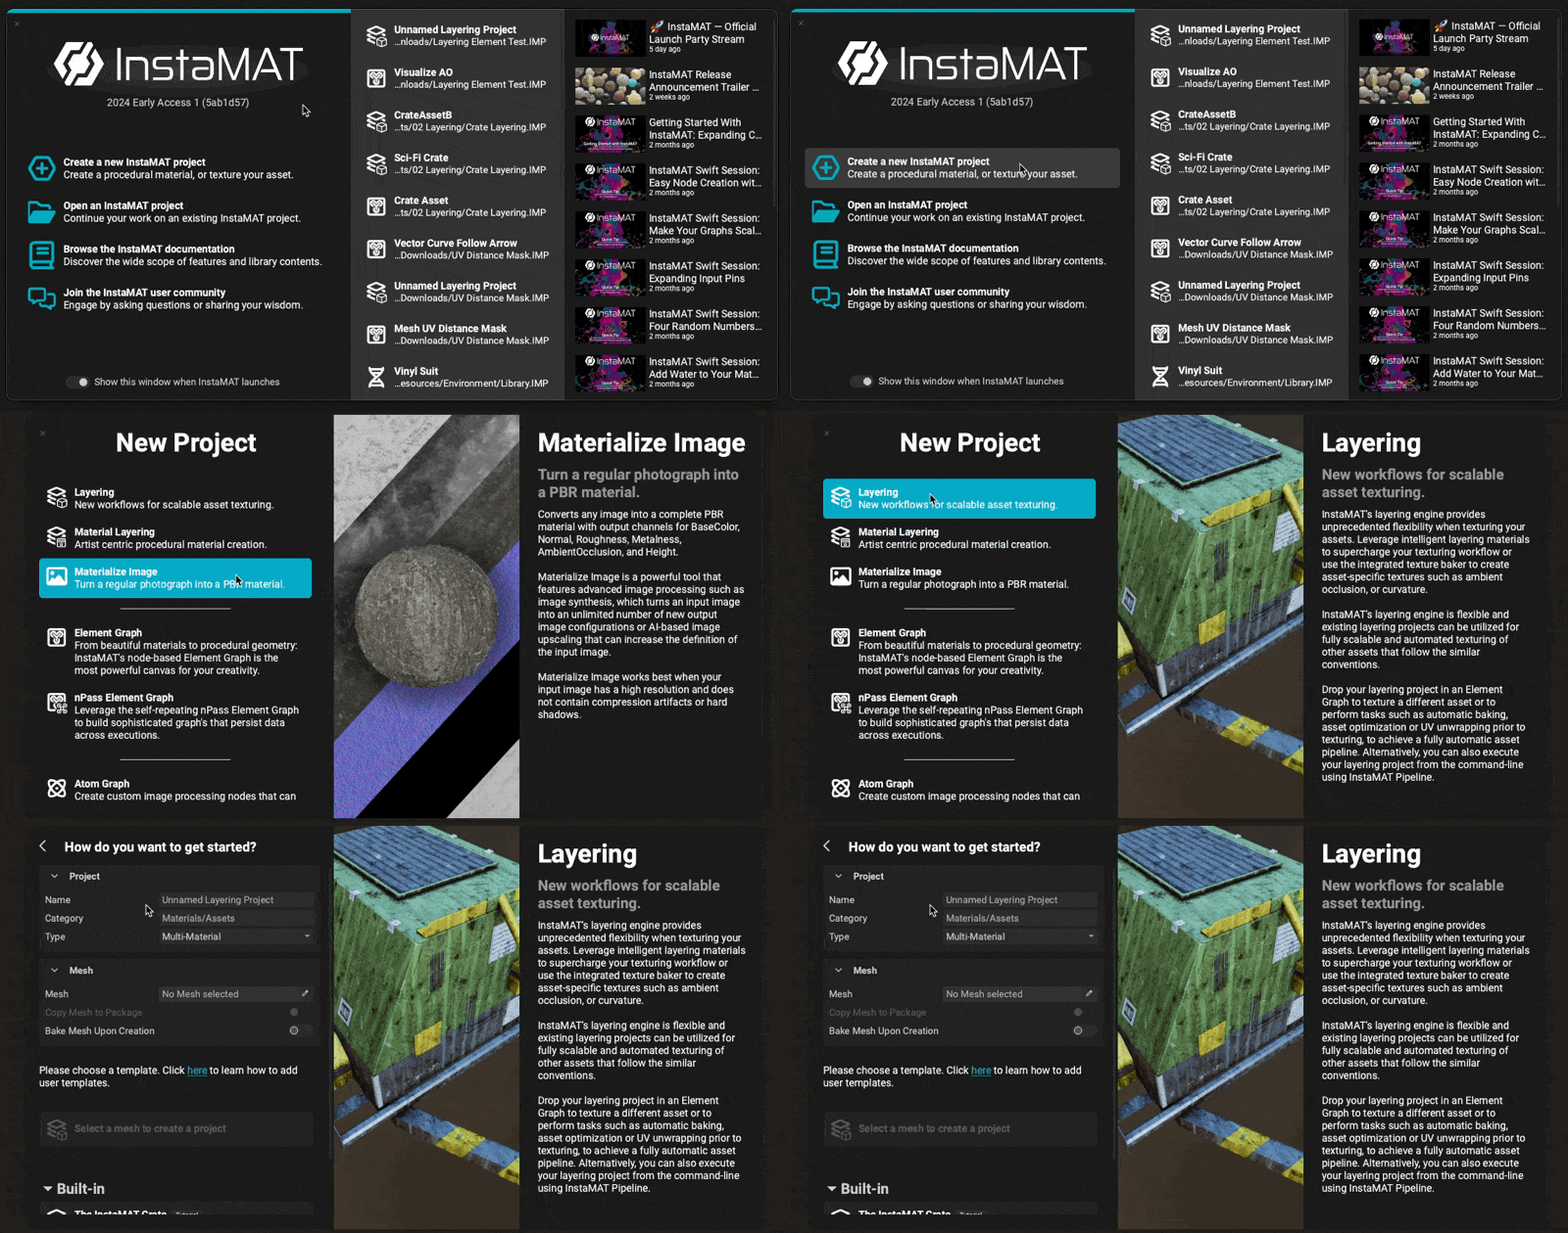
From here, the Asset Texturing project can be configured based on the type of workflow required for the asset.
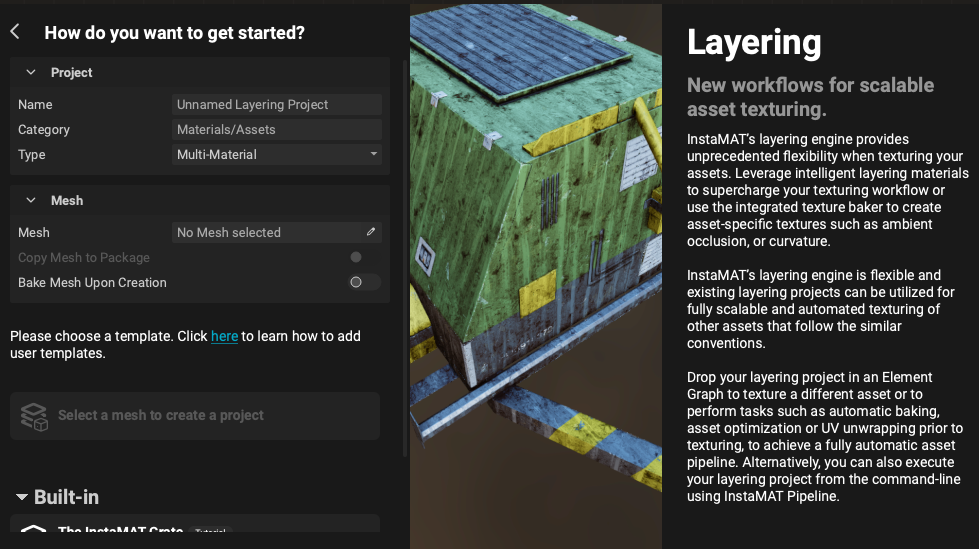
In the Project section, the project's name, category and type can be assigned. The Type dropdown determines how the Asset Texturing project will interpret the materials associated with the asset. The following overviews the available Asset Texturing project types:
- Multi-Material projects treat each material section (texture set) individually. This allows you to texture the asset with a separate layer stack for each material assigned to the mesh.
- Multi-Material (Unified) projects are unique to InstaMAT Studio. They allow you to work across material sections treating them like one unified material. This means that you can texture an asset that has multiple material sections with one layer stack unlocking workflows such as painting across material sections without having to worry about selecting the right stack.
- UDIM projects take advantage of assets that are configured to work with multiple UDIM tiles.
Multi-Material (Unified) projects unlock workflows that were previously only available in high-end VFX pipelines with UDIMs. They allow you to paint and layer in a realtime/game mesh setup without having to worry about managing multiple material sections. To learn more, please read our dedicated article on Multi-Material (Unified) Asset Texturing projects.
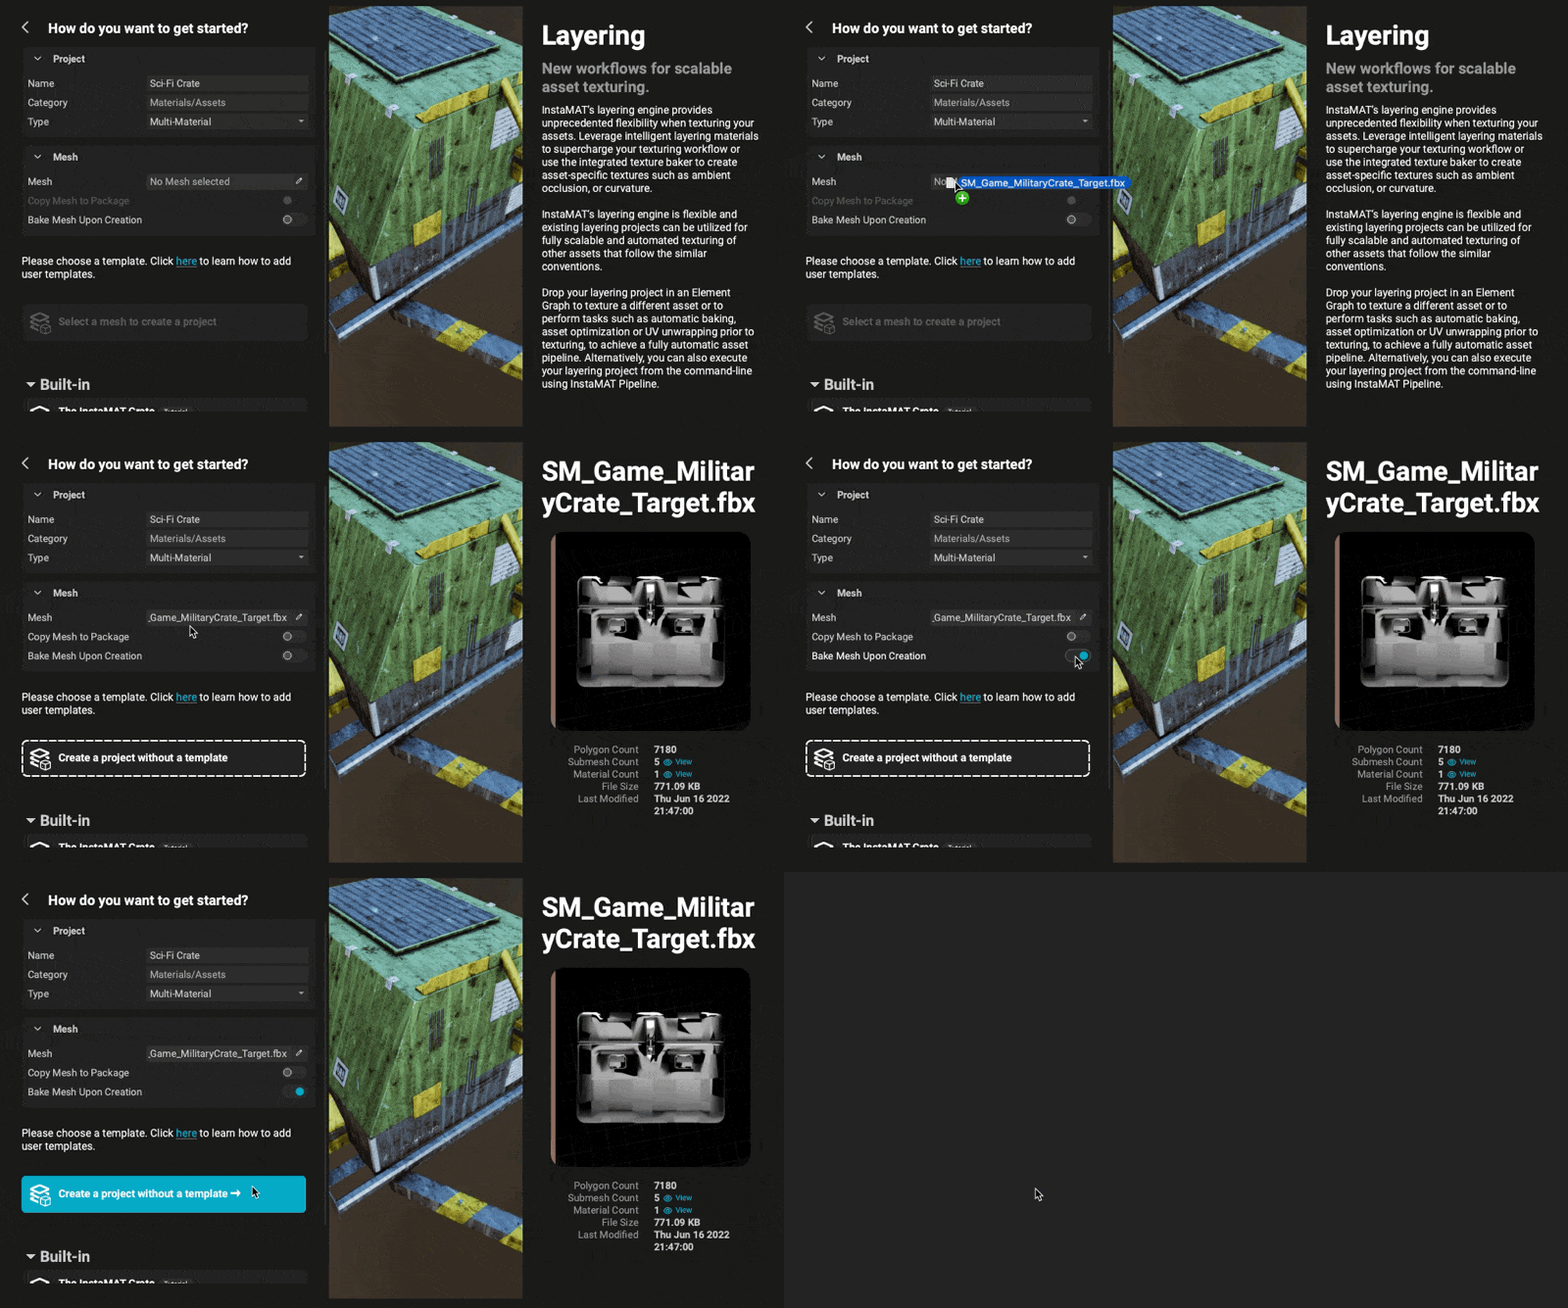
In the Mesh section, a mesh can be assigned to the project. Simply drag a mesh into the Mesh field from the Finder/Windows Explorer or click the (Pencil) icon to choose from selecting a mesh with the file browser or a resource from the currently open package with the Resource Picker.
Enabling the Bake Mesh Upon Creation toggle will open the Mesh Baking panel once the project has been created to begin the baking process.
¶ Baking Mesh Maps
Now that the Asset Texturing project has been created and a mesh has been added, InstaMAT Studio is now able to use its mesh bakers to extract the physical characteristics of the model into texture maps. These "mesh maps" are used with many of InstaMAT's smart masks and materials to add realistic effects like edge wear around corners.
Mesh baking also makes it possible to transfer details from a high poly model onto a low poly model in the form of texture information by specifying a Source Mesh. This will bake the high poly details into the normal map of the Target Mesh resulting in the perception of finer detail on the asset with less geometry.
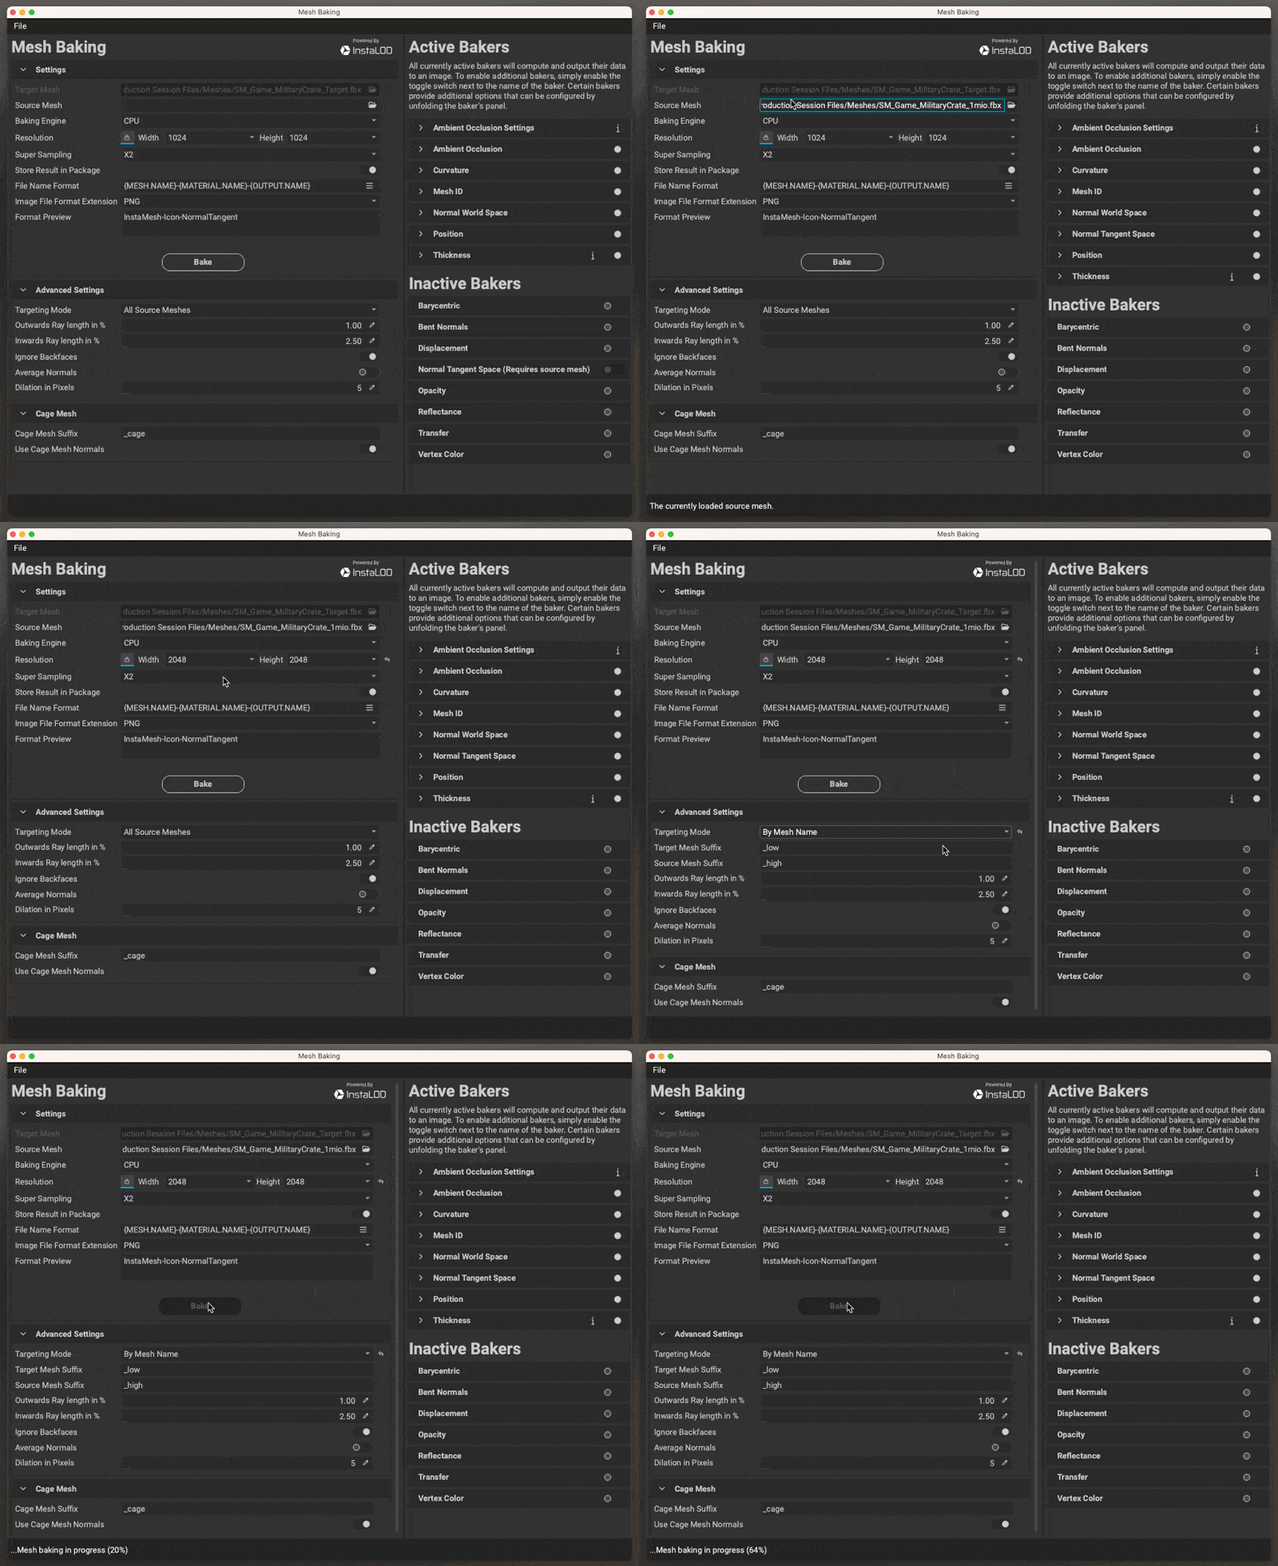
To bake mesh maps, choose the Resolution for the bake. It is recommended to pick the resolution you will be working at to get the most detail for the generated maps. Bakers can be enabled or disabled by toggling the switch for each baker on the right.
Once the baking settings are configured, click Bake to begin the baking process. InstaMAT Studio will generate the baked maps, add them to the current package, and automatically connect the generated mesh maps to the proper channels in the Asset Texturing project.
Note: A
Source Meshis not necessary in Asset Texturing projects to bake mesh maps. If you're texturing a high poly asset directly or there is no need to transfer any high poly information, omitting theSource Meshwill let InstaMAT bake maps such as Ambient Occlusion, Curvature, position, and Thickness for theTarget Mesh.
¶ Using Target Baking
When baking meshes there are two targeting modes. These can be accessed from the Targeting Mode dropdown under the Advanced Settings category. Choosing By Mesh Name allows InstaMAT to match the corresponding source and target submeshes based on the suffixes appended to their name. This allows the baker to selectively bake matching submeshes from the Source Mesh onto the Target Mesh which prevents baking artifacts by isolating each source/target component.
For example, with a
Source Mesh Suffixset to "_high" and aTarget Mesh Suffixset to "_low", a source mesh mesh named "Round_Part_high" will bake onto a target mesh named "Round_Part_low".
To learn more about the
Mesh Bakingpanel, please read our dedicated article here.
¶ Begin Texturing!
With the project created and mesh maps baked, it's now time to begin texturing. Here are a few ways to begin texturing an asset in an Asset Texturing project.
¶ Dragging Materials and Assets onto the Mesh
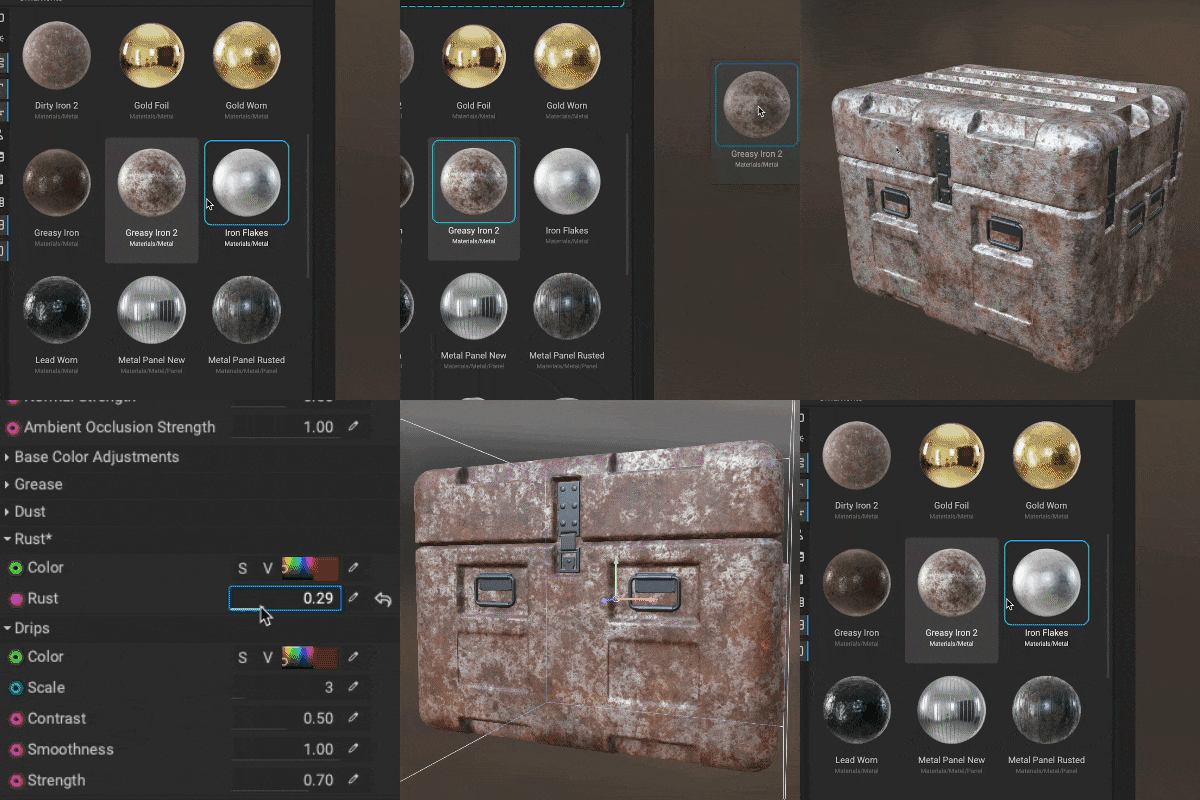 InstaMAT Studio comes with a massive high-quality material library filled with beautiful, procedural materials that let you customize their properties with dynamic parameters. To find the material library, open the MAT Library panel on the left and navigate to the
 Materials category.
Simply drag a material onto a portion of the mesh in the Viewport. InstaMAT will automatically fill that submesh with the material and apply a Mesh Mask to prevent it from showing up on other portions of the asset.
Clicking on the material's layer in the Layer Stack will bring up the Layer Element Settings panel where the material's dynamic parameters can be adjusted.
InstaMAT offers many types of smart masks to control where layers appear on an asset. To learn more about these masks, please read our dedicated article here.
Materials aren't the only thing that can be dragged into an Asset Texturing project. Assets from other library categories can be dragged either onto the mesh or directly into the Layer Stack. Try it with the following categories:
- Grunge
- LayerMaterials
- Noise
- Patterns
The LayerMaterials category contains InstaMAT Studio's Smart Prefab Layer Materials. These are special materials that contain entire layer stacks with layers, masks, and effects that can be dynamically applied to an asset. You can even create your own smart materials by dragging a layer group into the
MAT Librarypanel. To learn more, please read our dedicated article on Smart Prefab Layer Materials.
¶ Texture with Multi-Channel Layers
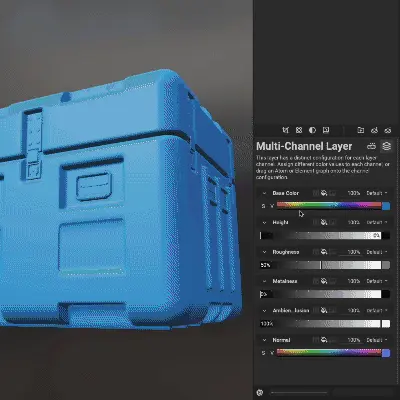 Multi-Channel Layers allow you to supply specific information for each channel in a Layering project. These channels can include properties such as the Base Color, Roughness, and Metalness of a PBR material.
To create a Multi-Channel Layer, click the (Add New Layer) button in the Layer Stack and choose Multi Channel Layer from the popup menu.
Below the Layer Stack is the Layer Editor which contains the Layer Channels panel. From here, each channel in a Multi-Channel Layer can be configured independently with either a color value, image, or Element.
When using an Element, its exposed parameters become available to dial in the exact look.
To learn more about layer types, please read our dedicated article here.
¶ Painting Directly onto the Mesh
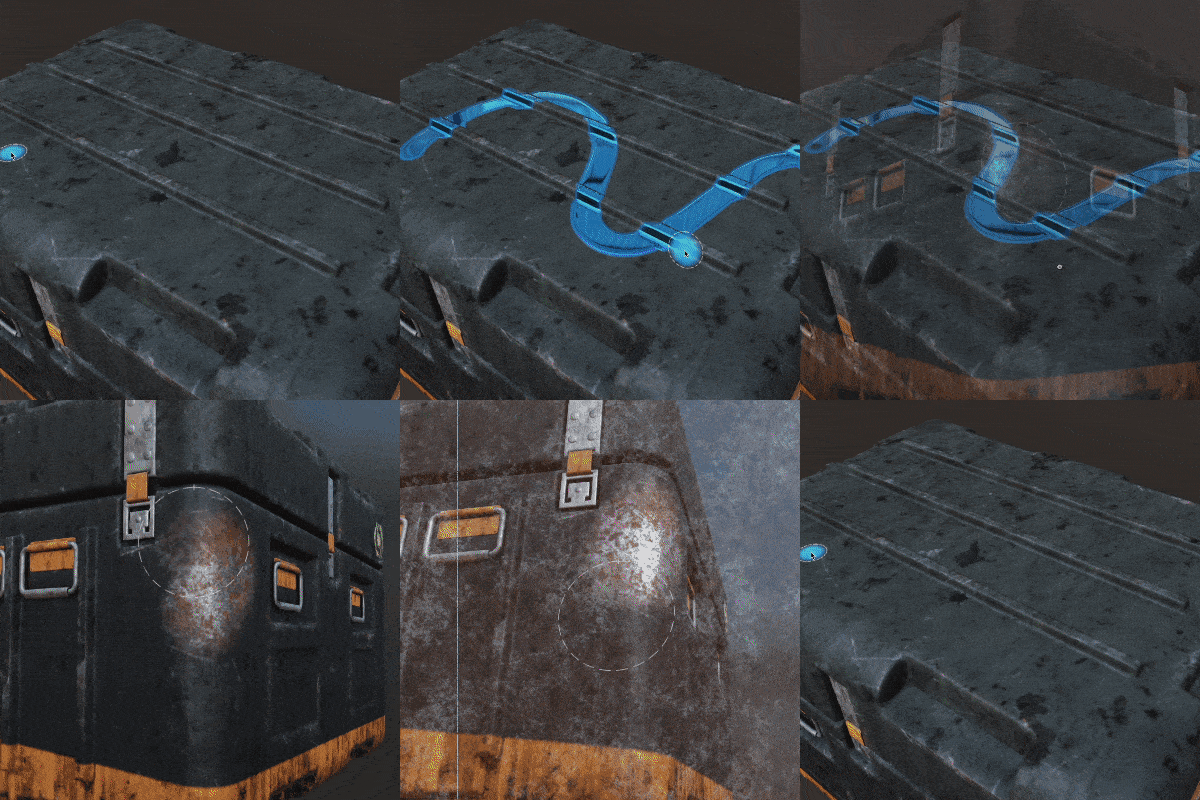 InstaMAT Studio's procedural 3D painting engine lets you paint directly onto the mesh in the
 Viewport. This can be done with a mouse or a pen tablet. The painting dynamics engine can be used to adjust a brush based on pen properties such as pressure, tilt, and rotation.
There are two types of brush layers:
- Multi-Channel Brush: Applies brush strokes with configurations for each individual channel. Similar to Multi-Channel Layers each channel can be controled by a color value, image, or Element.
- Element Brush: Applies strokes where channels are mapped from the graph outputs of an Element.
To create a brush layer, click the (Add New Layer) button in the Layer Stack and choose from either a Multi-Channel Brush or an Element Brush.
Brush settings can be configured using the
Brush Propertiespanel. To learn more, please read our dedicated article here.