Masks are based on grayscale values, where white represents 100% influence and black represents 0%. InstaMAT Studio provides a large assortment of specialized masks each with a particular approach to masking features of a mesh. In InstaMAT Studio, masks can be used in both layer-based and node-based project types. The following section explains how to use a mask in both project types.
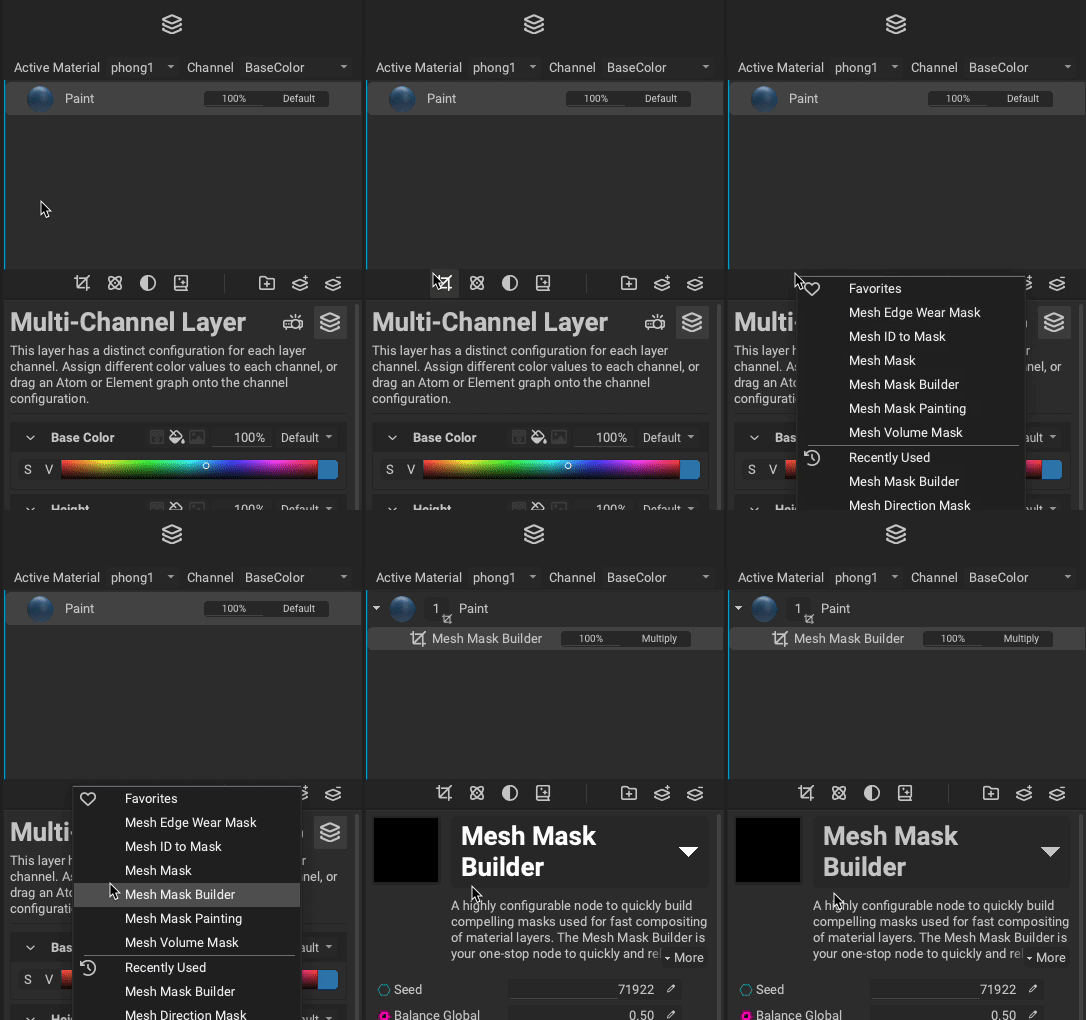 In Asset Texturing projects, masks can be assigned to a layer or Layer Group within the Layer Stack.
To add a mask to a layer or group:
- Select the layer or group in the
Layer Stack. - Click the
Add Maskbutton. - From the popup menu, choose the mask you would like to add from any favorites, recently used masks, or with the Resource Picker panel by selecting
Pick from library....
¶ Combining Masks with Layer Blend Modes
 Layer masks can be combined and blended together using their own dedicated opacity and blend mode settings.
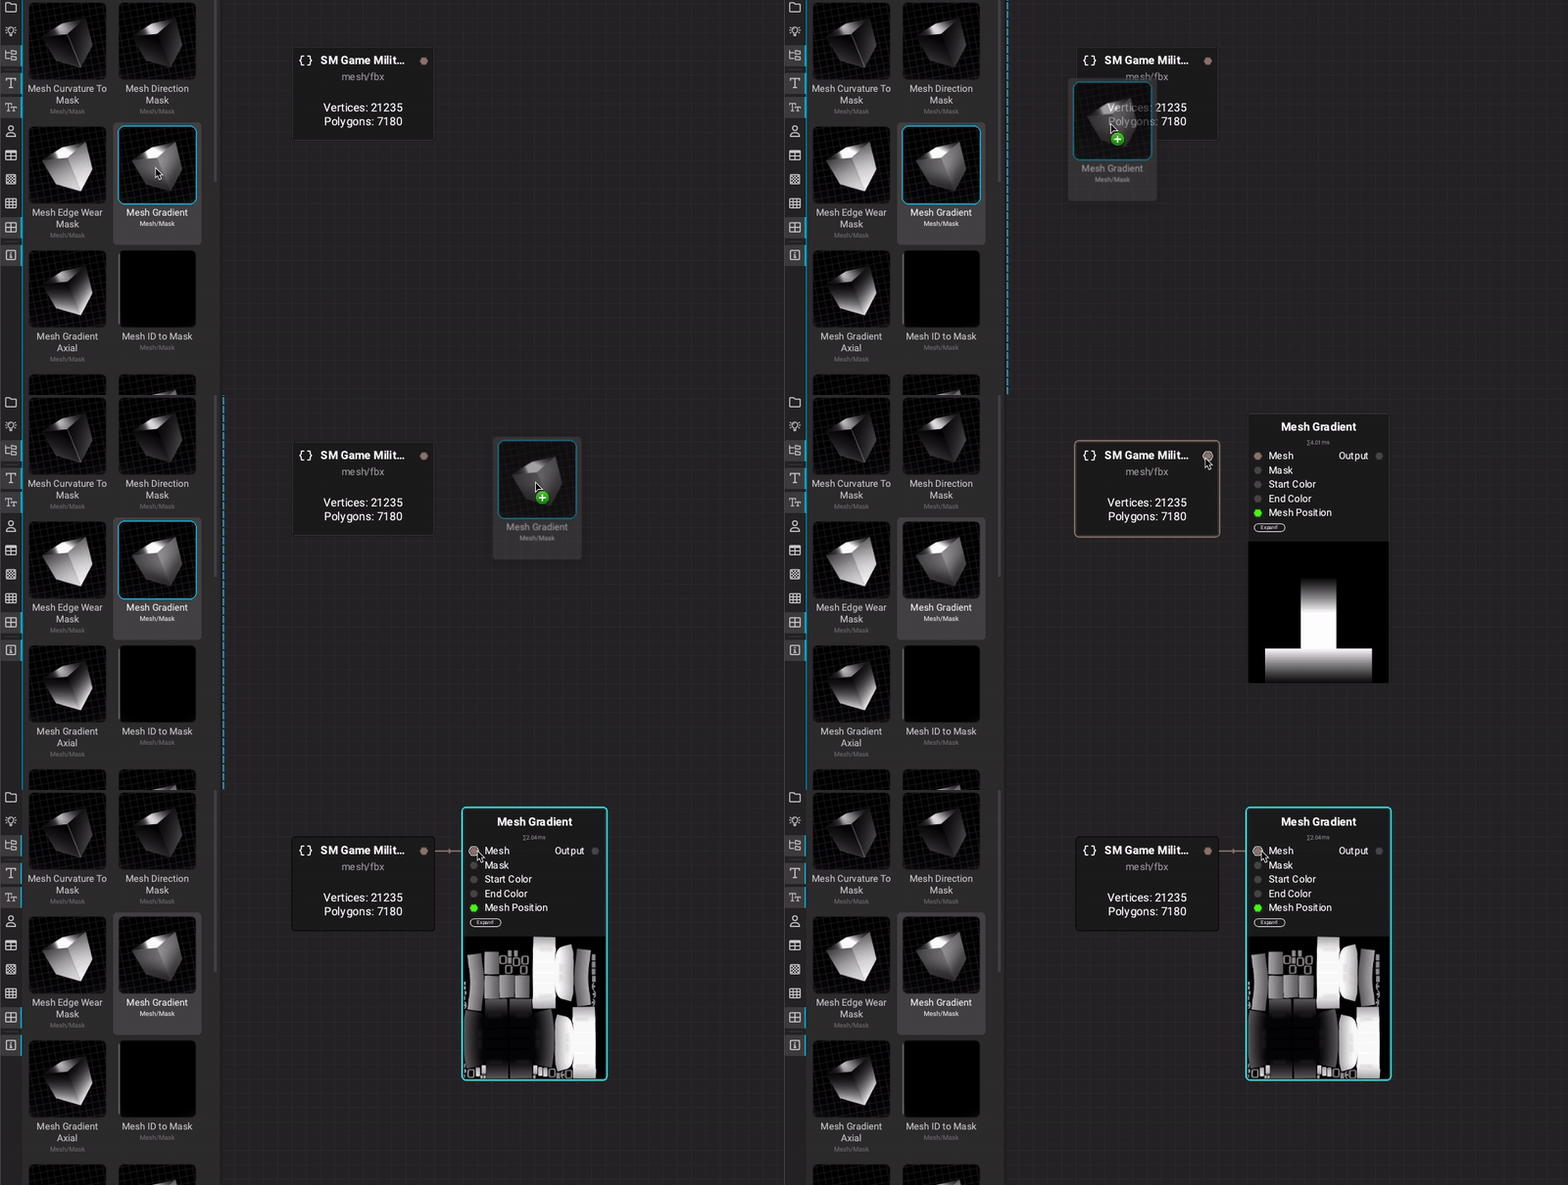
In Element Graphs, masks can be instanced as a node in the Canvas.
To create a mask node in an Element Graph:
- Find the mask node by searching or using the categories in the MAT Library panel.
- Drag and drop the node into the
Canvasto instance it. - Connect the required graph inputs such as a mesh or baked mesh maps if necessary.
Additionally, masks can be brought into a graph by using Quick Search.
¶ Overview of Available Masks
The following section overviews many of the various masks found in InstaMAT Studio's MAT Library.
¶ Mesh Mask
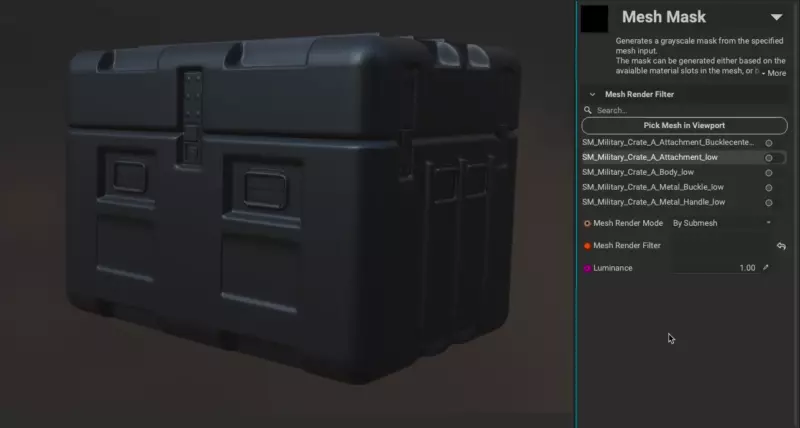
The Mesh Mask generates a mask based on the supplied input mesh. It can either be generated based on the available material slots in the mesh, or by the individual submeshes. This makes it easy to mask off particular pieces of the mesh based on how the scene has been set up prior to texturing.
¶ Mesh Render Filter
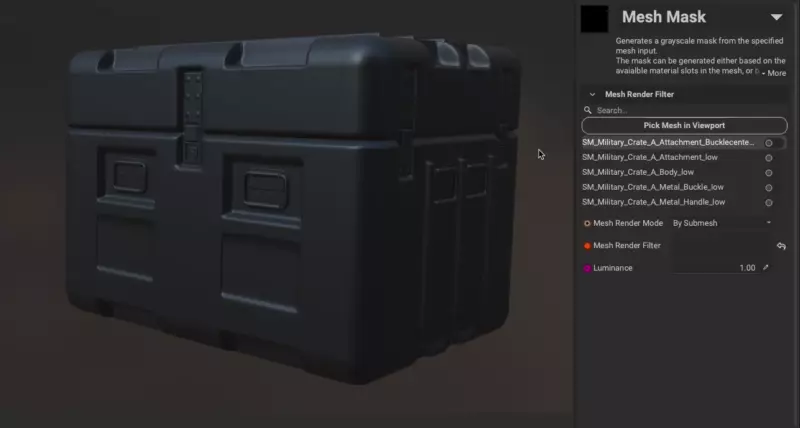
One of the primary features of the Mesh Mask is its ability to procedurally identify parts of a mesh based on a given wild card string found in the submesh name.
I wildcard is denoted by two (*) asterisks around a keyword or phrase. If the wildcard is found within the name of a submesh in the scene, the Mesh Mask will automatically fill that piece with white. This allows InstaMAT to automatically identify specific parts of a mesh and mask them, regardless of the input mesh. This is just one of the many ways to create a scalable texturing workflow with InstaMAT Studio.
¶ Mesh Submesh Mask
The Mesh Submesh Mask allows masking objects based on polygon adjacency, enabling separate parts of an object to be masked even when combined into a single mesh. Similarly to the Mesh Mask, parts of a mesh can be chosen by clicking on them directly in the viewport. Multiple parts can be selected by holding the Shift key.
¶ Mesh Mask Builder
The Mesh Mask Builder combines various mask types into a single node or mask layer. It is a highly configurable generator that allows for the quick creation of compelling masks based on mesh data. This mask is commonly used in Asset Texturing projects once mesh maps have been baked to extract the physical characteristics of the mesh into texture maps such as the Ambient Occlusion, Curvature, and World Position. The Mesh Mask Builder uses these maps to apply its various mask types.
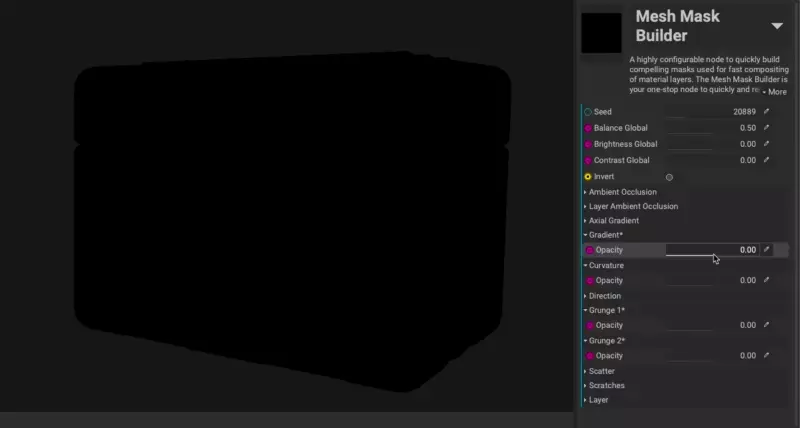
Each component of the Mesh Mask Builder can be used as an additive or subtractive element providing additional artistic control over the result.
¶ Mesh Normal Mask
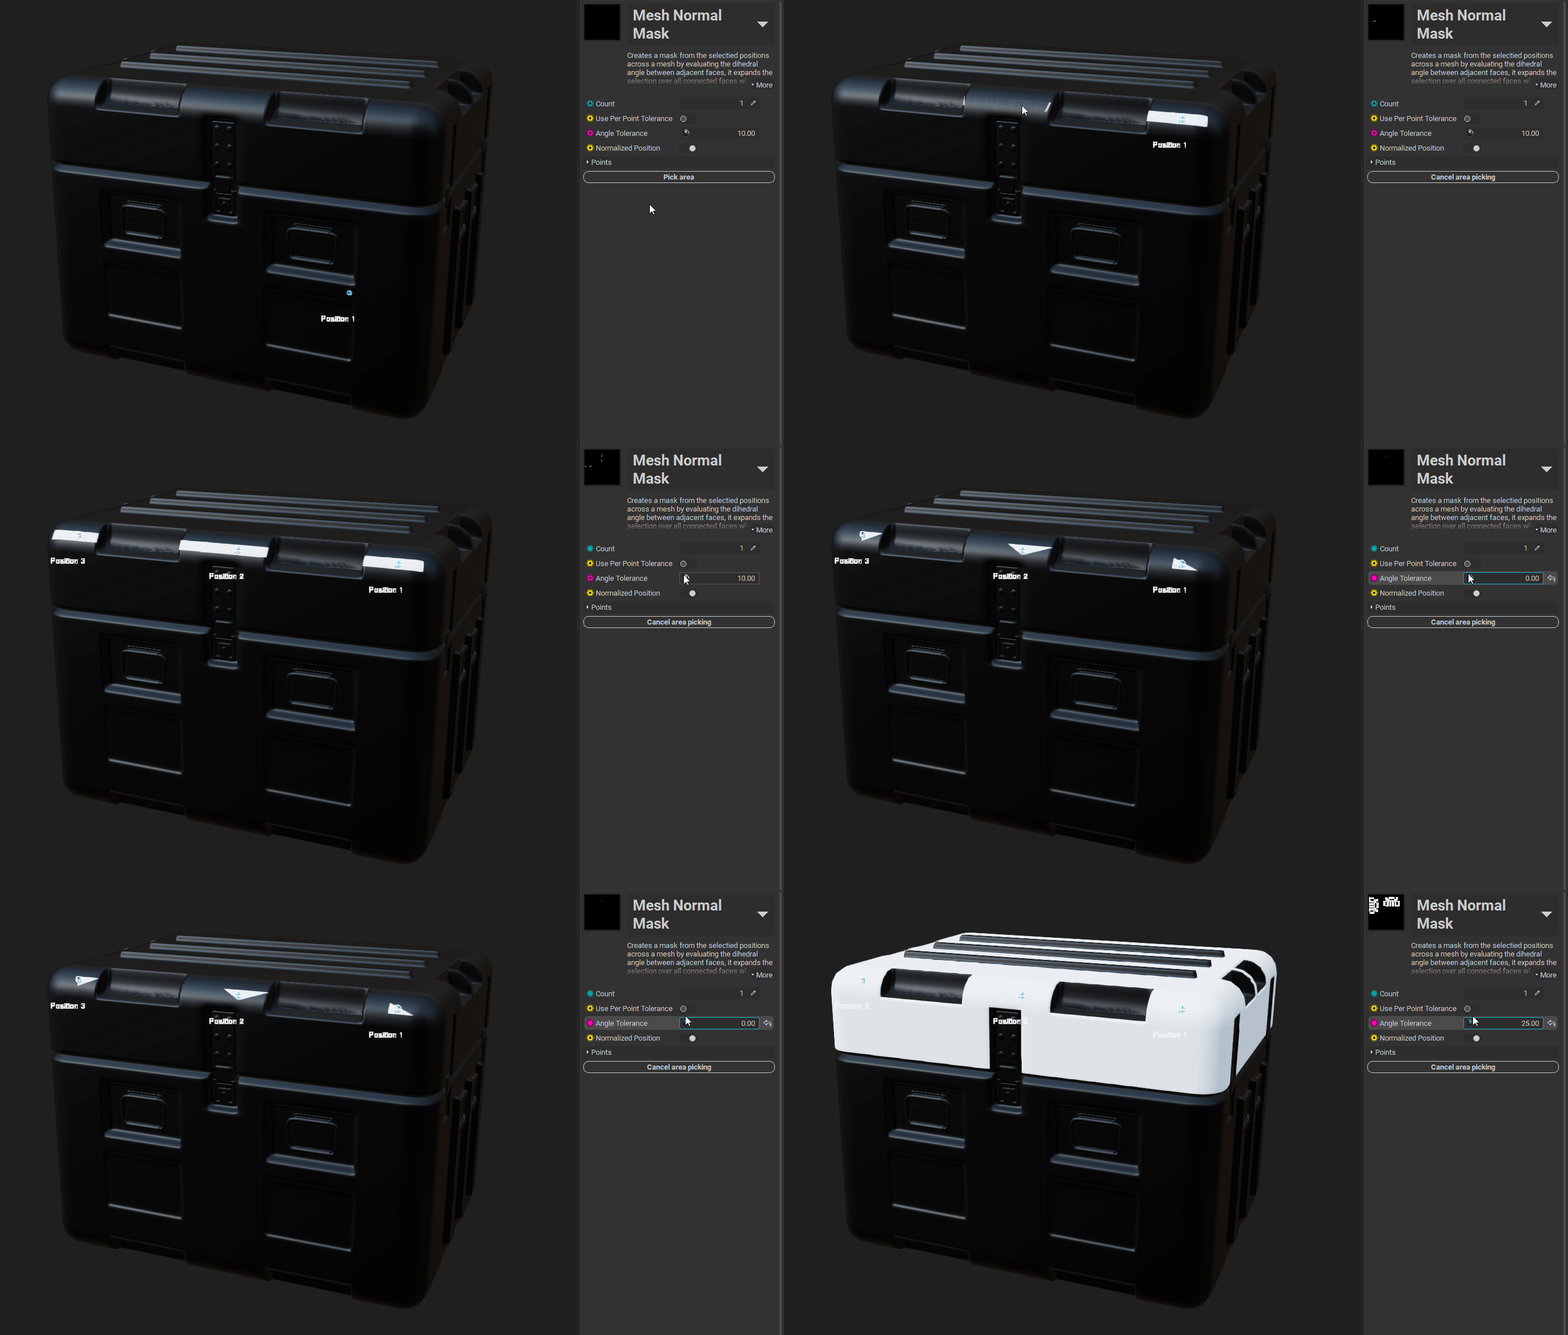
The Mesh Normal Mask generates a mask using a mesh's surface normals. Select a part of the mesh and adjust the Angle Tolerance to determine the which faces get masked. Shift + Left Click to select multiple points on a mesh. Enable Use Per Point Tolerance to refine the angle tolerance for each individual point.
Set the
Angle Toleranceto 0 to select individual polygons on the mesh.
¶ Mesh Edge Wear Mask
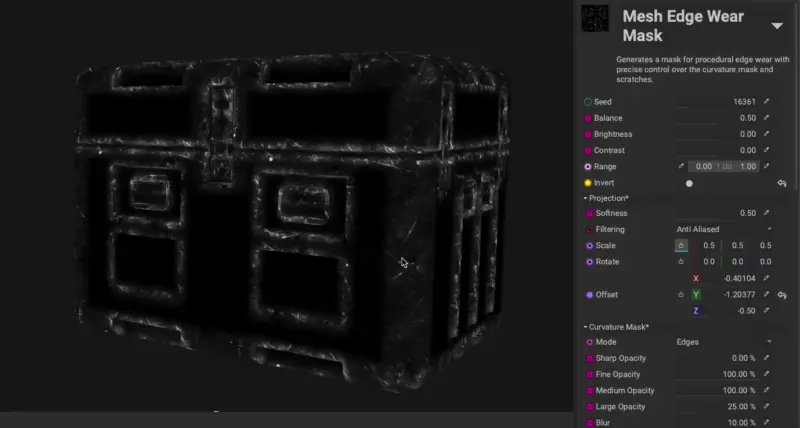
The Mesh Edge Wear Mask generates a mask for procedural edge wear, automating the process of adding natural scratches and bumps to a worn surface or asset. It allows for precise control over the curvature mask it generates, as well as offering various settings for the scratches.
¶ Mesh Leaks Mask
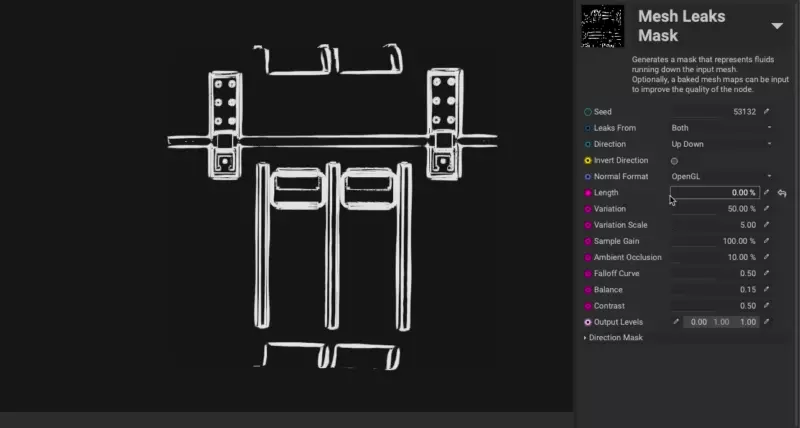
The Mesh Leaks Mask generates a mask that represents fluids running down the surface of a mesh. This is useful for automating the creation of leaks on old and weathered surfaces. Various properties of the leaks such as the length, direction, and source of the leak can be controlled for increased customization.
¶ Mesh Mask Painting
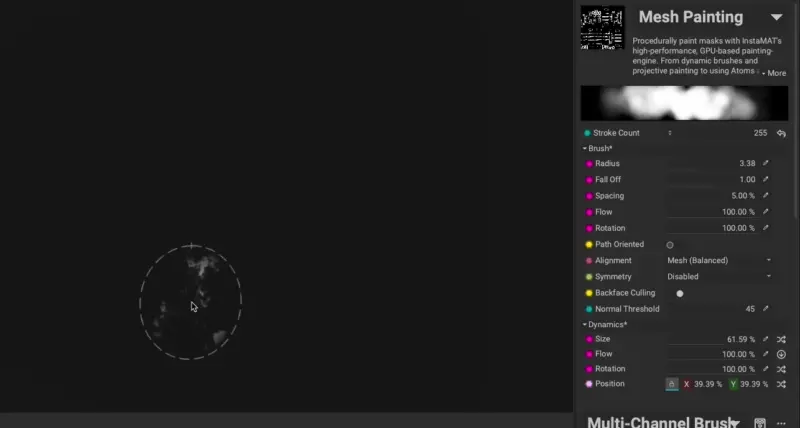
The Mesh Mask Painting node utilizes InstaMAT Studio's painting engine to paint a mask on the surface of a mesh using a brush. By utilizing the Brush Dynamics engine, properties of a pen tablet such as the pressure and angle can be used to determine the intensity of the mask.
Using the
Mesh Mask Paintingnode is a great way to take a non-destructive approach to painting when using Multi-Channel Layers in an Asset Texturing project. By painting using a mask, the various layer channels can be adjusted afterwards to provide another level of flexibility when texturing an asset.
¶ Mesh Volume Mask
The Mesh Volume Mask generates a mask based on the volume of a chosen primitive shape. This volume is generated based on the normalized volume of the mesh meaning it can produce the same results even if the scale of the input mesh changes. Many common primitive 3D shapes can be chosen and their position, scale, and rotation can be configured using the various Viewport Gizmos.
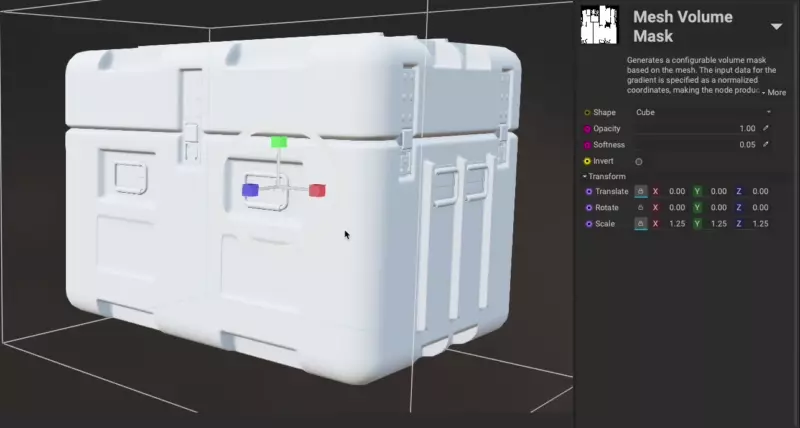
Mesh Volume Maskscan be combined to create more complex shapes. A common use for this mask is to create stripes along a complex surface.
¶ Mesh Projected Mask
The Mesh Projected Mask node generates a mask by projecting an image onto the mesh using various projection modes such as Decal, Tri Planar, and UV. The projection's volume of influence can be manipulated using the various Viewport Gizmos.
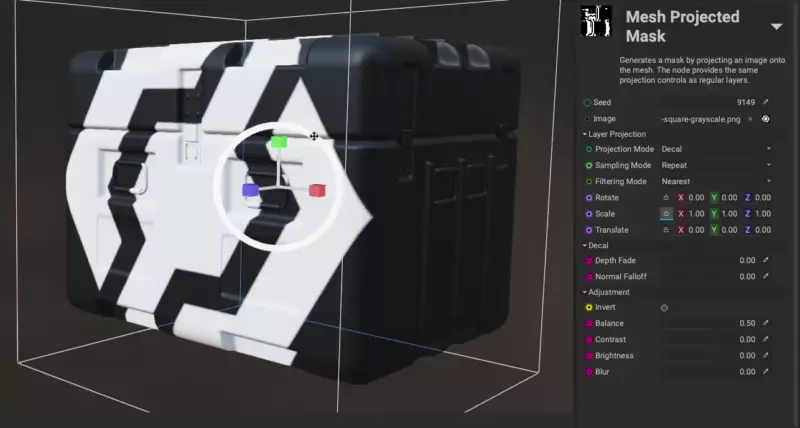
To learn more about projection modes, please read our dedicated article on the Layer Projection panel.
¶ Mesh Previous Layer Mask
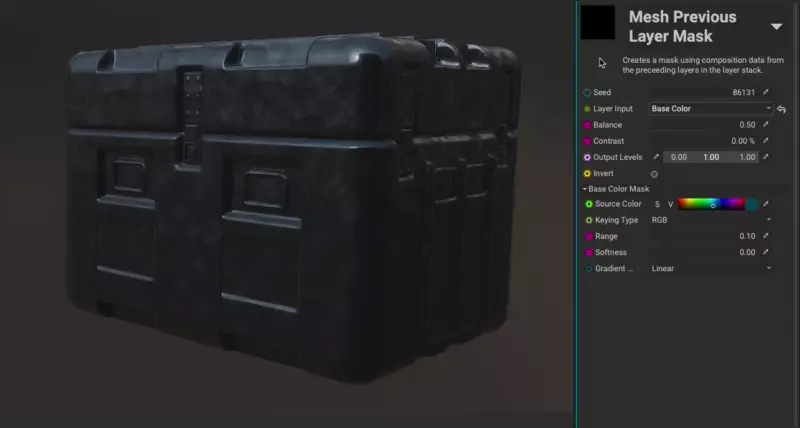
The Mesh Previous Layer Mask uses the information from the preceeding layers in the Layer Stack to generate the mask. This makes it possible to use channels like Base Color, Normal, Roughness, Metalness, and Height to procedrually build the mask based on the previous layers in the stack.
¶ Mesh Gradient Mask
The Mesh Gradient mask generates a mask based on a configurable gradient. The gradient's start and end points are based on the scale of the mesh meaning that it can produce the same results even if the scale of the input mesh changes. Their positions can be configured using the various Viewport Gizmos.
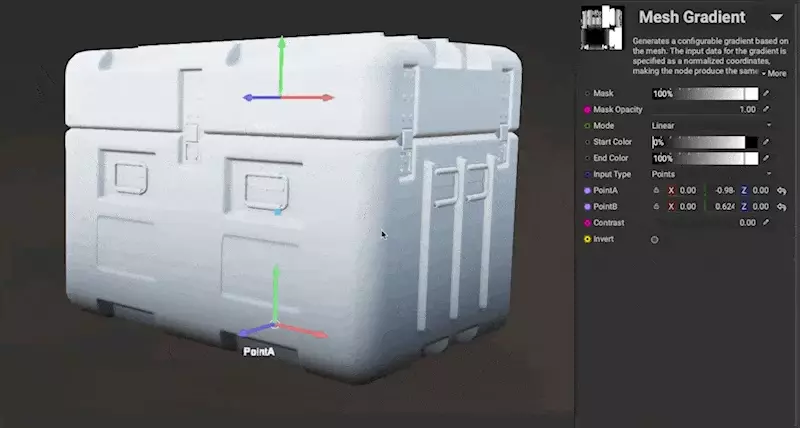
One example use case for this mask is when generating a gradient of dirt coming from the bottom of the mesh and slowly fading towards the top. Use this mask in conjunction with a grunge or noise to subtract and break up the linear nature of the gradient for a more realistic effect.
Additionally, there is a
Mesh Gradient Axialmask used to generate an axial gradient based on the extens of the mesh on an axis.
¶ Mesh Curvature to Mask
The Mesh Curvature To Mask node generates a mask based on the curvature of the input mesh. It provides the ability to identify the edges and cavities of the mesh's surface. This mask is commonly used to create edge wear on exposed corners or dust in corners. This mask includes parameters to dial in the large, medium, fine, and sharp features of the curvature to refine the mask.
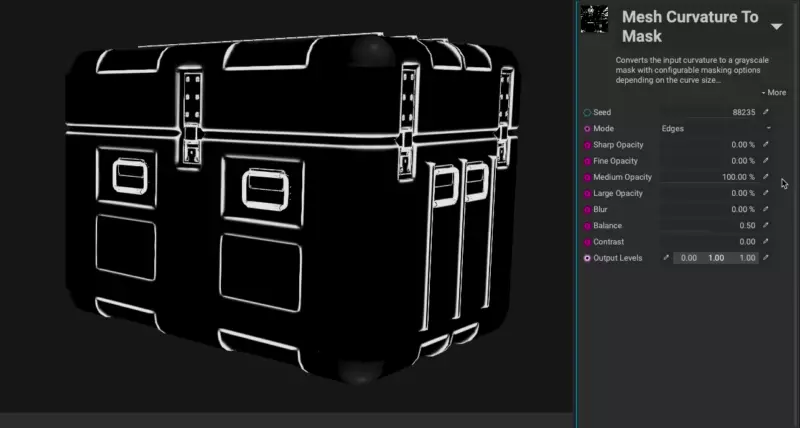
Use this mask in conjunction with a grunge or noise to create a mask for edge wear or dirt.
¶ Mesh Direction Mask
The Mesh Direction Mask generates a configurable mask based on the normal direction of the input mesh. This is based on the X axis for left and right, the Y axis for up and down, and the Z axis for front and back.
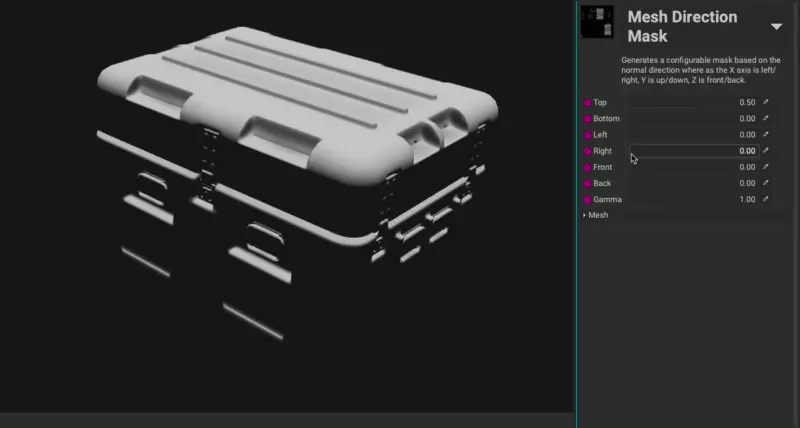
Some example use cases for this mask is to provide increased sun exposure over a particular side of the asset, or to add a layer of accumulated dust.
¶ Mesh UV Shell Mask
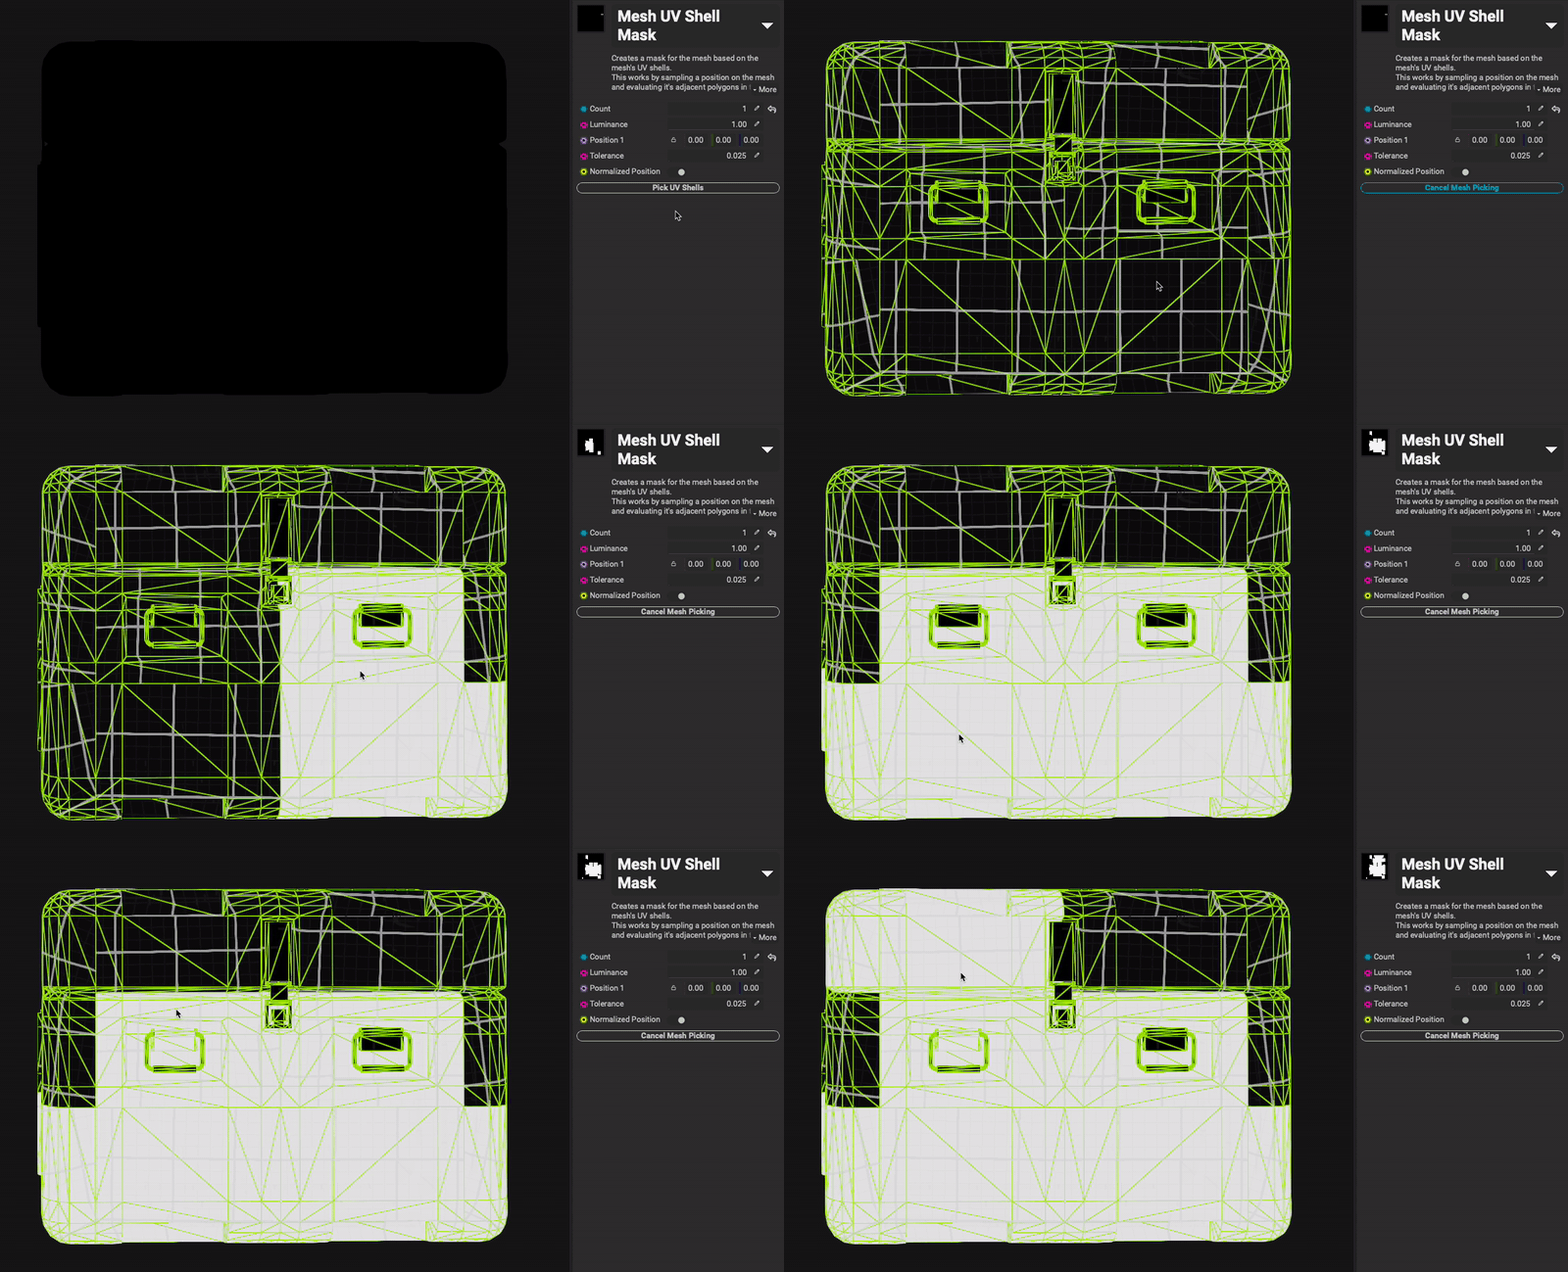
The Mesh UV Shell Mask generates a mask for the mesh based on the mesh's UV shells. This makes it possible to create a mask based on the mesh's UV shells while still providing procedudral functionality. Shells can be picked directly on the mesh. UVs are selected by sampling points in the mesh's normalized volume meaning that if the mesh's topology or UVs change, the mask will still apply.
¶ Mesh Polygon Mask
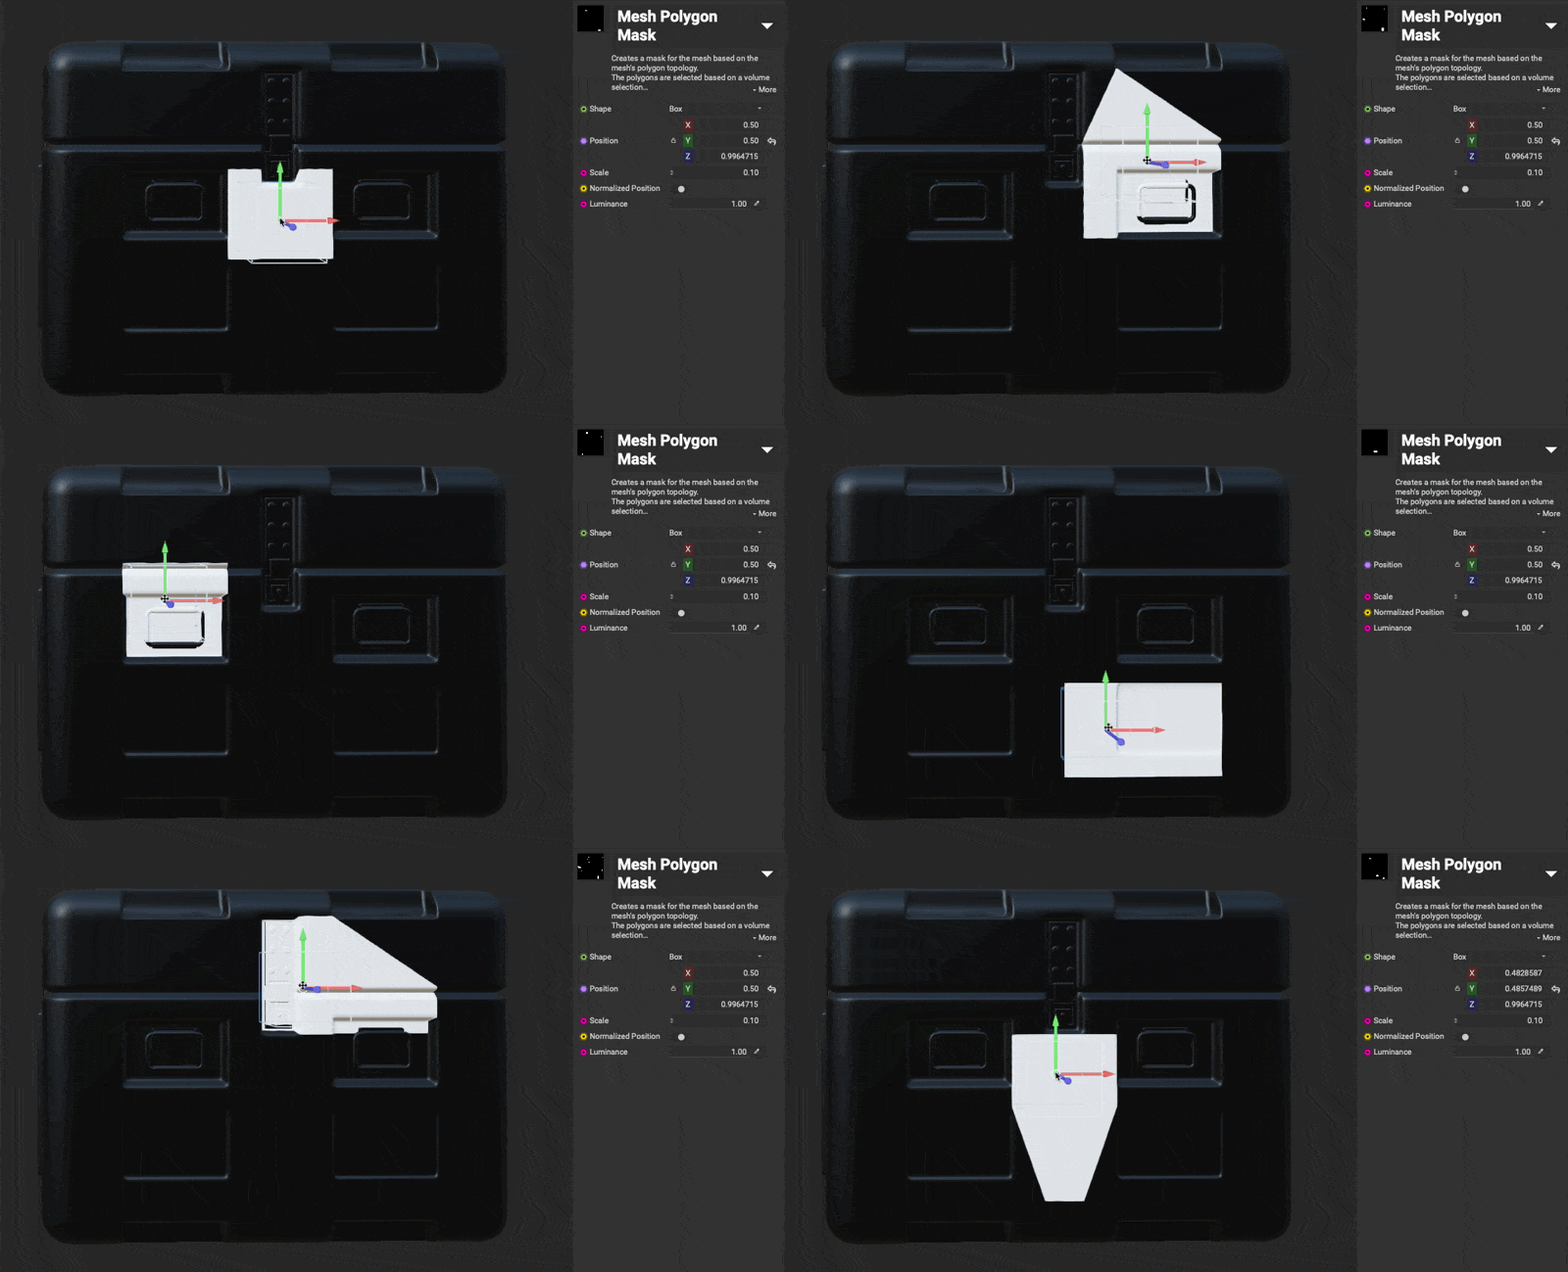
The Mesh Polygon Mask generates a mask based on the mesh's polygon topology. Polygons can be selected by positioning a volume around an area of the mesh. This makes it possible to mask by polygon while providing procedural functionality. The volume is generated based on the normalized volume of the mesh meaning that the mask will still apply if the mesh's topology changes. Create mutliple Mesh Polygon Masks and use blending modes to create more complex mask shapes.
¶ Mesh Vertex Color Mask
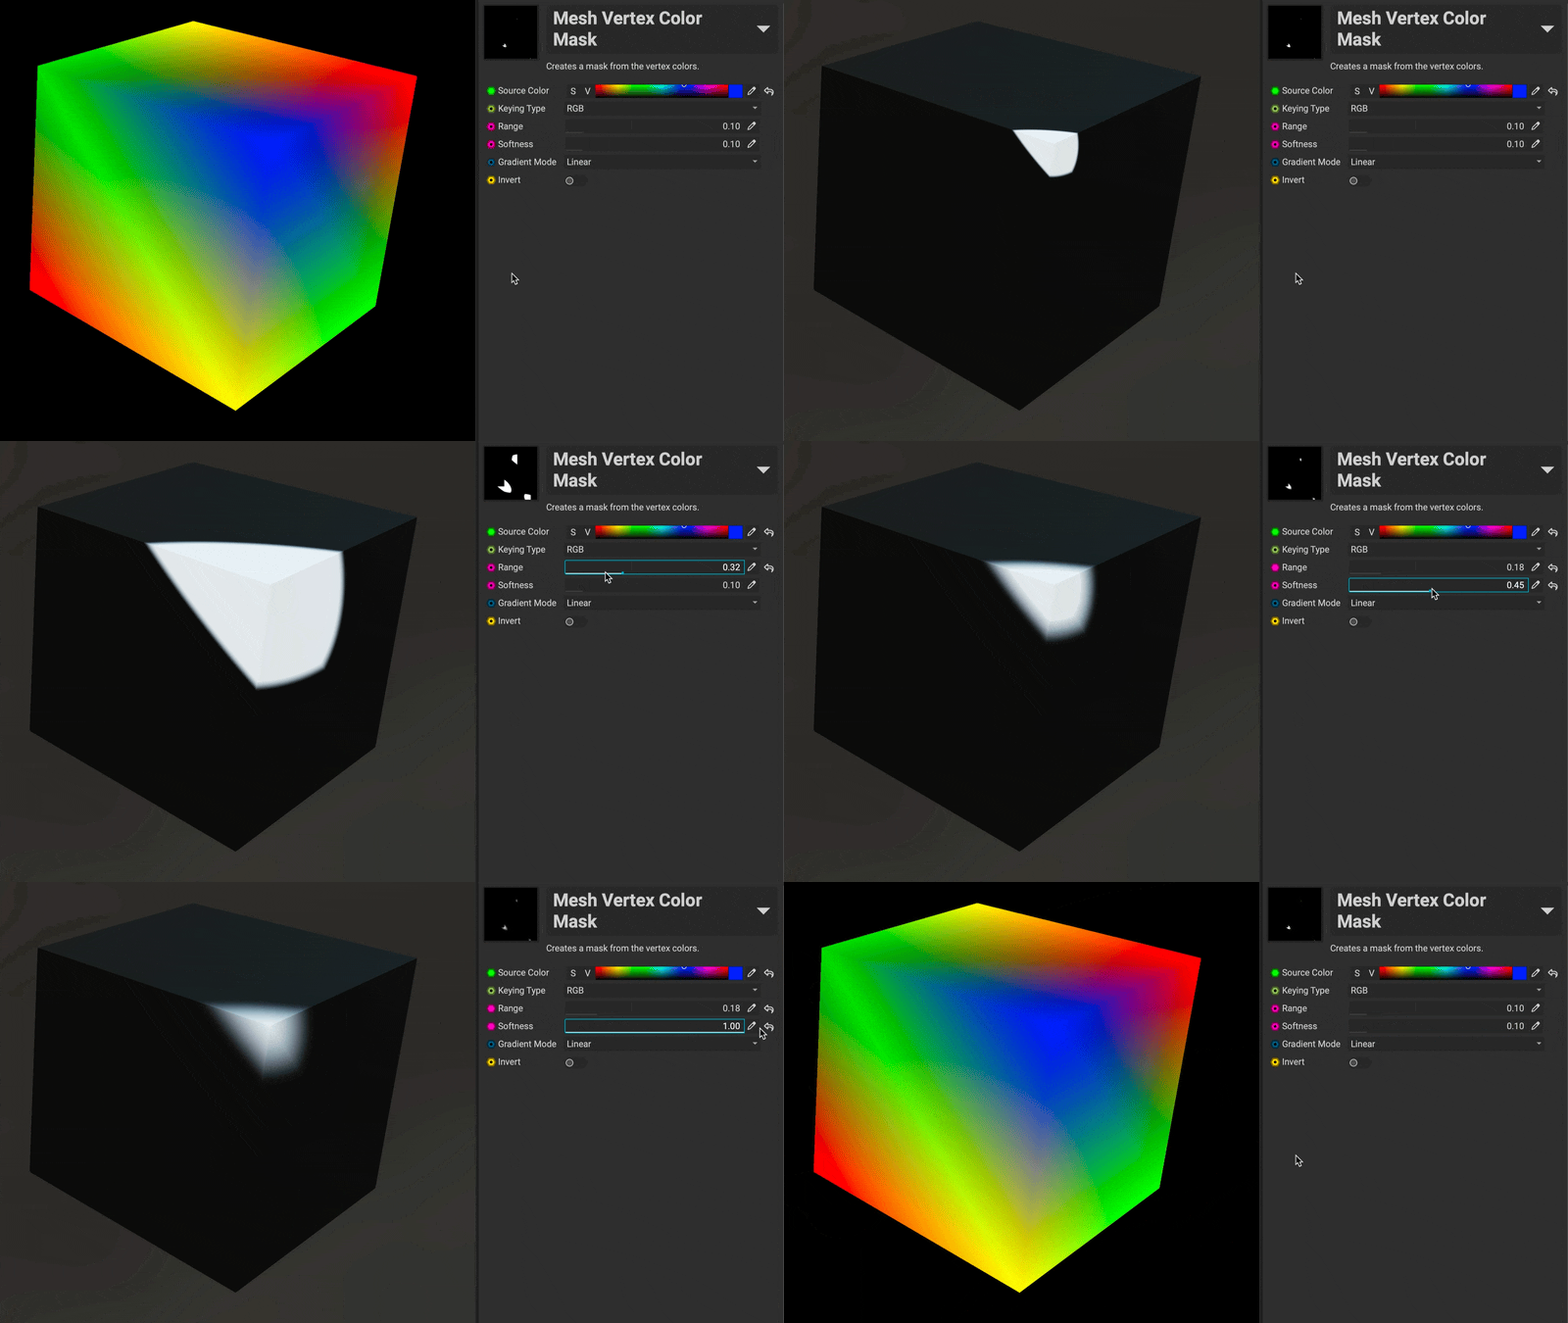
The Mesh Vertex Color Mask generates a mask based on the mesh's vertex colors. To pick vertex colors directly from the mesh in the 3D Viewport, go to the Viewport Settings panel and with the Render Mode dropdown, choose Vertex Colors.
