This page contains additions, changes and fixes to InstaMAT products. It's a living document that will be continuously updated after each release.
¶ InstaMAT 2026-05 Hotfix - Released on 11th May 2026
This release adds OAuth support to the license activation UI. It has full feature parity with the March release. Now you can easily activate InstaMAT Studio with your Abstract ID. No password needed.
¶ InstaMAT 2026-05 – Released on 1st May 2026
This release marks the first time Abstract’s full technology stack runs natively on Linux — no compatibility layers, no Wine, no virtual machines, no performance penalties. The same generative material creation, texturing, and automated pipeline tools that have transformed workflows for leading studios and enterprises now execute directly on the operating system that powers the majority of professional 3D infrastructure worldwide.
Platform-specific considerations for the Linux preview release:
- GPU baking is not currently supported.
- The Python plugin uses Python 3.11.
¶ Linux Integrations
This release brings InstaLOD and InstaMAT integrations to Linux for the first time, completing the native Linux experience for Blender and Maya users. Integration support is currently in preview as we continue to expand platform coverage.
¶ InstaMAT Integrations
- Support for Blender 5.1
- NOTE: Some older GPUs may experience issues with the EGL OpenGL context on Blender for Linux. If you encounter initialization issues, try switching to Blender's Vulkan backend.
👀 Read the full annoucement here.
¶ InstaMAT 2026 – Released on 11th March 2026
This release introduces powerful asset texturing tools to InstaMAT Studio, delivering unparalleled control and flexibility for 3D artists and technical artists alike. From GPU-accelerated curve-based painting to advanced symmetry tools and intelligent masking systems, this update empowers creators to achieve precision and artistry in their texturing workflows like never before.
¶ Curves Brushes
Curves brushes allow you to define editable curve paths with control points directly on the surface of your mesh. Unlike traditional brush strokes, curves remain fully editable after creation. You can adjust, move, and refine control points to achieve precise placement and flow across your 3D surface. In addition, each curve can be transformed as a whole to translate, rotate, or scale the entire path.
You can create multiple curves within a single curves layer and reorder their painting sequence, set curves to erase instead of paint, and close curves to create seamless shapes from start to end point.
Control points can be set to different types including linear, symmetrical, smooth, or cusp, giving you complete control over the curve's shape and flow. The Joint Smooth setting allows you to control how sharp or smooth the transitions are between curve segments, ranging from hard angles to fluid curves.
Each control point supports custom per-point settings for radius, fall off, flow, and rotation, enabling dynamic effects like tapering or gradual fading along the curve path.
Brush strokes can be path oriented, allowing them to align with and follow the direction of the curve for natural, flowing details. Curves fully support InstaMAT's dynamics engine for randomized size, flow, rotation, and position, adding organic variation to your strokes.
Curves brushes utilize InstaMAT's GPU-accelerated 3D painting engine and does not rely on mesh UVs, meaning your curves remain intact even if the mesh topology or UV layout changes. This workflow is particularly powerful for adding details like panel lines, seams, stitches, decorative elements, or any feature that requires precision, repetition, and symmetry, while maintaining complete flexibility to iterate and adjust your work at any time.
¶ Lazy Stroke
Lazy stroke is a brush smoothing feature that helps create cleaner, more controlled strokes by dampening hand movements and cursor jitter. When enabled, the brush follows your cursor at a slight delay determined by a configurable radius, automatically smoothing out shaky movements to produce fluid lines. This is particularly useful for freehand painting tasks requiring precision, such as applying smooth lines, creating organic patterns, or painting fine details.

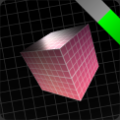
¶ Radial Symmetry Painting
Radial symmetry enables you to create repeating patterns around a central axis, perfect for adding circular details, decorative motifs, or symmetrical designs to your meshes. You can configure the symmetry axis (X, Y, or Z) to match your mesh orientation, set the number of repeated brush instances around the circle, and adjust the angle span to create full 360-degree patterns or partial arcs. The plane origin location is customizable, allowing you to position the center point of the radial symmetry precisely where you need it. This makes it easy to paint elements like bolts around a circular panel, decorative patterns on cylindrical objects, or any detail that requires evenly spaced repetition around a central point.
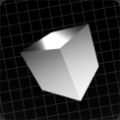
¶ Improved Planar Symmetry Painting
 Painting with planar symmetry has been significantly improved with better accuracy and increased control. The visibility of symmetry plane can be customized, and the plane itself can be offset to a custom position on any of the three world axes. Additionally, you can choose to mirror the brush on the opposite side of the symmetry plane, giving you more flexibility in how you apply symmetrical details to your mesh. Symmetry accuracy has been greatly improved when painting on meshes that are not exactly symmetrical. Great for when texturing objects or characters that have natural deformations and differences across symmetry planes.
¶ New and Improved Masks
InstaMAT 2026 extends it's wide collection of dynamic masks with two powerful workflows that make isolating meshes and their features easier than ever before.
¶ Mesh Normal Mask
 The
The Mesh Normal Mask is a powerful selection tool that allows you to isolate and mask portions of your mesh based on polygon normals and an adjustable angle tolerance. Simply click on any part of your mesh, and the mask will automatically select surfaces with similar normal directions, making it easy to target areas that would otherwise be difficult to select manually.
This is particularly useful for masking flat surfaces, curved regions, or specific faces on complex geometry. You can define multiple chosen areas within a single mask, building up precise selections across different parts of your mesh. Additionally, the tolerance can be adjusted per point, giving you fine-grained control over how aggressively the mask expands from each selected area.
Because the mask operates independently of UVs, it remains stable and adapts automatically if the mesh topology or UV layout changes, ensuring your masking stays intact throughout iterative modeling workflows.

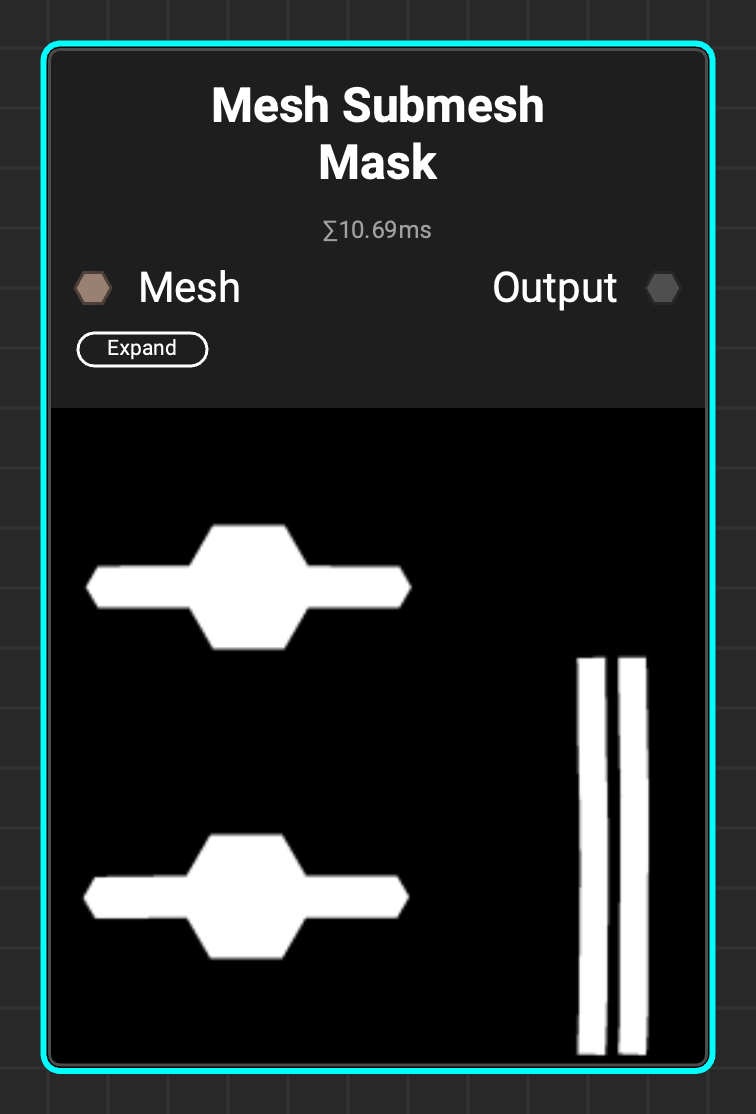
¶ Mask by Submesh Size
 The
The Mesh Submesh Mask now includes the ability to mask submeshes based on their size and distance. This makes it easy to apply textures and materials to scenes that include similarly-sized objects without having to isolate them manually.

¶ Mesh Laplacian smoothing
 The
The Mesh Smooth node now includes an improved Laplacian smoothing mode that delivers superior results when smoothing mesh geometry. Unlike traditional smoothing methods that can cause unwanted volume loss or shrinkage, Laplacian smoothing generates a more unified, even surface while better preserving the original mesh volume. This makes it particularly effective for cleaning up scan data, removing noise from photogrammetry meshes, and refining sculpted details without sacrificing the overall form and silhouette of the model.

¶ Mesh Mirror
 Easily mirror decals, masks, and entire layers with the
 Mesh Mirror filter. Apply the filter to a layer group to mirror complex effect and mask combinations.

¶ Mesh Bevel Bake Normals
 Easily bevel the edges of your low poly assets with the
 Mesh Bake Bevel Normals node. This node uses InstaMAT's GPU-accelerated bevel normals baker and includes quick access to masking features, allowing you to easily select which objects or edges to bevel. Like all of InstaMAT's effects, these bevel masks are applied procedurally. This means if you change the input mesh’s topology or UVs, the bevels will still appear in the correct locations.

¶ Mesh Directional Blur
 Create realistic leak effects with the new
 Mesh Directional Blur filter. This filter blurs in a specific direction in 3D space, maintaining consistent directionality across the mesh surface regardless of UV layout or texture resolution. Easily create drips and leaking textures with quick access to powerful distortion and falloff effects.

¶ More Mesh Filters, Effects, and Masks
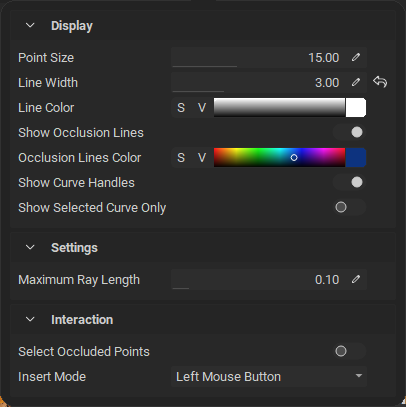
InstaMAT 2026 introduces even more powerful mesh filters, effects, and masks to expand your creative toolkit. The Mesh Solidify filter adds solidification to layers to prevent rendering artifacts, while Mesh Sharpen enhances definition and surface detail clarity. The Mesh Stylized Filter provides artistic texturing options for achieving non-photorealistic looks. Finally, the Mesh Ambient Occlusion Mask uses raytracing to generate occlusion-based selections, making it easier to isolate crevices, corners, and recessed areas for targeted texturing and detailing work.
¶ UI/UX Improvements
This update brings several improvements to the UI and UX of InstaMAT Studio.
¶ New Dedicated Painting Toolbar
InstaMAT 2026 now features a new dedicated painting toolbar that provides essential brush and curve settings at your fingertips.

 This new toolbar consolidates frequently-used painting controls in one convenient location, giving you quick access to brush radius, flow, rotation, lazy stroke radius, symmetry, and curve-specific settings without interrupting your workflow. The toolbar dynamically updates based on your active layer, showing relevant options for brushes and curves while keeping the interface clean and distraction-free.
¶ Dedicated Brush Rotation Hotkey
 Quickly rotate a brush by holding Cmd/Ctrl + Shift and dragging with the left mouse button to stay in your creative flow.
¶ Planar Translation Gizmos
 InstaMAT’s translation gizmos have received an upgrade with new planar gizmos. This makes it possible to move a mesh, effect, or mask along two axes at the same time.
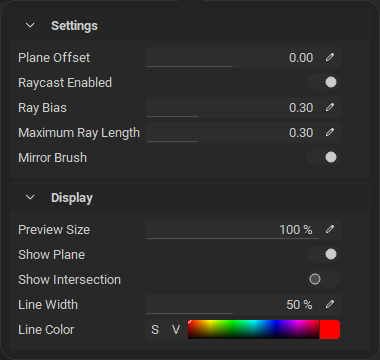
¶ Custom Viewport Wireframe Settings
 It is now possible to control the width and color of the wireframe overlay in the viewport.
¶ Viewport shortcut overlay
InstaMAT now displays helpful shortcuts and hotkeys in the viewport when painting, using curves, and using the paint projector.

¶ Mesh Import Settings
 It is now possible to configure the mesh up axis and coordinate system handness for asset texturing projects.
¶ All Changes
-
Asset Texturing
- New Curves Brush based on bezier curves
- Added radial symmetry support for painting brushes
- Added Lazy Radius option for brushes
- Added offset control for plane symmetry
- Added mirror brush option for plane symmetry
- Added keyboard shortcuts for symmetry controls and gizmo to translate the plane
- Added a configurable shortcut to rotate the mesh painting brush ( Ctrl+Shift+LMB) and improved projector rotation consistency
- Improved stroke precision when using plane symmetry
- Corrected Picking doesn't work for Mesh mask set to material mode
- Corrected Clamping issues with projector masking
- Corrected an issue where the Mesh UV Shell Mask did not highlight individual shells
- Corrected an issue where enabling MSAA in the Layering settings with Bilinear Smooth caused clamping to be ignored
- Corrected an issue where solo preview did not work correctly for masking when using certain blend modes
- Corrected painting graph deserialization cases that accessed missing JSON keys
- Corrected an issue where undo in Multi-Material (Unified) mode caused loss of material sections
- Corrected a crash when creating a new material layering project without a template
- Updated add/remove layer icons in the Asset Texturing toolbar to align with the main toolbar iconography
- Added mesh up axis and coordinate system handness for asset texturing projects
-
Library
Mesh MirroreffectMesh Directional BlureffectMesh SharpeneffectMesh Solidifywhich solidifies using the seam neighborsMesh Ambient Occlusion MaskmaskMesh Bake Bevel Normalseffect for beveled normals with configurable maskingMesh Normal Maskto create a mask from a selection and an angle thresholdMesh Unique Colorsgenerates an ID map based on the submesh indicesMesh Set Vertex Colors Unique SubmeshCurves Select Range- Added separate clamping modes to
Blurnodes - Added disk sampling to
Mesh Curvature - Added laplacian option
Mesh Smooth - Added support for single material inputs to the
Material Scatter - Added Kuwahara and Symmetric Nearest Neighbor filters to
Material Effect Stylize - Added wrap option to Scatter nodes
- Added Submesh and material index to
Get Polygon Attributes - Added support for flood fill and position array input modes to
Random Scatter - Added color input for
Random Scatter - Added seam blur support for curvature and ambient occlusion inputs for
Mesh Mask Builder - Added curve data outputs to
Bezier Curve Dynamic - Added background input to
Mesh RenderandScene Render - Added Utilities to shuffle, sort and swap elements of an array
- Added Nearest sampling option to
Mesh Render - Improved
Mesh Submesh Maskto also create a mask from a selection based on submesh size and distance - Corrected distribution for odd counts
Curves Scatter - Corrected FloodFill Shape Info for certain inputs
- Corrected luminance variance issues in
Brick Generatorrandom mode - Corrected
Material Adjustmentbrightness issues - Corrected solid colors do not appear in
Scene Rendernode when usingScene Material Set Textures - Corrected nearest filtering with multiple patterns for
Tile Scatter - Corrected crash in
Inpaint Maskfor grayscale inputs - Corrected orientation issues for 90 angles in
Height Extrude - Corrected bogus outputs for
Mesh Scatter On PointCloudwhen there are no points - Corrected an issue where the
Blurnode did not take the image aspect ratio into account - Corrected
PointCloud Cull Volumewhen one of the scene sizes is zero - Corrected cutoff issues with quadratic Bézier curves in the curves nodes
- Corrected an issue where
Curves Scattercould fail to distribute when using a large number of curves
-
Viewport
- Transform gizmo UI/UX improvements
- Added wireframe support for displacement
- Added nearest filtering option
- Added viewport options for wireframe width and color
- Added a viewport shortcut overlay to surface active tool shortcuts for painting and curves gizmos
- Added plane symmetry intersection line visualization
- Viewport render settings such as emissive intensity, bloom strength, and displacement can now be overridden with custom values
- Point Clouds can now be previewed in the viewport from the Library and Package Management
- Corrected an issue where Orbit Free Look was inverted when the up axis was negative
- Corrected an issue where orbiting did not work correctly with translucent materials
-
Mesh Baking
- Adjusted curvature strength calculation so it is no longer dependent on mesh scale
- Improved sampling quality in the Bevel baker
- Corrected inconsistencies between CPU and GPU Bevel baker results
- Corrected tangent space issues affecting normal map baking
-
Output Export
- New channels can be created via drag and drop from graph outputs in the Output Template configuration
- Corrected cooked project creation with external assets so external files are properly imported into cooked packages
-
Dope Sheet
- Improved performance when capturing the output into a video
- Corrected an issue where recording with raytracing could wait indefinitely when the viewport was hidden
- Corrected timeline control behavior when starting a recording from a paused state to prevent frame re-queuing and ordering issues
- Corrected missing tonemapping when capturing from the Image Viewer so all frames are tonemapped consistently
-
General
- Projects can now be executed and exported at a custom resolution when using Advanced Features in the Preferences
Normalized16is used by default as execution format unless enabling Advanced Features in the Preferences- Added a considerate reminder for Pioneer (free) licensees explaining how a Pro license supports continued development
- Additional context menu options in Package Management for resources including "Preview in Image Viewer" for images, "Load as Environment into Viewport" for EXR/HDR, and "Preview in Viewport" for meshes and point clouds
- Instance graph inputs can now be exposed as local variables in the Graph Object Editor
¶ InstaMAT for Blender
- General
- Support for latest InstaMAT Studio release
- Significantly improved performance when setting mesh as graph input
- Improved performance when resetting inputs to their default values in a Graph Instance
- Corrected a bug causing plugin to be stuck when creating faulty graph instances
- Graph Material Group node will no longer spawn on active material anymore if "Connect to Active Material" is not selected
- UI/UX
- Improved Library grid UX with fixed cell width
- Improved Library and Graph Instances search results quality
- Improved UX when adding new User Path in settings
¶ InstaMAT for Unreal Engine
- General
- Support for latest InstaMAT Studio release
- Support for Unreal Engine 5.7.3
- Corrected an occasional crash when creating graph instance with "Scene" outputs
- Corrected "Scene" outputs broken materials and mesh orientations
- Corrected a crash when creating an invalid graph instance
- Default User Path was sometimes not set correctly on macOS
- UI/UX
- Added Library previews for Mesh-type Graphs and Graph Instances
¶ InstaMAT for Autodesk 3ds Max
- General
- Support for latest InstaMAT Studio release
- Corrected a bug causing plugin to be stuck when creating faulty graph instances
- UI/UX
- Changed window icons to match InstaMAT main menu
¶ InstaMAT for Autodesk Maya
- General
- Support for latest InstaMAT Studio release
- Significantly improved performance when setting mesh as graph input
- Corrected a bug causing plugin to be stuck when creating faulty graph instances
- Corrected a bug causing exported textures to be incorrect when using the export dialog window
¶ InstaMAT Integrations 2026 - Released on 12th January 2026
This release contains the following improvements and changes.
¶ InstaMAT for Blender
- Support for Blender 5.0.1
- Reduced main window update frequency for increased performance
- Added new button to create a material instance directly from the main library grid
- Added a setting to change the default Update Type behavior when creating new graph instances
- Graphs now auto-update after restart when modified in InstaMAT Studio
- Improved handling when changing the InstaMAT Studio installation path
- Enhanced popup message when a floating license is unavailable
- Integration files reorganized into multiple modules
¶ InstaMAT for Unreal Engine
- Support for Unreal Engine 5.7.1
- Added a setting to change the default Update Type behavior when creating new graph instances
- Removed deprecated Unreal Engine calls
- Enhanced popup message when a floating license is unavailable
¶ InstaMAT for Autodesk 3ds Max
- Significantly improved UI and UX in the Instances window
- Graphs now auto-update after restart when modified in InstaMAT Studio
- Added a setting to change the default Update Type behavior when creating new graph instances
- Improved handling when changing the InstaMAT Studio installation path
- Enhanced popup message when a floating license is unavailable
¶ InstaMAT for Autodesk Maya
- Added a setting to change the default Update Type behavior when creating new graph instances
- Graphs now auto-update after restart when modified in InstaMAT Studio
- Improved handling when changing the InstaMAT Studio installation path
- Enhanced popup message when a floating license is unavailable
¶ InstaMAT Integrations 2026 - Released on 14th January 2026
This release contains the following improvements and changes.
¶ InstaMAT for Blender
- Support for Blender 5.0.1
- Reduced main window update frequency for increased performance
- Added new button to create a material instance directly from the main library grid
- Added a setting to change the default Update Type behavior when creating new graph instances
- Graphs now auto-update after restart when modified in InstaMAT Studio
- Improved handling when changing the InstaMAT Studio installation path
- Enhanced popup message when a floating license is unavailable
- Integration files reorganized into multiple modules
¶ InstaMAT for Unreal Engine
- Support for Unreal Engine 5.7.1
- Added a setting to change the default Update Type behavior when creating new graph instances
- Removed deprecated Unreal Engine calls
- Enhanced popup message when a floating license is unavailable
¶ InstaMAT for Autodesk 3ds Max
- Significantly improved UI and UX in the Instances window
- Graphs now auto-update after restart when modified in InstaMAT Studio
- Added a setting to change the default Update Type behavior when creating new graph instances
- Improved handling when changing the InstaMAT Studio installation path
- Enhanced popup message when a floating license is unavailable
¶ InstaMAT for Autodesk Maya
- Added a setting to change the default Update Type behavior when creating new graph instances
- Graphs now auto-update after restart when modified in InstaMAT Studio
- Improved handling when changing the InstaMAT Studio installation path
- Enhanced popup message when a floating license is unavailable
¶ InstaMAT Integrations 2025-10 - Released on 21st October 2025
This release contains the following improvements and changes.
¶ InstaMAT for Blender
- General
- Improved graph memory usage during execution
- Fixed an issue with images being interpreted as linear when used as instance input
- Improved Blender material setup for emissive materials
- UI/UX
- Added option to authorize with different account when locked by floating license
- Improved UI for grayscale image inputs
- Fixed interface being incorrectly translated by Blender native translator
- Fixed broken instances for graphs containing properties with long names
- Fixed banding issue in emissive graph previews
- Removed material instance name constraints for special characters
¶ InstaMAT for Unreal Engine
- General
- Improved graph memory usage during execution
- UI/UX
- Fixed issue where the import graph button was sometimes unresponsive
- Added option to authorize with different account when locked by floating license
- Fixed banding issue in emissive graph previews
- Improved Library Browser filtering for InstaMAT library graphs
¶ InstaMAT for Autodesk Maya
- General
- Improved graph memory usage during execution
- Significantly improved Library Browser startup time
- Fixed an issue with images being interpreted as linear when used as instance input
- UI/UX
- Added option to authorize with different account when locked by floating license
- Fixed banding issue in emissive graph previews
- Clicking on a InstaMAT menu entry will bring window to focus instead of re-opening it
- Improved Library Window main layout spacing
- Now displays "default" path from User Paths list
¶ InstaMAT for Autodesk 3ds Max
- General
- Improved graph memory usage during execution
- Significantly improved Library Browser startup time
- Automatically loading InstaMAT Instances when loading a new file
- Added reset buttons for all instances input
- Fixed an issue with images being interpreted as linear when used as instance input
- UI/UX
- Added option to authorize with different account when locked by floating license
- Fixed banding issue in emissive graph previews
- Added support for multiple texture execution extension formats
- Improved main InstaMAT menu entry ordering and added icons
- Clicking on an InstaMAT menu entry will bring window to focus instead of re-opening it
- Added option to rename InstaMAT Instances
- Improved Library Window main layout spacing
- Changed instance input panels behavior to open with a single click
- Improved search results from InstaMAT Instances window list
- Now displays "default" path from User Paths list
¶ InstaMAT 2025-09 - Released on 10th September 2025
This release further pushes InstaMAT's stellar performance when texturing to new heights delivering new shading capabilities, improved painting tools, improved terrain erosion, and better localization support across multiple languages. InstaMAT continues to focus on both power and usability to ensure artists can create higher-quality 3D assets with greater efficiency.
Check out the video to learn more about what's new.
¶ Asset Texturing Improvements
This release delivers significant improvements to asset texturing in InstaMAT Studio, including new shading model support, enhanced performance, and improved painting tools.
¶ Sheen and Coating Support
It is now possible to enable additional channels such as Sheen and Clearcoat in Asset Texturing projects. These channels can be added in the Layering Project Editor panel under the Channels section.
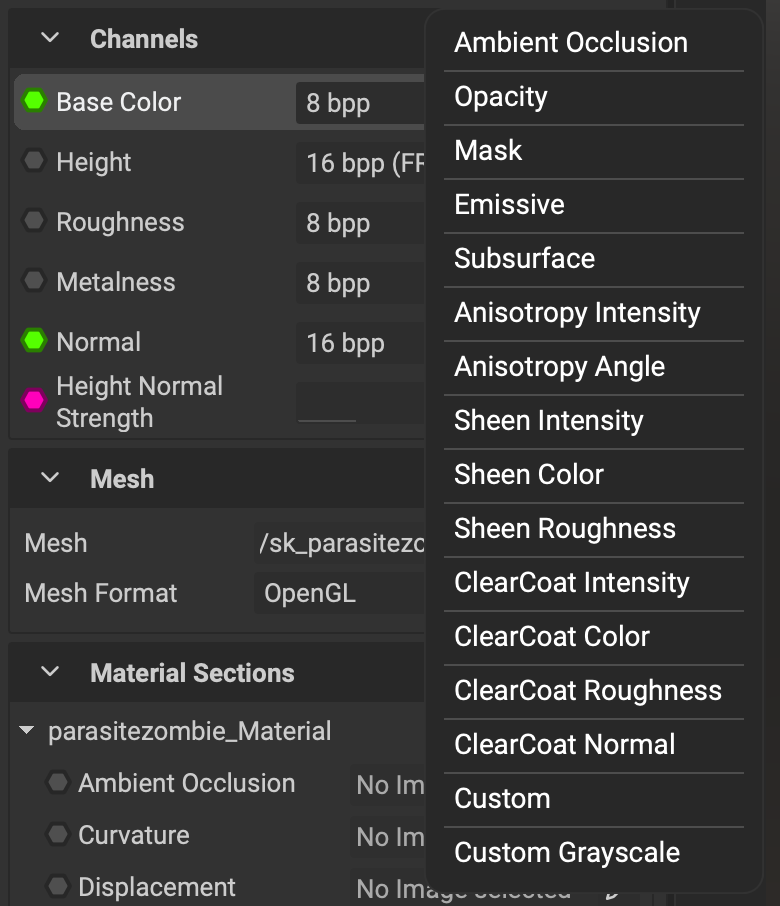
Utilize clearcoat and sheen to visualize high-quality surfaces, such as car paint and fabrics.
¶ Shading Model Shown in Viewport Status Bar
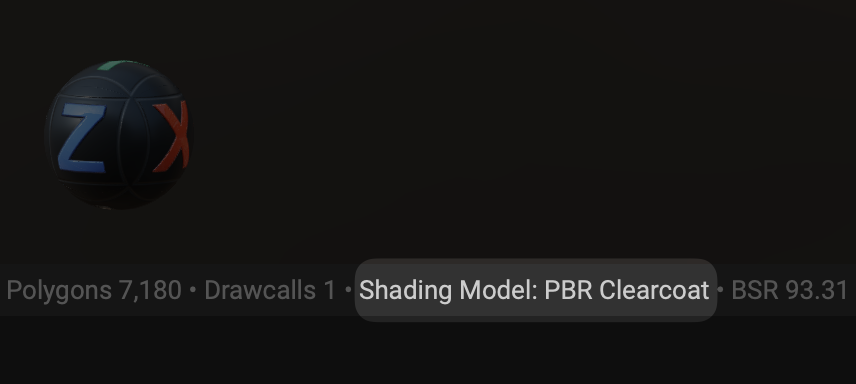 InstaMAT automatically switches viewport shading models based on the channels needed for the active project. The active shading model can be seen in the status bar below the viewport.
¶ Layering Performance Improvements
 The performance of InstaMAT's GPU-powered layering and painting engine has been further enhanced, allowing for even quicker texturing of 3D assets.
¶ New Layer Channels are Not Enabled Retroactively for Existing Layers
 Adding a new layer channel now does not retroactively enable it for all existing layers in the project. This gives you the flexibility to apply specific effects where needed and improves texturing performance.
¶ Paint Projector Improvements
Hotkeys for the Paint Projector have been updated to the universal W, E, and R keys, which allow you to translate, rotate, and scale the projection area while painting.
Note: The Paint Eraser tool's keyboard shortcut has been changed to Z by default for new users and when resetting preferences through the Preferences panel. To enable rotation for the Paint Projector, please consider remapping the Paint Eraser's shortcut in the Preferences panel under the Shortcuts tab.
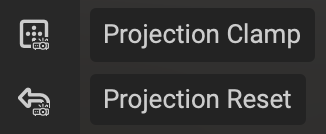 Toggle the
 Projection Clamp in the viewport toolbar to either allow the projection to repeat across tile boundaries or restrict it to a single tile.
Use the Projection Reset button in the viewport toolbar to quickly reset the projection area.
¶ Terrain: Improvements to Erosion on High Resolutions
The Terrain Erosion node has been greatly improved with increased realism and consistency across execution resolutions.
¶ Viewport Improvements
InstaMAT's vewport features new improvements including improved transparency support and an expanded set of tonemapping options.
¶ Improved Transparency
 Transparency in the viewport has been greatly improved when texturing assets and creating materials.
¶ New Tonemapping Options (AgX, PBR Neutral)
The 3D viewport now includes two additional tonemap options: AgX and PBR Neutral. These options make it easier to visualize your 3D assets with accurate color and contrast for destinations such as game engines and rendering pipelines that utilize these specific tonemapping algorithms.
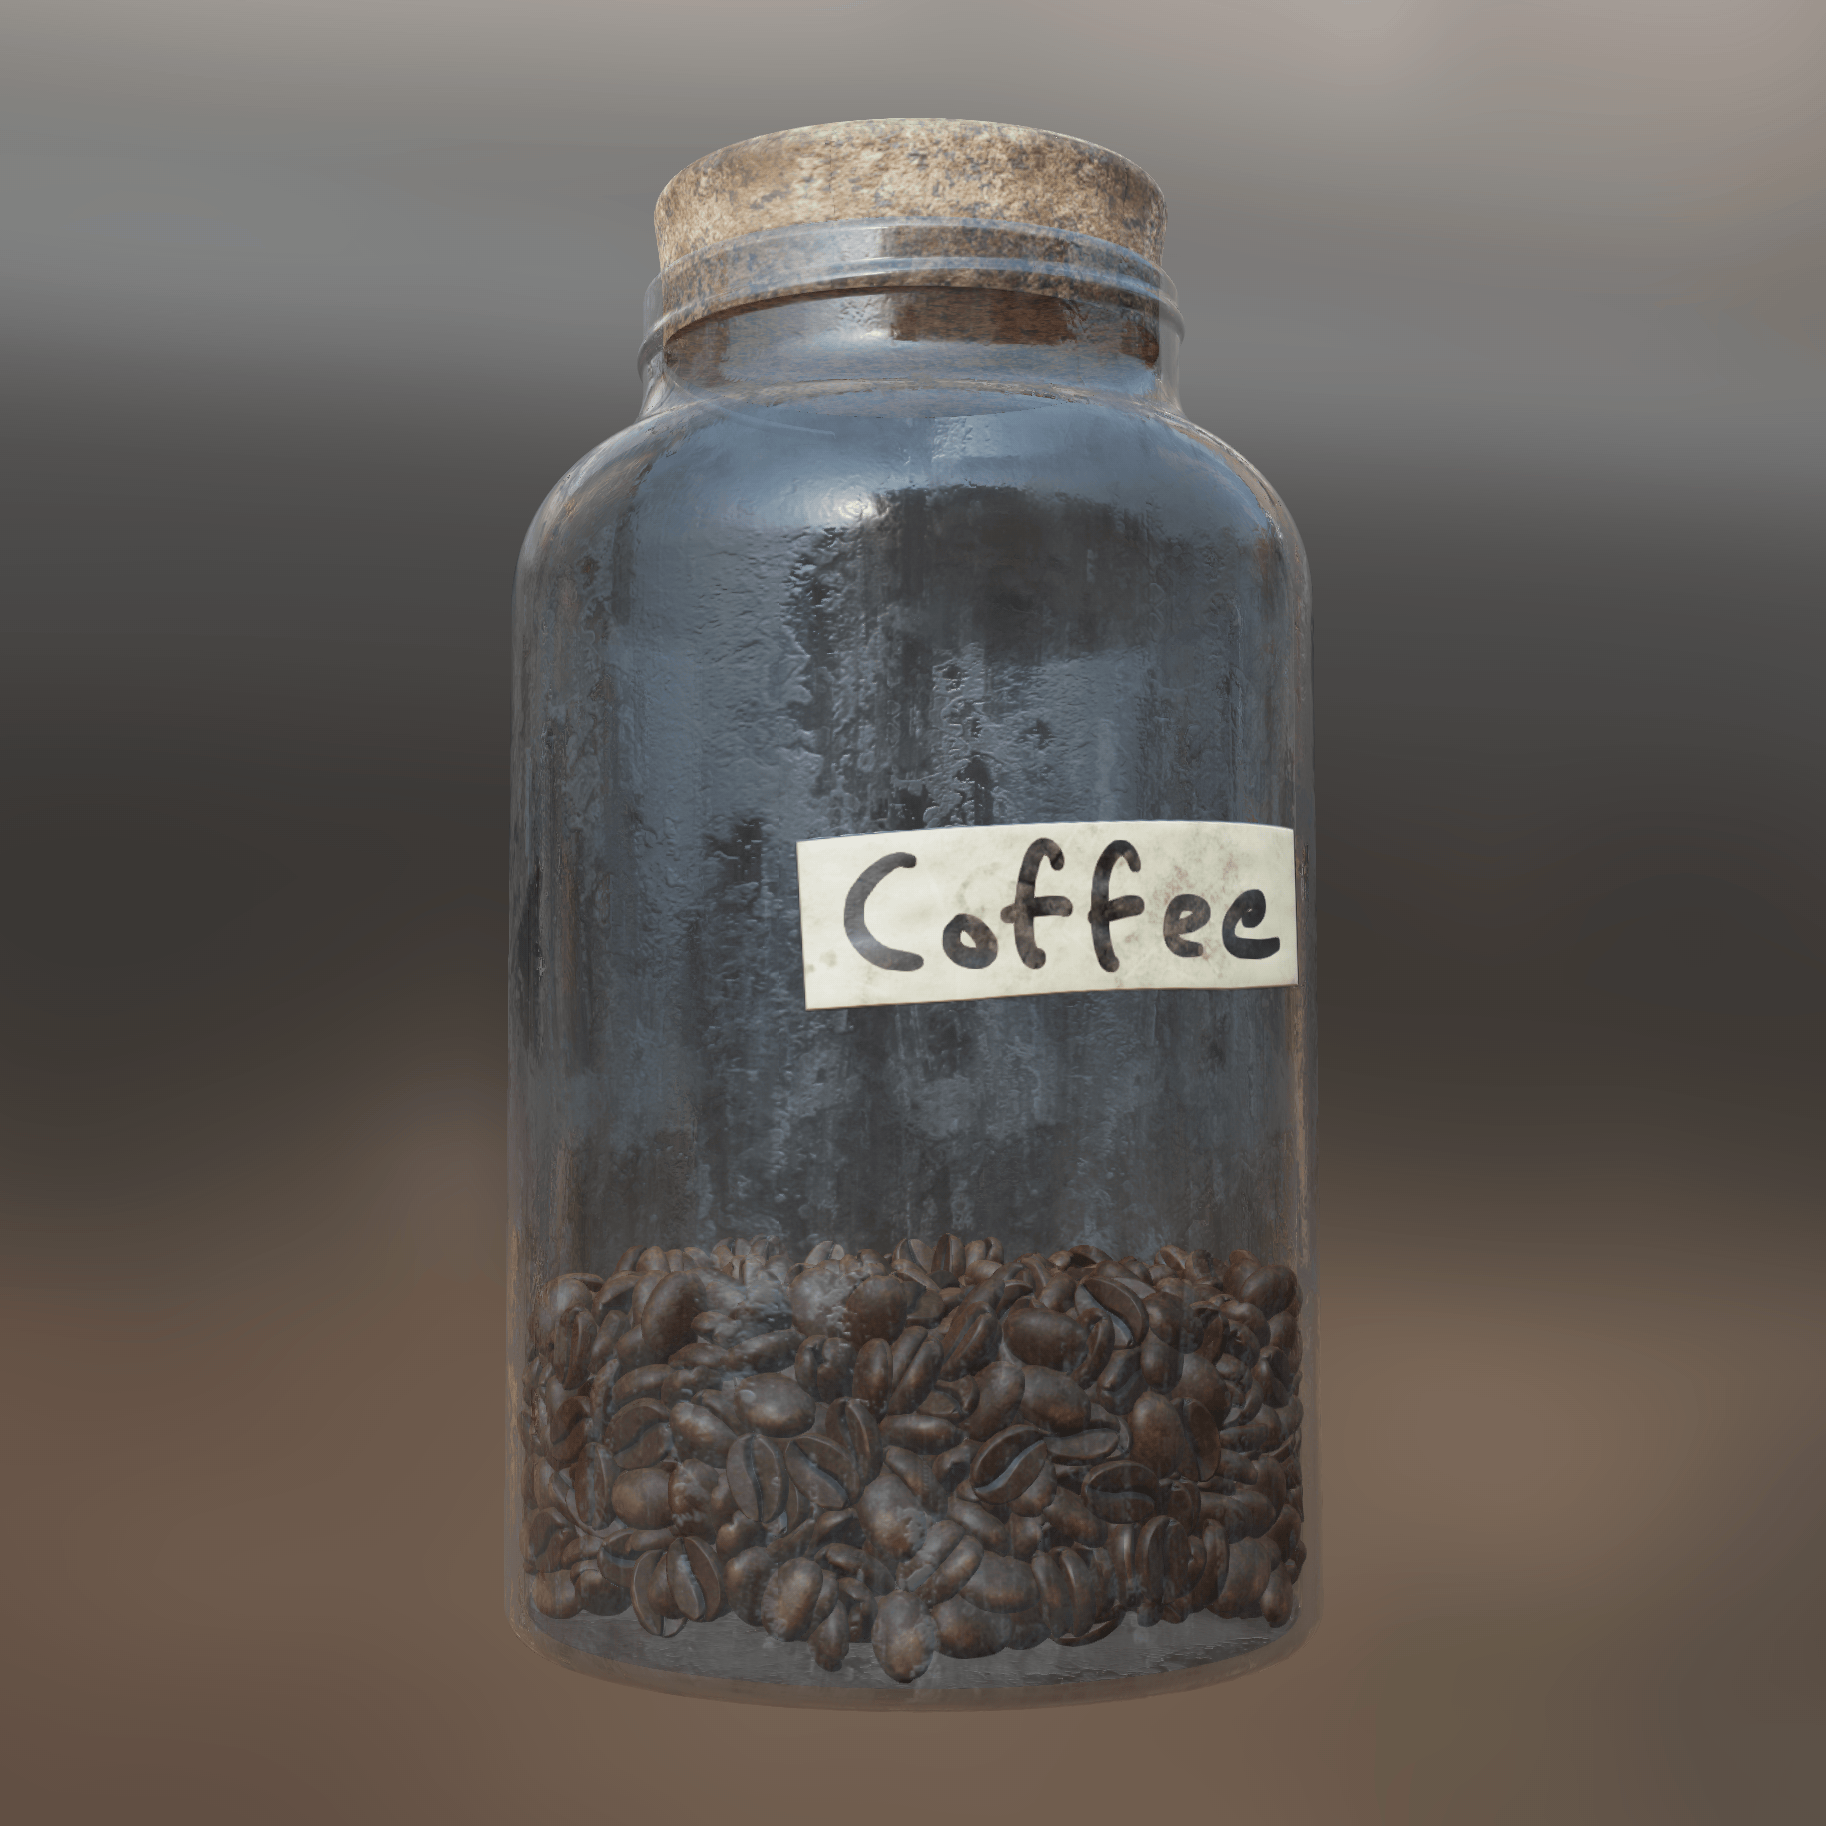
¶ Mesh Submesh Mask
 The
The Mesh Submesh Mask allows masking objects based on polygon adjacency, enabling separate parts of an object to be masked even when combined into a single mesh.
InstaMAT's Mesh Mask streamlines object masking through either manual selection or automatic identification using submesh names via the mesh filter. This method requires that scenes already contain multiple submeshes. The Mesh Submesh Mask can distinguish separate components within a combined submesh, eliminating the need to split the mesh into individual pieces.
¶ New Grunges
This release features two new grunges: Plastered and Rampage 3.
¶ Plastered
 The new
 Plastered grunge is great for adding distress to walls and architectural surfaces. Add additional micro detail with the Dissolve parameter.
¶ Rampage 3
 InstaMAT adds to the Rampage line of grunges with
 Rampage 3. This complex grunge contains increased micro detail variation with scratches, brushed effects, tearing, and spots.
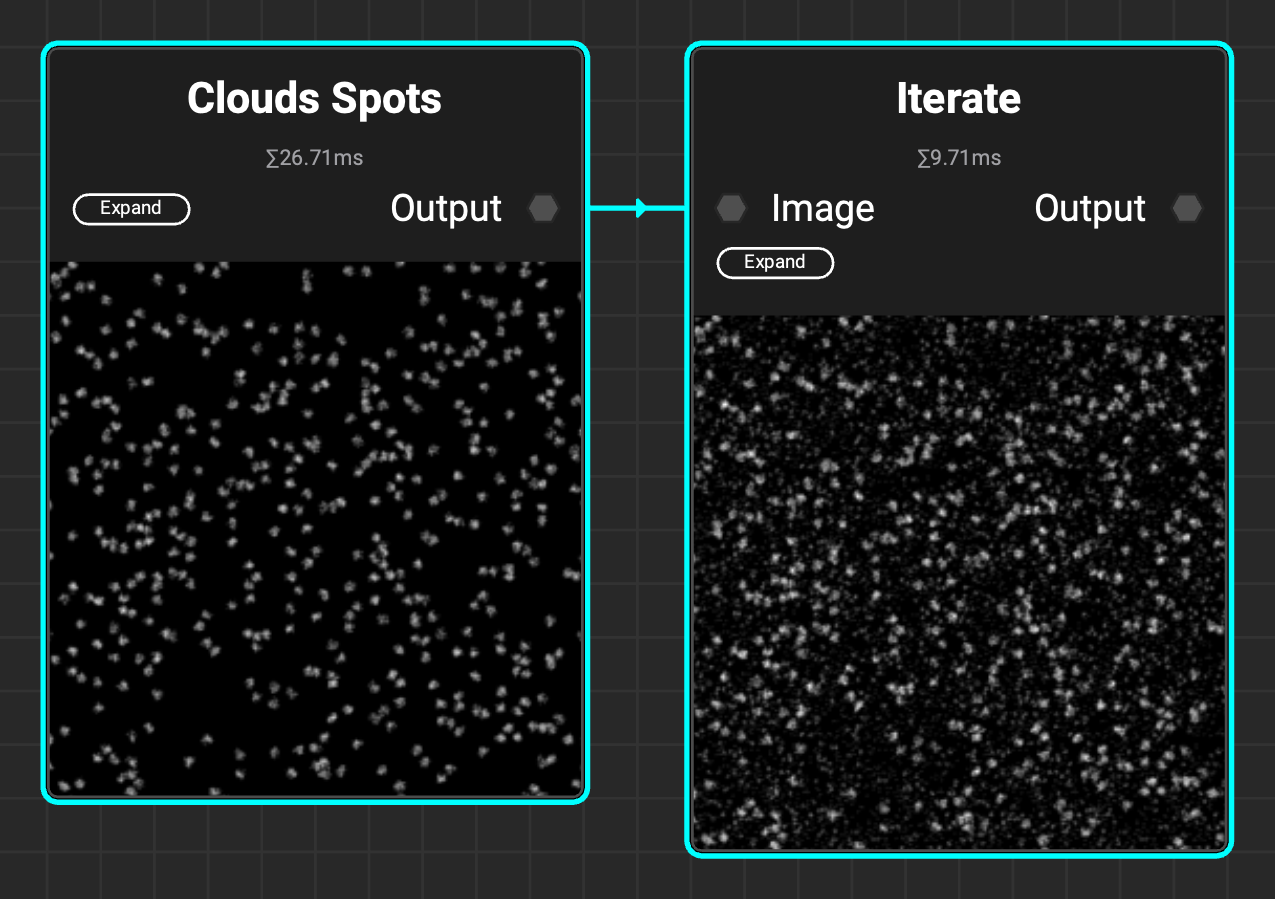
¶ New Clouds Spots Noise
The Clouds Spots noise is great for creating natural breakup. When used in combination with the Iterate node users can create custom spots grunges.
¶ Localization Improvements
 InstaMAT's UI has improved localization for the following languages:
- German
- Italian
- Spanish
- Japanese (thanks to community user 'Rapilias')
- Korean (thanks to community user 'Choi do won')
¶ All Changes
-
Asset Texturing
- Performance optimization for multi-channel layers with disabled inputs
- The active layer channel is retained upon undoing or switching between graphs
- Corrected issues with filters on UDIM projects
- Corrected issues with reference layers on UDIM projects
- Corrected an issue with the automatic migration of Height blend settings from projects originating from EA3 and older
- Corrected issues with an incorrectly initialized Reference layer UI state
- Support for translation during mesh painting in the paint projection mode
- Support for clamped mesh painting in the paint projection mode
-
Library
- New node
Mesh Submesh Maskto create a mask based on polygon adjacency-based submesh detection - New grunges:
PlasteredandRampage 3 - New noise:
Clouds Spotsto create natural breakup and use in combination withIteratenode to create custom spots grunges.- New element expressions,
Vec4 Array Create, to create arrays from multiple scalar values - Support for submesh and material index in the
Mesh Get Polygon Attributesnode - Corrected an issue with
Nearestfiltering in theTile Scatternode with multiple patterns
- New element expressions,
- New node
-
Viewport
- Showing the active shading model in the viewport status bar
- Improved transparency support with order independent transparency
- Fixes to raytraced transmission/refraction
- Corrected an issue with the grid not appearing when an emissive map is present
- Corrected a compatibility issue between Bloom rendering and Mesh Painting
- Corrected an issue where loading a corrupted user environment file could lead to a crash
-
Mesh Baking
- The Bevel Normals baker is scale invariant
- Corrected an issue in the Bevel Normals baker where the Surface Offset didn’t adjust the result on the CPU
- Corrected an issue with progress reports from the Bevel Normals and Curvature bakers
-
General
- Added the option to update the credentials when the floating license validation fails
- Corrected an issue with loading meshes as an external asset
- Corrected an issue with loading built-in image resources on macOS
-
Localization
- Improved German localization
- Improved Italian localization
- Improved Spanish localization
- Improved Japanese localization (thanks to community user 'Rapilias')
- Improved Korean localization (thanks to community user 'Choi do won')
- Corrected issues with clipped UI elements in some languages
¶ InstaMAT for Blender
- Added support for latest InstaMAT Studio version released
¶ InstaMAT for Unreal Engine
- Added support for latest InstaMAT Studio version released
¶ InstaMAT for Autodesk Maya
- Added support for latest InstaMAT Studio version released
¶ InstaMAT for Autodesk 3ds Max
- Added support for latest InstaMAT Studio version released
¶ InstaMAT 2025 — Released on 22nd July 2025
InstaMAT 2025 introduces a groundbreaking set of features that are transforming how artists create stunning 3D assets and environments. This first release out of early access packs an enormous amount of improvements, including AAA-quality terrain generation and procedural asset placement, layer references and mask effects, curves nodes, and an enhanced viewport with raytracing effects!
¶ Layer References
Layer References enable you to create powerful, procedural effects by accessing data from layers positioned below in the layer stack. Simply create a Reference point on a lower layer. Then, use a Reference Generator on a layer above to access the reference layer's texture or mask information.
To learn more about Layer References, open the InstaMAT Crate tutorial project from the New Project screen. The project contains a group of layers dedicated to Layer References.
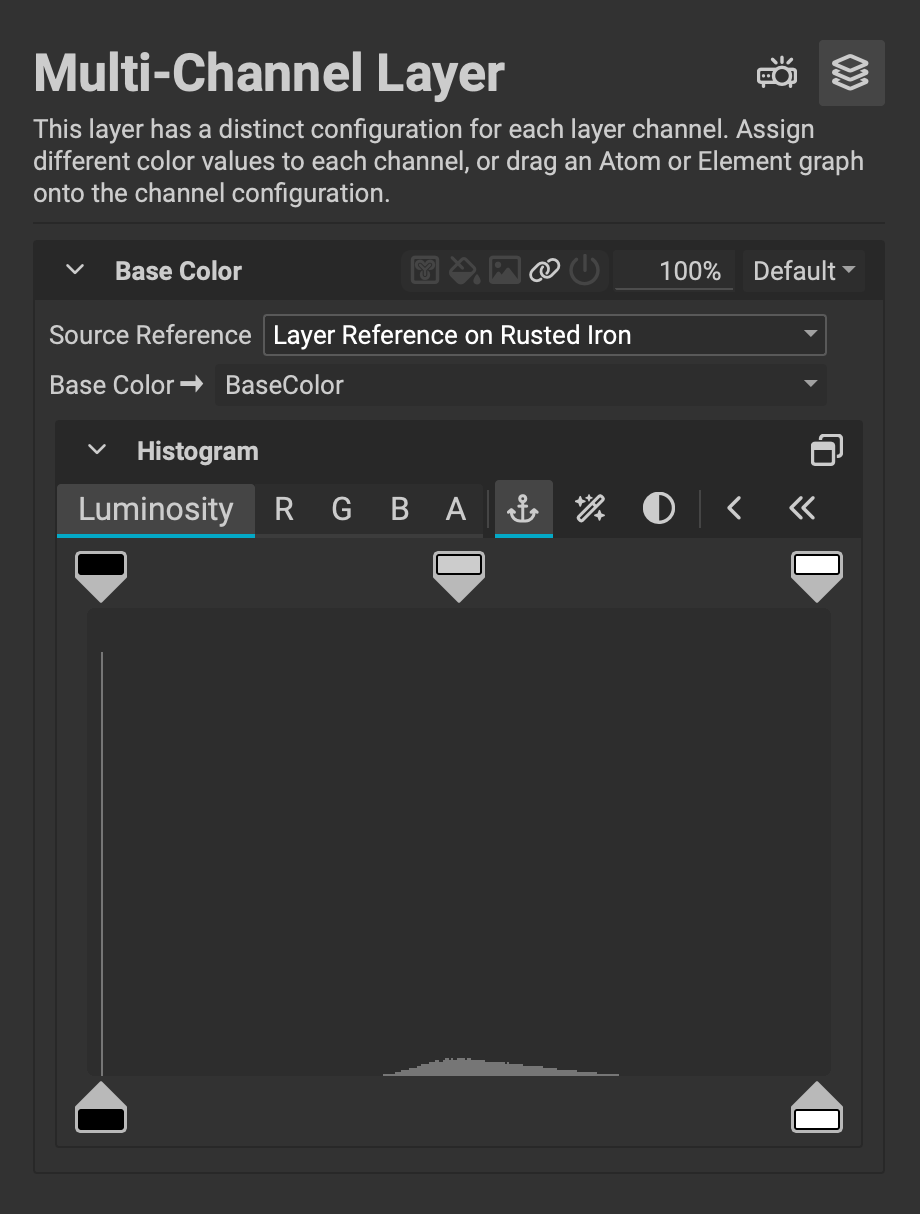
Multi-Chanel Layers can automatically populate their channels with information from references with a new input option in the Layer Channels panel. Select a Source Reference, then choose the channel from the source to supply the data.
Masks can be referenced from layers below and manipulated to create complex effects such as damage build-up or embossing.
¶ Filters for Masks
Masks can now be manipulated with filters, unlocking powerful procedural workflows for texturing assets or creating procedural materials in layer-based projects.
For example, a painted mask can be blurred with
Mesh Blurthen warped with aSlope BlurorSlope Warpfilter to create damage effects.
![]()
¶ Terrain Generation
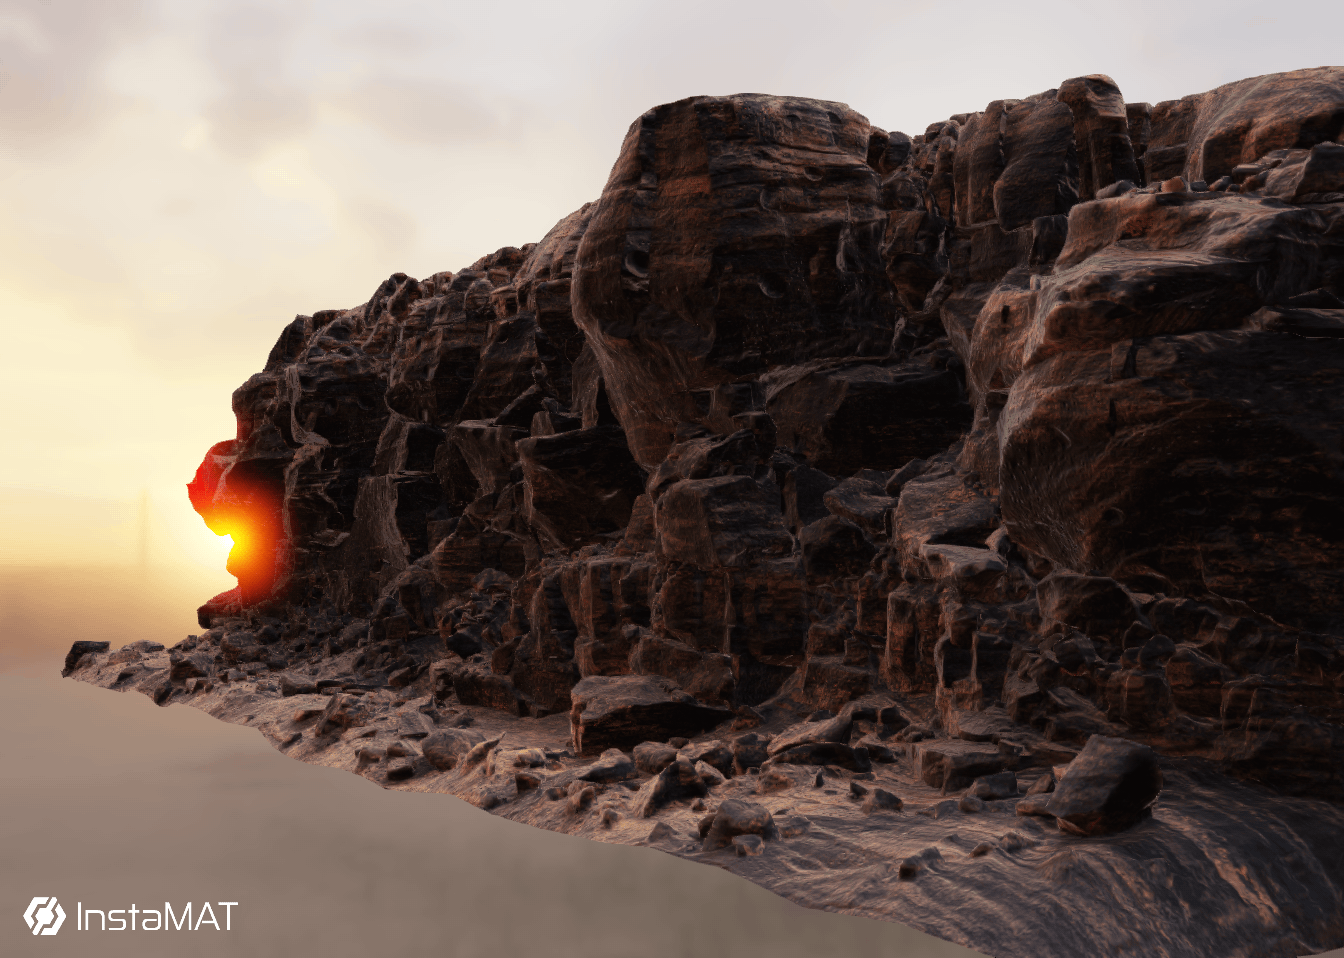
 InstaMAT 2025 adds world-class procedural terrain generation to InstaMAT's massive library of nodes and tools.
¶ Realistic Natural Erosion
 With the
 Terrain Erosion node, artists can easily apply natural thermal and water-based erosion utilizing the power of their GPU.
Use a simple set of sliders to control the natural erosion process that would take place over thousands of years.
¶ Height Water Simulation
 Simulate natural rivers and waterways with the
 Terrain Water Simulation node. This node computes both a flow and a water accumulation map.
¶ Height Snow Simulation
 Simulate snow cover with the
 Terrain Snow Simulation node. Enter the geographical position of the terrain and the day of the year for physically accurate results.
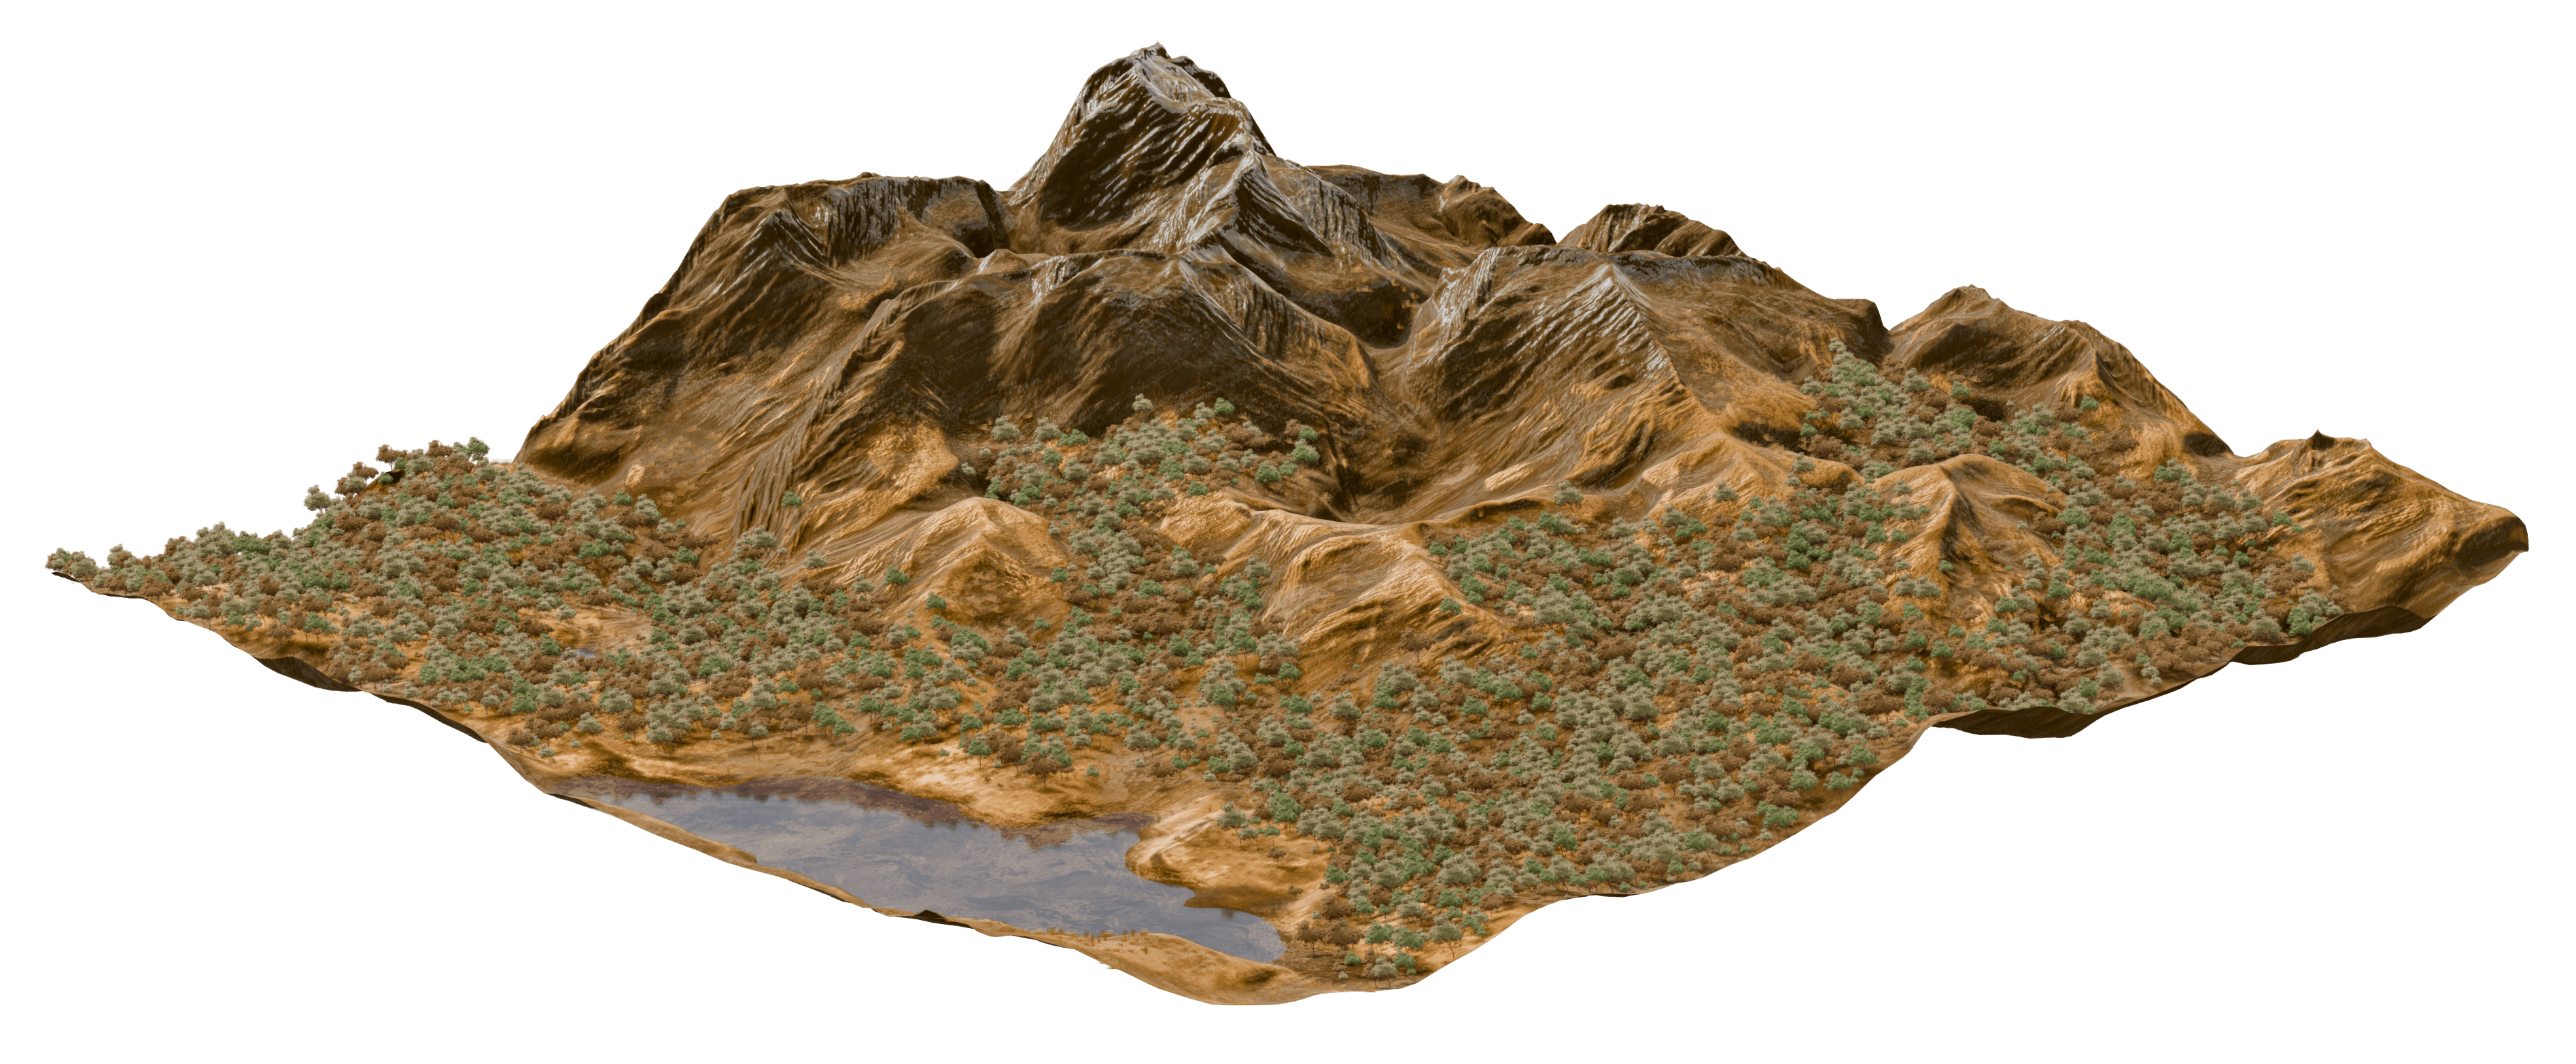
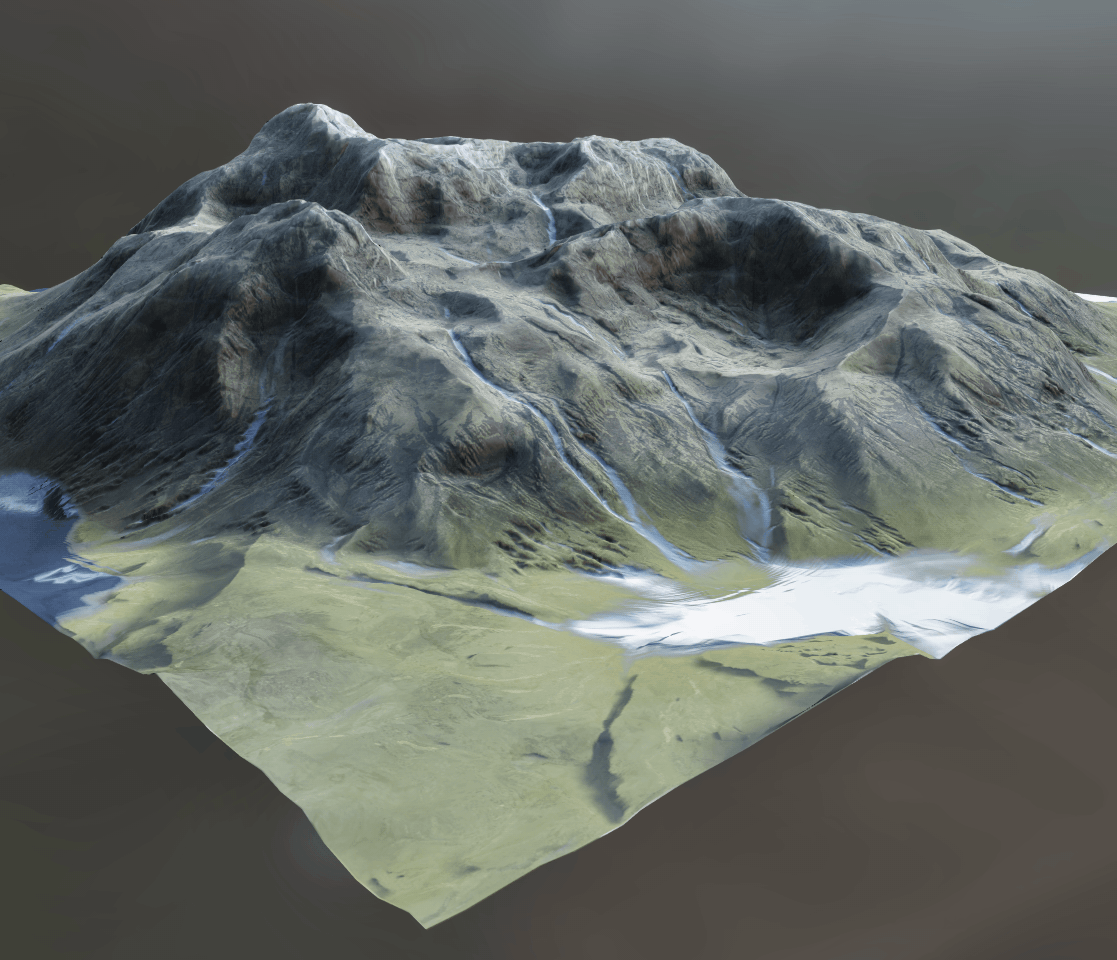
¶ Texture Biomes with Procedural Material Splatmaps
 Apply textures and materials to terrain using height data to generate complete biomes. With InstaMAT's extensive material library, you can quickly create stunning vistas and landscapes.
¶ Procedural Placement
 Utilize the Element Graph’s ability to combine images, meshes, and point clouds into a single graph by scattering assets like trees, rocks, and grass across procedural terrain.
Use the Scene Procedural Placement node to spawn meshes dynamically within a scene.
¶ Placement Layers
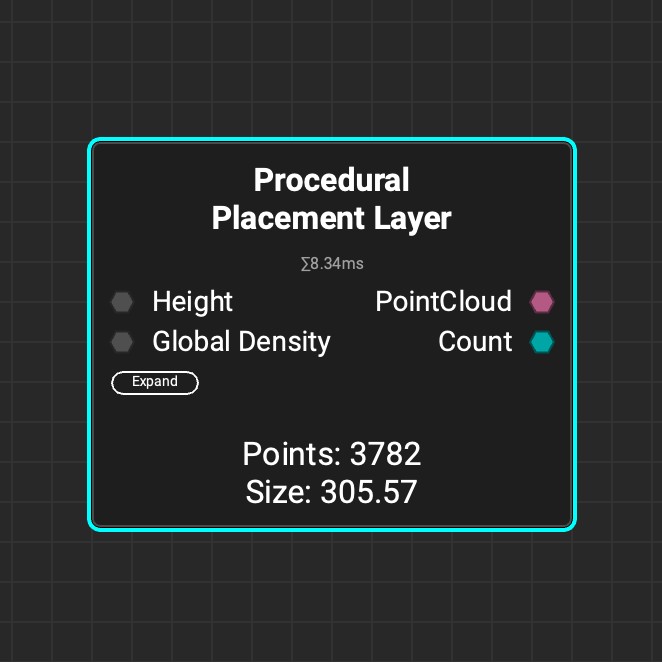 Use the
 Procedural Placement Layer node to scatter a layer of procedurally placed 3D assets on a height map. Create multiple placement layers to scatter a diverse set of objects in a scene.
¶ Placement Collision
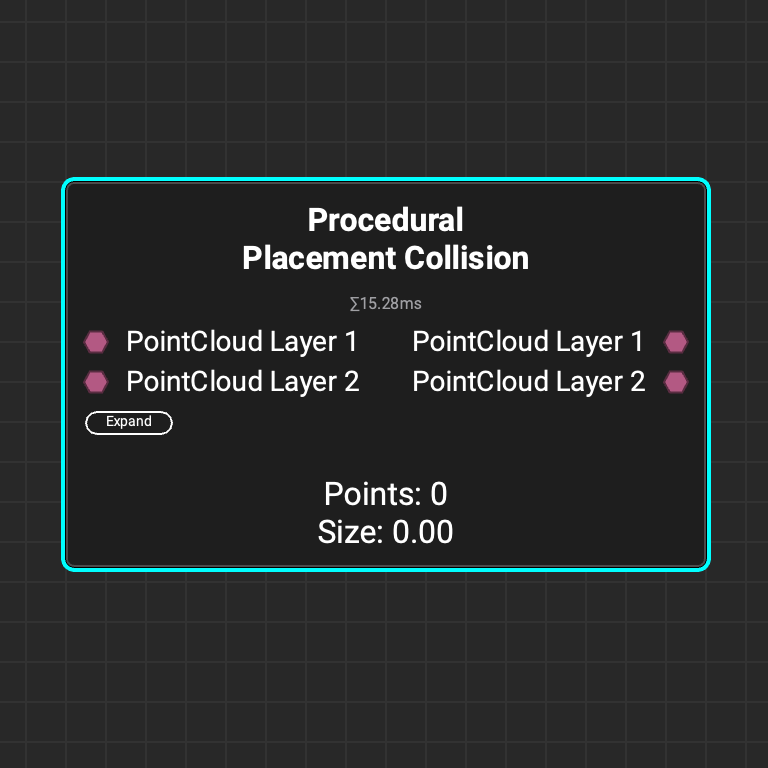 Use the
 Procedural Placement Collision node to perform collision detection between two placement layers. This will prevent objects from spawning inside of one another.
¶ Placement Density
 Use the
 Procedural Placement Density node to generate a density map for the Procedural Placement Layer node. Use the attributes of a height map such as height and humidity to refine the density map.
¶ Natural Terrain Topology Masking
InstaMAT includes a new suite of nodes for identifying naturally occurring phenomena—from hills and valleys to areas where sediment accumulates over time—making it easy to designate object placement.
¶ Landforms
 The
The Terrain Landform node helps identify hills, valleys, and areas of natural sediment buildup for proper environment asset placement.
¶ Residual Maps
 The
The Terrain Residual Map node makes it easy to determine different types of accumulation on natural terrain that can be used as a mask or density map when procedurally placing objects.
¶ Curvature
 Use the
 Terrain Curvature node to quickly analyze a terrain's topology and identify the topology's peaks and valleys with various curvature types.
¶ Curves Nodes
 InstaMAT 2025 introduces a new suite of curves nodes, making it easier than ever to create smooth and complex shapes using Bezier curve paths (splines).
¶ Curves Scatter
 Use the
 Curves Scatter node to scatter images along a curve's path. The node's parameters let you control the number of scattered images, the curve range to scatter on, and the images' orientation — including aligning them with the curve's direction. And that's just the beginning!
¶ Curves Sampler
 The
The Curves Sampler node makes it possible to map data along the path of a curve. This makes it easy to define curve attributes at various points along a path, such as color, height, and thickness. These attributes can then be used to adjust the visualization of the curve using nodes such as Curves Lines and Curves Mapper.
¶ Curves Mapper
 The
The Curves Mapper node applies an image along a curve's path, making it easy to create complex patterns and shapes like stitching. You can control the image mapping by adjusting the UV scale and offset. The node even allows cylindrical twisting of UVs around the curve to create sophisticated rope or threading patterns.
¶ Curves Lines
 Use the
 Curves Lines node to draw lines from curves. Control the color and thickness of the lines using gradients or data from the Curves Sampler node.
You can also generate Flood Fill data to easily identify and manipulate multiple lines with InstaMAT's extensive library of Flood Fill nodes.
¶ Curves Fill
 Use the
 Curves Fill node to create closed shapes from a curve or set of curves. Control the softness of the filled shape. Add variance to the softness and the luminance of each enclosed shape.
¶ Curves Append
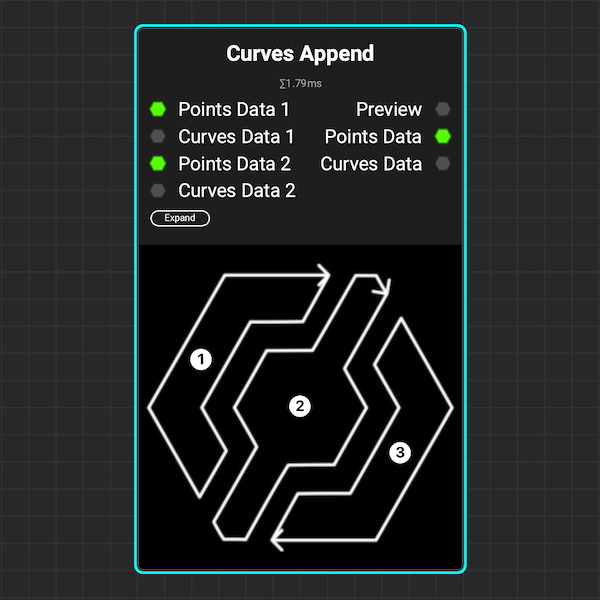 The
The Curves Append node combines multiple curves into a single node. This allows you to use nodes like Curves Transform to transform multiple curves simultaneously or create complex patterns using Curves Scatter.
¶ Curves Filter
 The
The Curves Filter node filters curves based on their index numbers, lengths, bounding boxes, and whether they form closed loops.
¶ Curves Transform
 Use the
 Curves Transform node to translate, rotate, and scale multiple curves at a time.
¶ Curves Flip
 Use the
 Curves Flip node to flip the direction of a curve or set of curves.
¶ Curves Warp
 The
The Curves Warp node warps curves using either a grayscale intensity map or vector map. You can control both the strength and direction of the warping. The effect's influence on curves can be based on their position, spline distance, spline index, or data from a Curves Sampler node.
¶ Curves Weld Points
 Use the
 Curves Weld Points node to weld multiple points of a curve together based on a distance threshold.
¶ Curves Circle
 Use the
 Curves Circle node to create a perfect circular curve or arc. Adjust the radius and curve range to form an arc, then modify its translation, rotation, and scale.
¶ PointCloud Bezier Curve Generator
 Use the
 PointCloud Bezier Curve Generator node to generate a set of points along the path of a curve. Set attributes such as Normal, Color, Size, and Height based on inputs created by the Curves Sampler node. Use the Mesh Spawn On PointCloud node to spawn meshes onto the generated points.
¶ 3D Viewport Improvements
InstaMAT Studio's physically accurate 3D viewport gains a massive boost in visual quality with new features such as raytraced shadows, global illumination, reflections, improved bloom and translucency, and support for Sheen, Anisotropic and Clearcoat materials.
¶ Raytraced Shadows
 Real-time raytraced shadows add extra levels of dimension and definition to 3D assets and materials.
¶ Global Illumination
 Global illumination elevates the photorealism of 3D renders by simulating natural light behavior.
¶ Raytraced Reflections
 Raytraced Reflections enhance the quality of the viewport experience by creating a more immersive and lifelike environment.
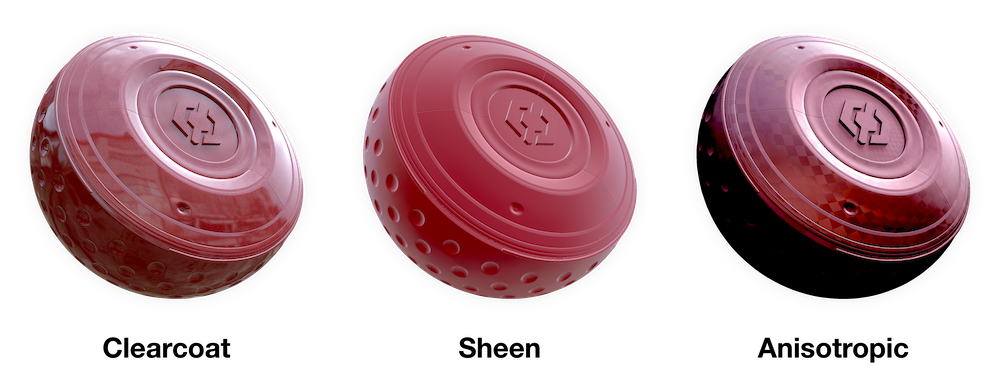
¶ Sheen, Anisotropic, and Clearcoat Support
With added support for Sheen, Anisotropic, and Clearcoat materials, InstaMAT Studio's viewport becomes more capable than ever before in visualizing high-quality surfaces, such as car paint, fabrics, and complex anisotropic metals.
¶ Custom User Environment Maps
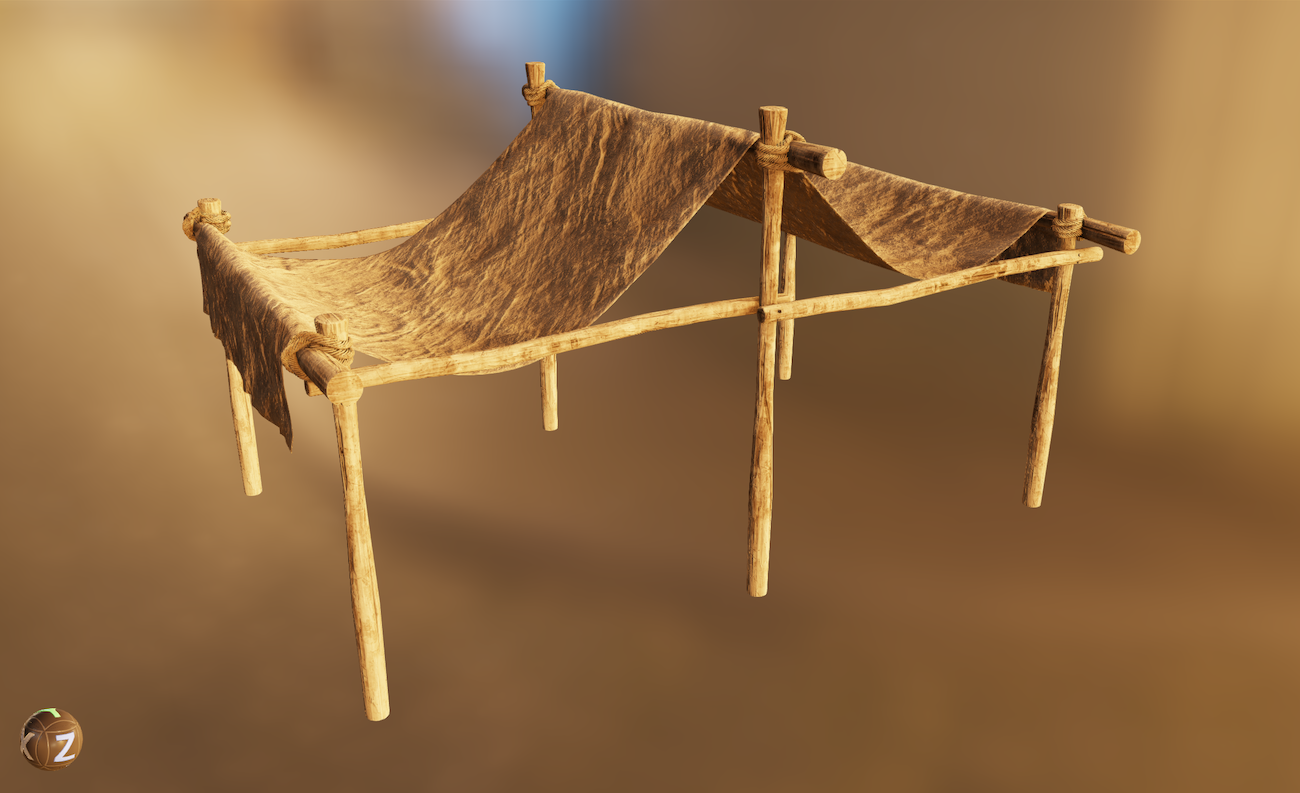 InstaMAT's real-time 3D viewport now supports custom environment maps. Simply drag and drop an HDRI onto the viewport to load the image as an environment image. This makes it possible to visualize 3D assets with accurate lighting that corresponds to their destination environment while texturing and painting.
¶ Mesh Render and Scene Render Node Improvements
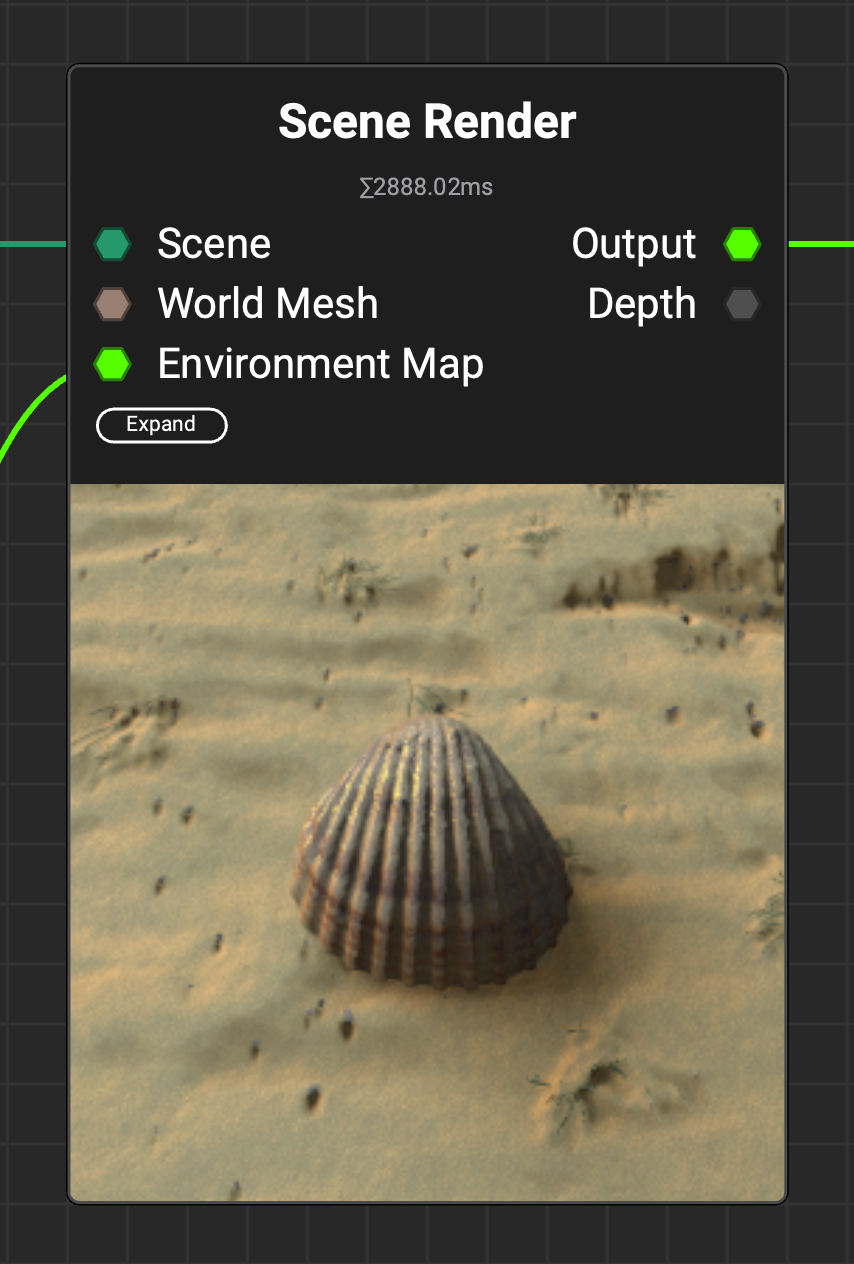 InstaMAT's viewport improvements extend to the
 Mesh Render and Scene Render nodes, including support for shadows, clearcoat, sheen, and anisotropic effects, enhancing both capability and render quality.
¶ Post-Processing Effects
 The new
 Post-Processing Effects node makes it easy to add cinematic effects to any image, including renders generated using InstaMAT's Mesh Render and Scene Render nodes. These effects include Vignette, Bloom, Chromatic Aberration and Lens Flare. You can also find these effects built into InstaMAT's Material Showcase node to add a cinematic touch to your material renders.
¶ New Bakers
Two new bakers have been added to InstaMAT: a new Disk Sampling Curvature baker and a Bevel Normals baker.
¶ Curvature: Disk Sampling
The Disk Sampling mode for the Curvature baker yields significantly improved results for a wide range of use cases and texturing styles.
To access it, in the Mesh Baking panel, make sure Curvature is enabled as an active baker. Unhide the Curvature Settings in the Active Bakers section, and under the Curvature Mode dropdown select Disk Sampling.
¶ Bevel Normals
The Bevel Normals baker generates a normal map with beveled edges along sharp angles. This helps add smooth, rounded edges to simplistic and low-poly meshes without the need to add additional subdivisions and polygons to the mesh's geometry.
To access it, in the Mesh Baking panel, enable Bevel Normals in the Inactive Bakers section.
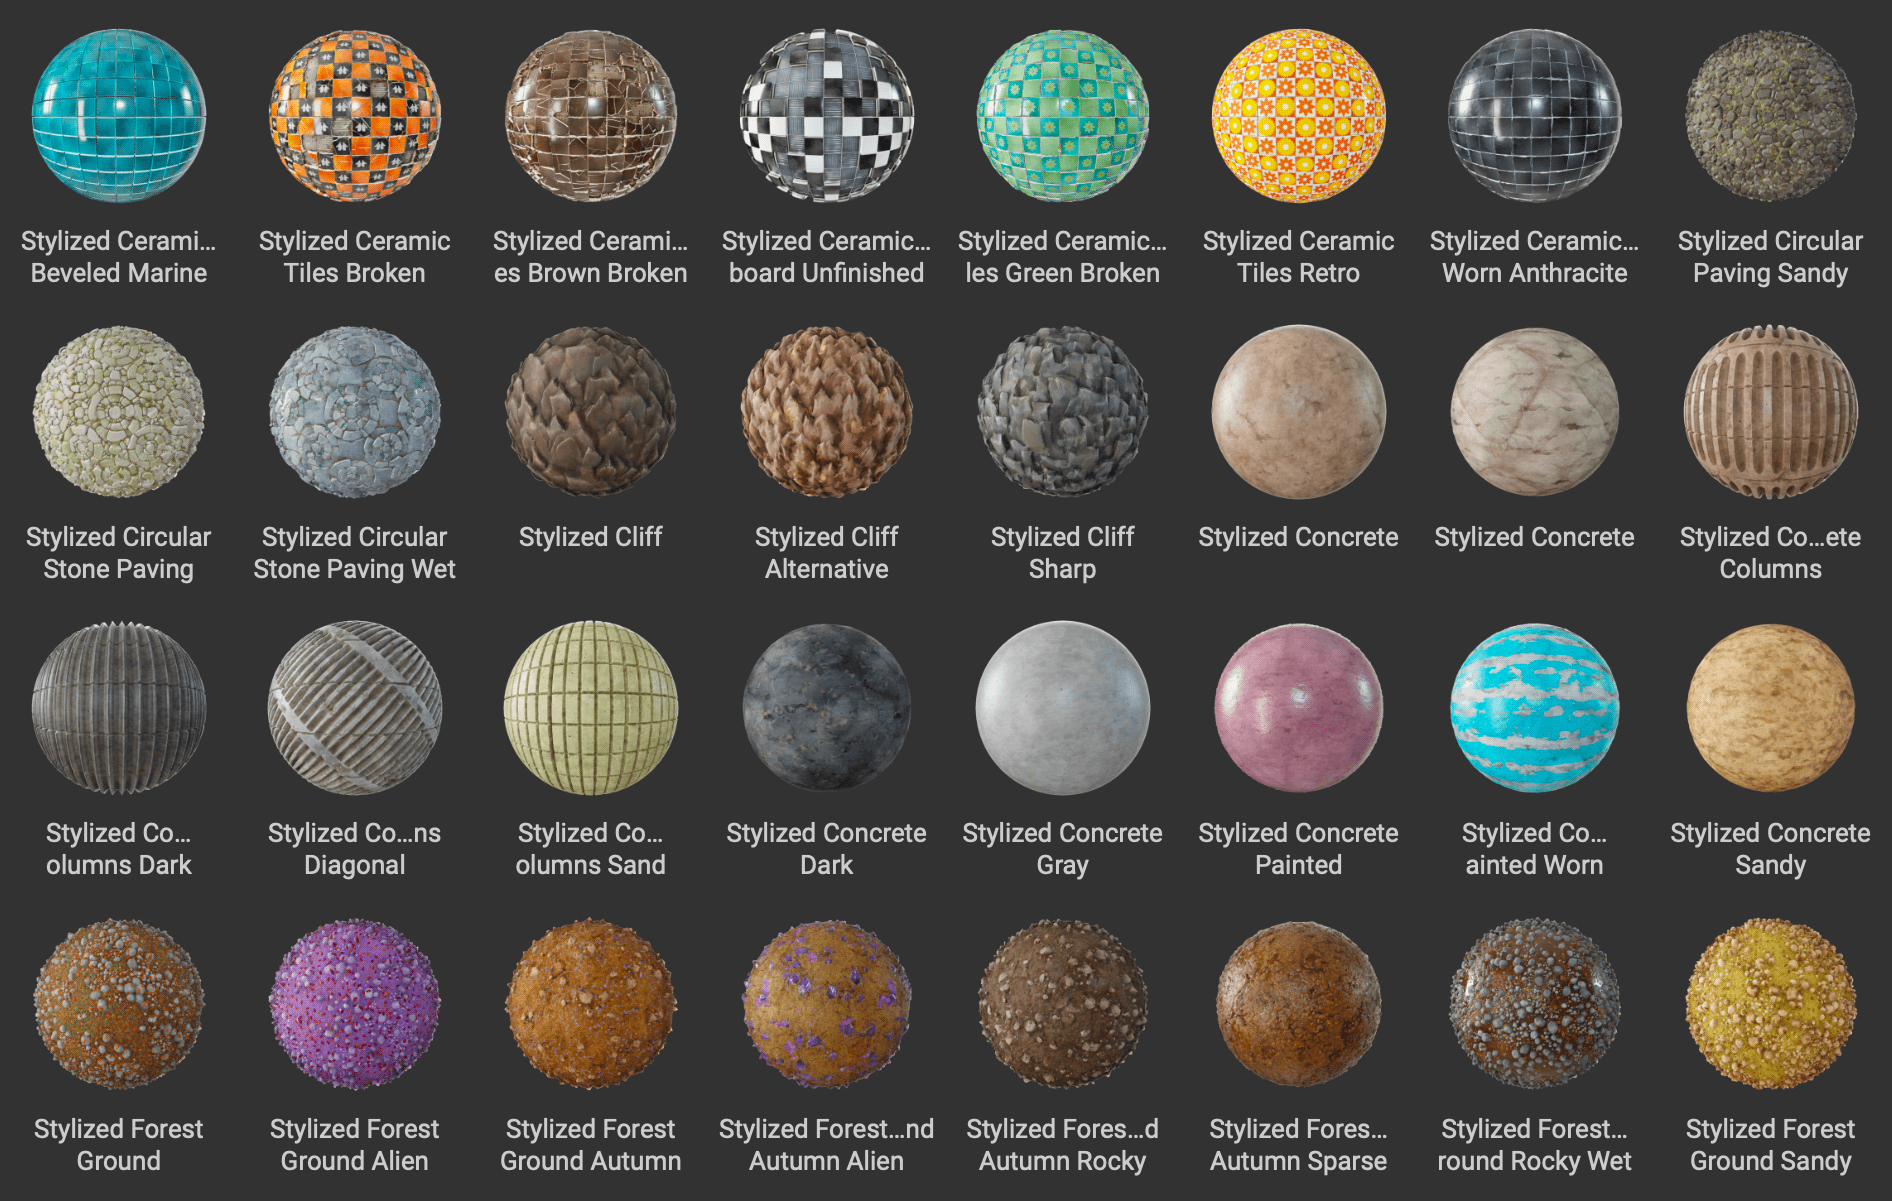
¶ New Stylized Materials
A new collection of stylized materials has been added to InstaMAT's generative material library.
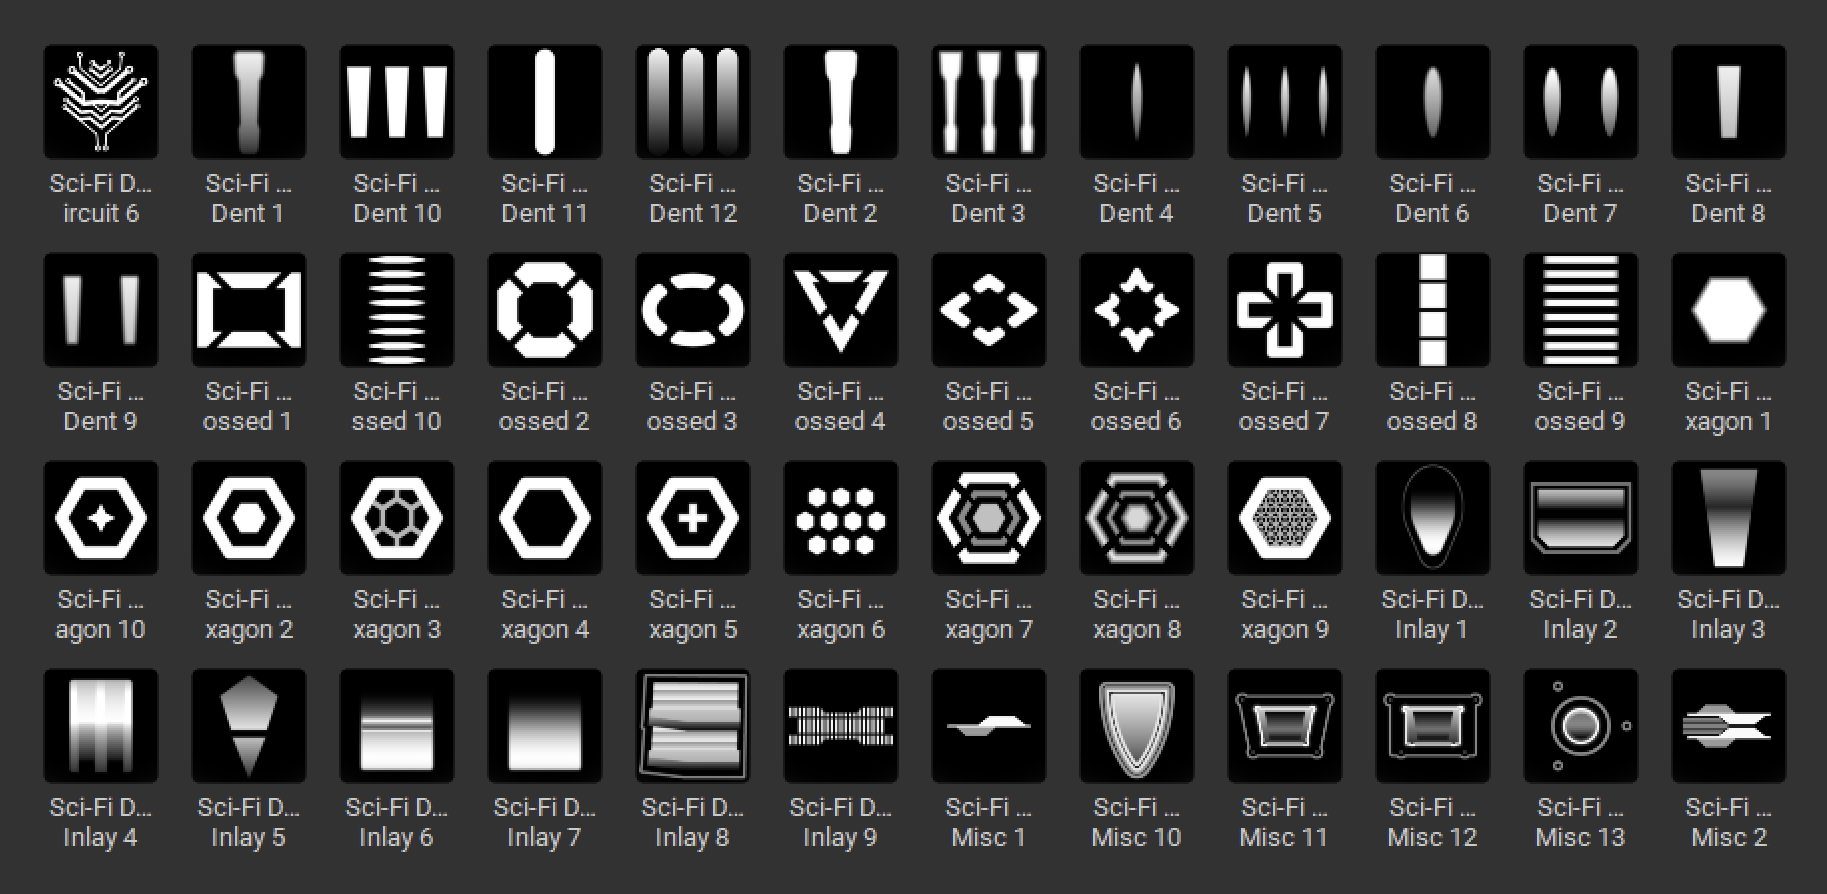
¶ New Sci-Fi Decals
InstaMAT 2025 adds over 140 sci-fi decals to the built-in asset library. These fully customizable decals enable the creation of complex, futuristic designs and materials. You can apply them as a brush or decal layer when texturing assets, or use them as patterns when developing sci-fi materials in the Element Graph.
¶ New Grunges and Patterns
InstaMAT 2025 introduces new grunges and patterns for texture and material creation.
¶ Moisture Spots
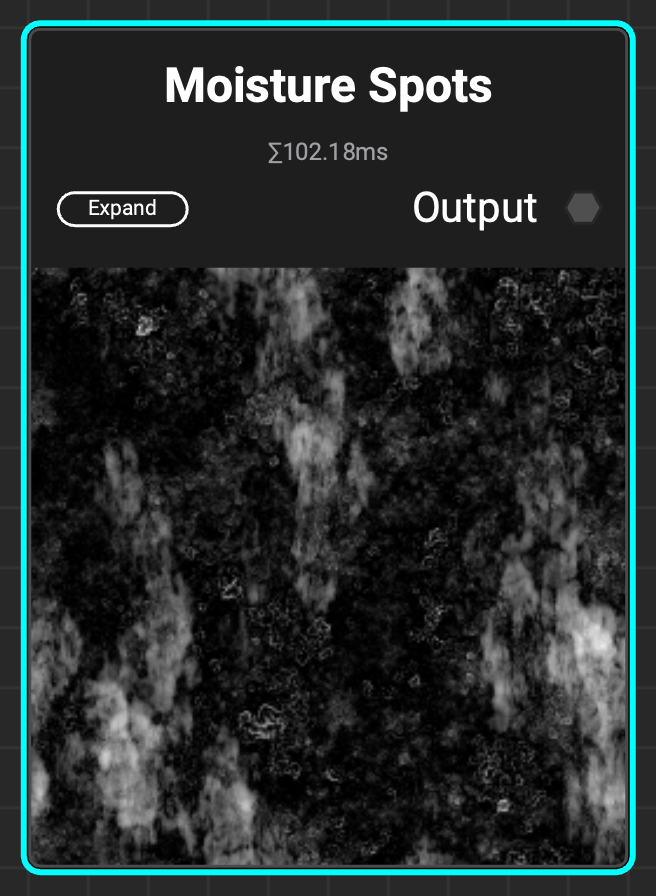 A grunge with moisture spots and stains, ideal to add moisture-like details to a roughness map.
¶ Brushed Over
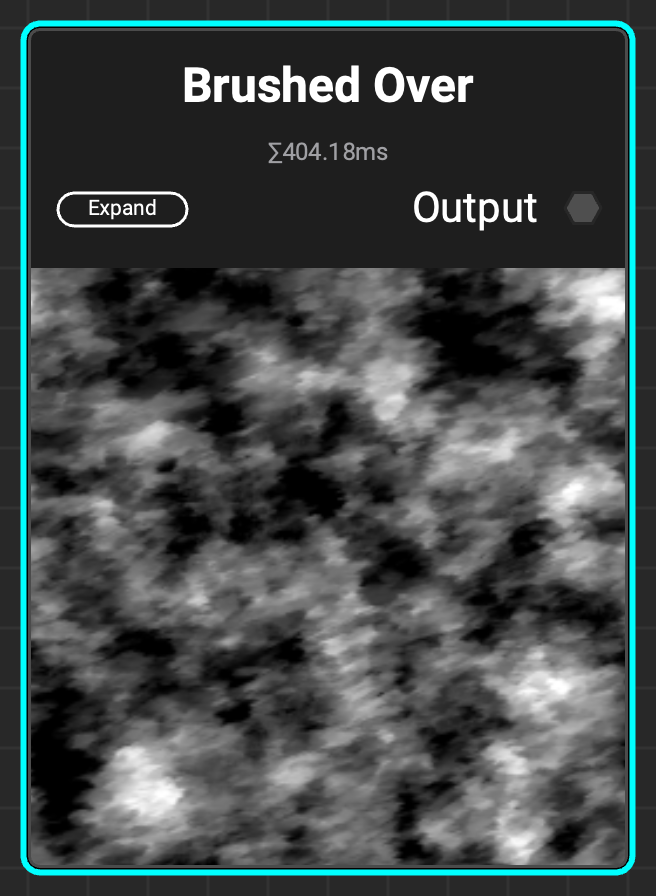 A grunge with a hand-painted style, a great fit for stylized materials.
¶ Scratched
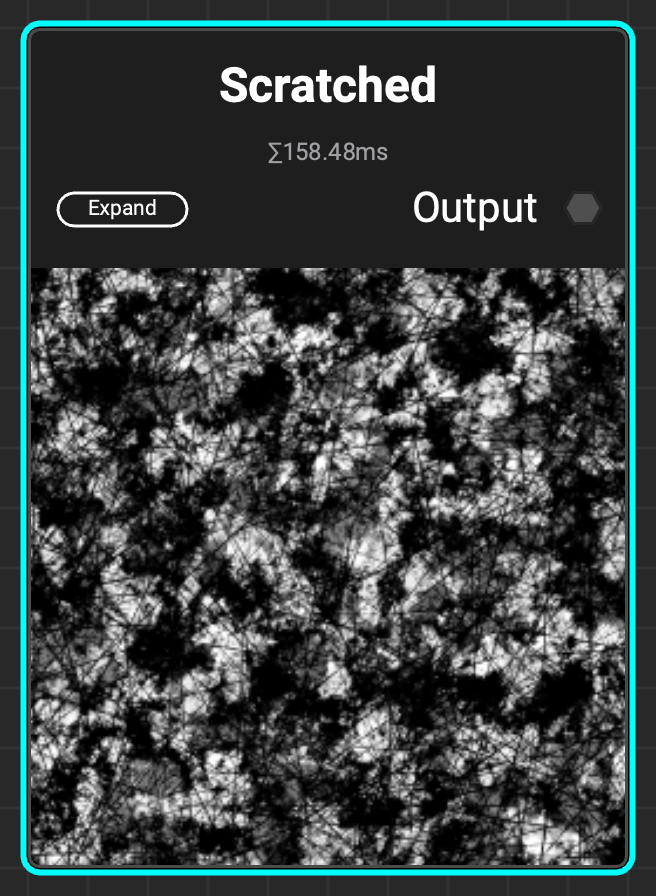 A grunge that represents a fully scratched and worn-out surface with a configurable number of scratches and scratch orientations.
¶ Flecks
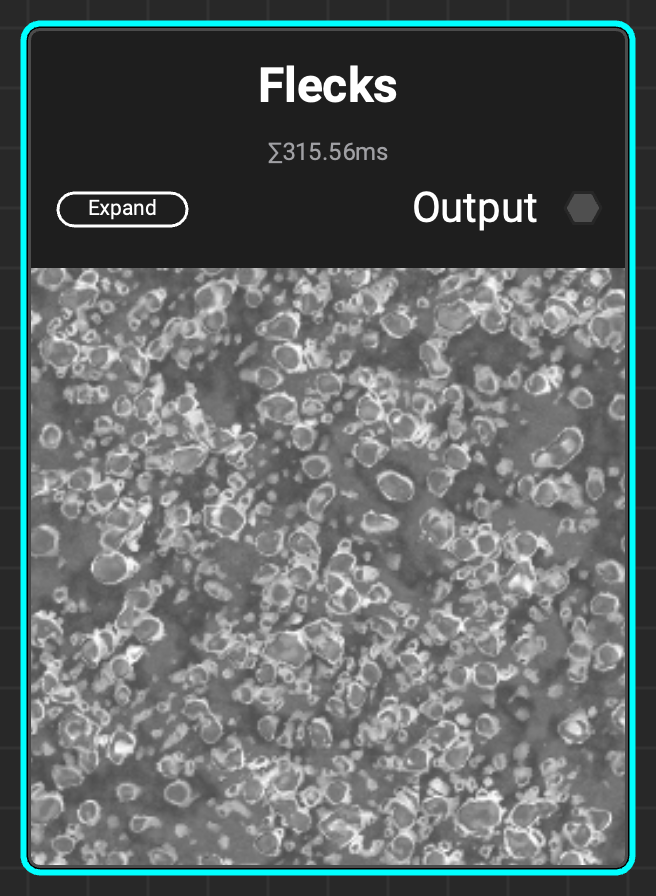 A grunge with a lot of flecks and spots ideal for surfaces that need to be detailed with dried moisture or mold.
¶ Crystal Slices
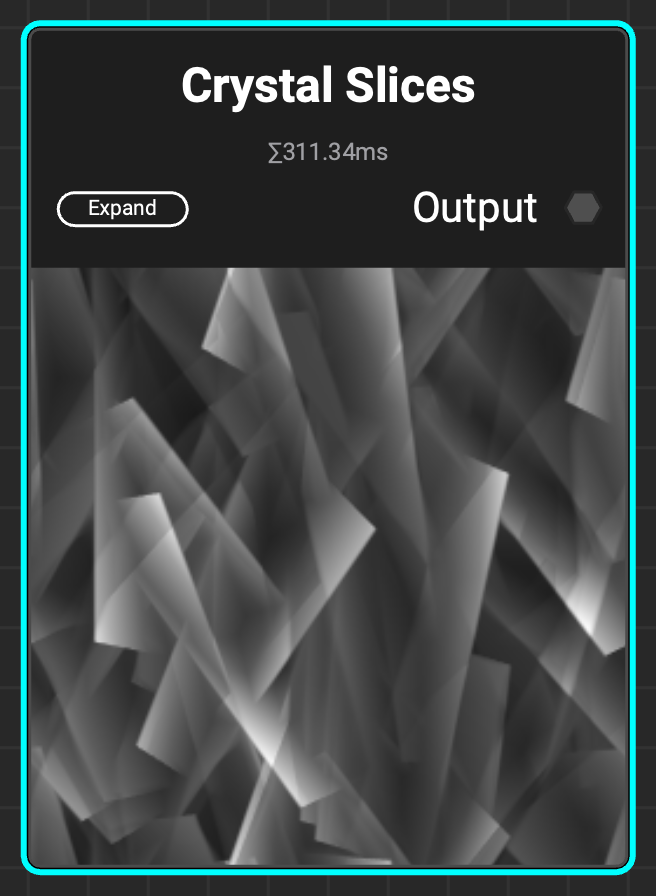 Creates a chaotic, irregular pattern with hard edges.
¶ Improved Mesh Blur
 The new and improved
 Mesh Blur node can now blur across UV seams. Use it to create various photo-realistic and stylized effects when texturing 3D assets.
¶ New Nodes for Stylization
InstaMAT 2025 introduces new nodes for creating stylized materials and textures, featuring a new Stylized Filter node along with a set of nodes for baking lighting and shadows.
¶ Stylized Filter Node
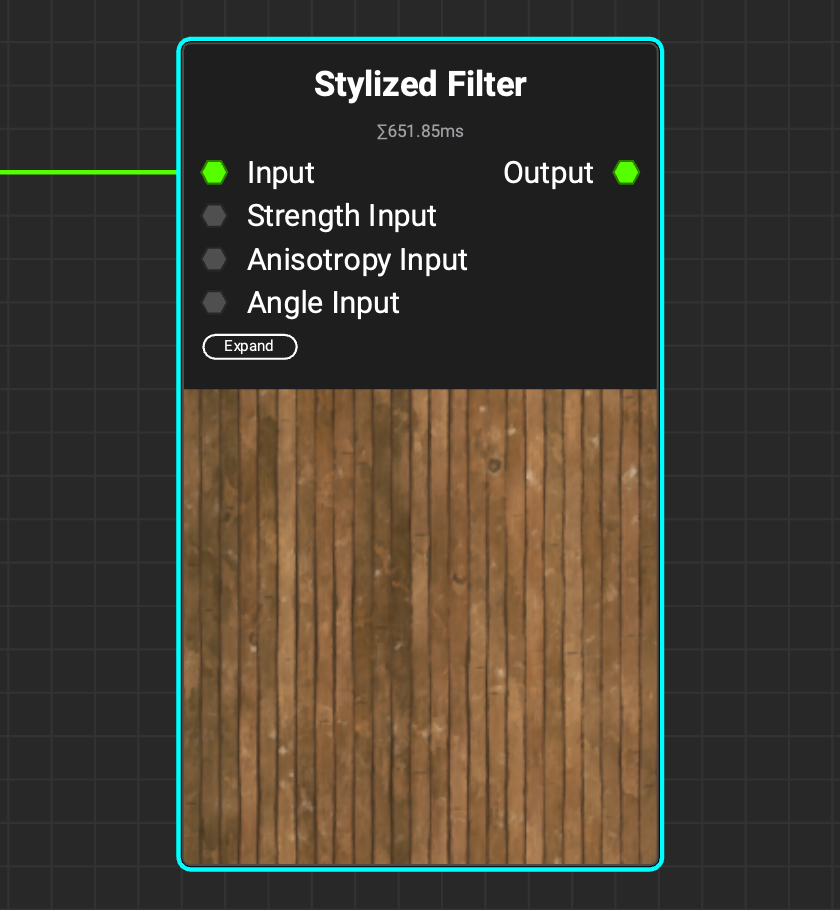 Use the
 Stylized Filter node to create painterly effects with modes like Kuwahara and Nearest Neighbor. Use the new filter node to stylize color/grayscale images as well as normal maps.
¶ Light and Shadow Baking Nodes
 The
The Mesh Bake Light node bakes lighting from up to three lights into a color map or generates a mask. Choose from area, point, or directional light types. Position, rotate, and scale lights using viewport gizmos.
 The
The Mesh Shadow Mask node generates a mask from a 3D light source. You can choose from various light types, including area, point, and directional lights. Position the light precisely using viewport gizmos.
¶ New Image Dragging Behavior in Asset Texturing
 Drag an image from the Package Management panel directly onto an asset in the viewport to instantly create a decal layer. You can then precisely position, rotate, and scale the decal using viewport gizmos, or use the
 Decal Picker to place the decal on the mesh at your chosen location.
Dragging an image into the Layer Stack automatically creates a new layer with a UV projection mode.
¶ Improved Paint Projector Controls
The Paint Projector now has free rotation, scale, and translation controls, adding more artistic control when painting stencils or even entire materials.
¶ Add Resources to the User Library with New Assets Folder
 Compatible resources such as images, meshes, and point clouds can be added to the User Library by moving them into a new Assets subdirectory in the InstaMAT user data folder. Assets placed in the Assets directory can be used without needing to add them to an InstaMAT package first.
The InstaMAT user data folder is typically located in your user's Documents folder.
¶ String from Resource and JSON File Parsing
 InstaMAT can now load string information directly from a file using the
 String from Resource node. This enables reading text files in various formats, including JSON data. In addition, InstaMAT now includes several nodes that can parse JSON data, making it possible to control the execution of a graph from an external file.
¶ Polyverse Integration
 InstaMAT Studio 2025 seamlessly integrates with Abstract Polyverse to make sharing and organizing materials, nodes, and projects simpler than ever.
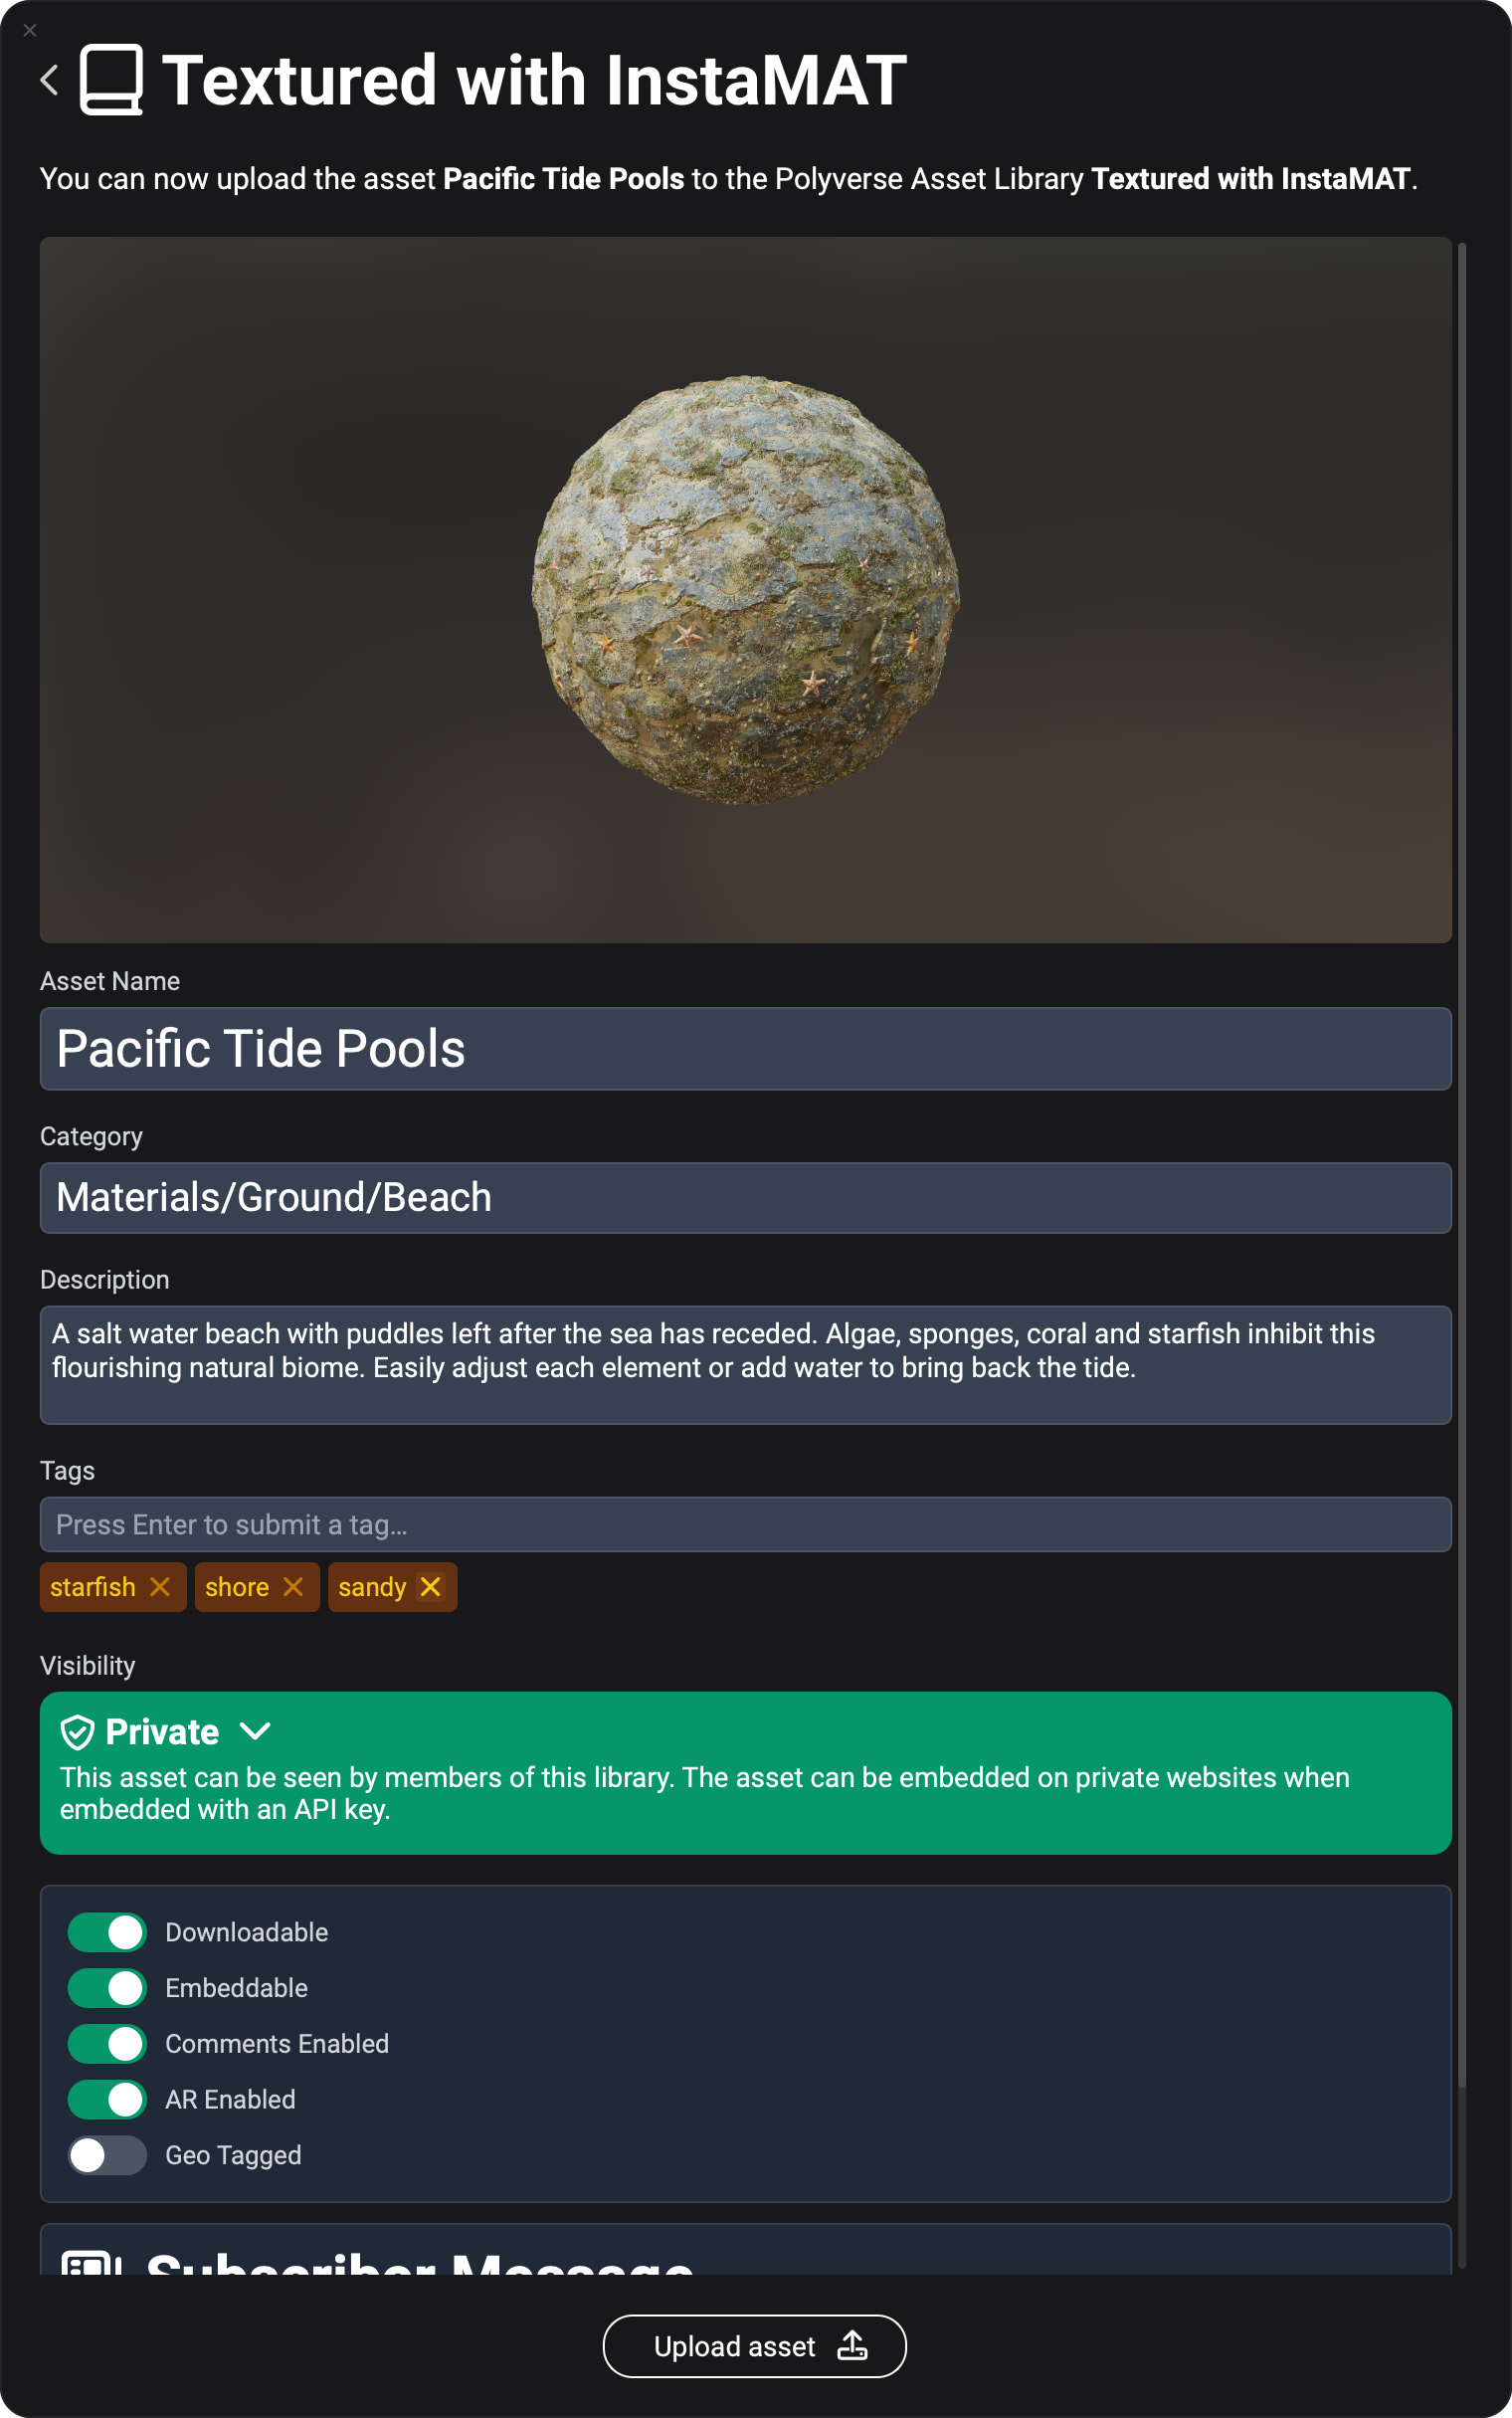
To instantly upload projects to your public or private Polyverse asset libraries, simply click the Share to Polyverse button in the Package Management panel. From there, you can choose to share your project as a 3D material or a cooked package.
Polyverse enables you to organize assets by category, description, and tags. Each asset tracks its version history, keeping everyone up to date and allowing users to revert to previous versions when needed. You can also view materials and 3D assets in the real world with one click using AR.
Share your creations publicly to receive likes and comments, or upload them to a private team library for efficient feedback and collaboration.
¶ All Changes
This release contains the following improvements and changes.
-
Layering/Asset Texturing
- New "Reference" layers that enable accessing data from other layers
- Masks can be manipulated with filters
- When creating a multi-channel layer or multi-channel brush, all channels except Base Color are now disabled by default
- Images can be dragged from the MAT Library or Package Management onto the viewport to spawn a new decal layer
- Images can be dragged from the MAT Library or Package Management onto the Layer Stack to spawn a new layer
- Atoms can be used as brushes
- Mesh material sections can be remapped after reimporting a mesh resource into the edited package
- The viewport camera position is restored after switching between projects
- Filtering by categories is now toggleable when picking an Element Layer input in the resource picker
- Layering effects now support spawn attachment input
- Corrected an issue when using the same mesh for a Multi-Material project and a UDIM project afterwards
- Corrected an issue where double-clicking a brush doesn't update the preview immediately
- Corrected an issue with a reversed layer order after copy-pasting layers
- Corrected a UI issue with the "Text" node as input for a Mask
- Corrected the rendering when the softness of the tri-planar mode is set to zero
- Improved Decal gizmo position picking when using shortcuts
- Corrected an issue with duplicated linear strokes
- Corrected an issue where using the mouse wheel could incorrectly apply paint strokes on macOS
- Corrected an issue where showing the resource picker for the first time in a Layering project could cause the application to load more data than needed
- Corrected an issue where copy-pasting a Mask layer with a template produced wrong parameter values
- "Layering" is renamed to "Asset Texturing" in the new project screen
-
Library
- New nodes for editing curve paths/splines:
Curves Weld Points,Curves Filter,Curves Warp,Curves Transform,Curves AppendandCurves Flip - New node
Curves Mergeto merge multiple paths into one - New node
Curves Circleto create a circle or arc path Bezier Curvenow provides support for creating curve pathsBezier Curvenow supports editing multiple paths in the widgetBezier Curvenode has an optional flood fill output- New node
Curves Fillto draw curve paths as shapes - New node
Curves Linesto draw curve paths as lines - New node
Curves Scatterto scatter points along the curve paths - New node
Curves Mapperto map an image stretched along the curve paths - New node
Curves Samplerto sample an image and convert it to the curve format - New nodes for creating terrains using heightmaps
- New node
Terrain Erosionwhich performs hydraulic erosion on the heightmap - New node
Terrain Thermal Erosionwhich performs thermal erosion on the heightmap - New node
Terrain Water Simulationto perform a flow map and water accumulation simulation - New node
Terrain Water Simulationto perform a flow map and water accumulation simulation - New node
Terrain Solar Radiationcomputes the amount of sunlight - New node
Terrain Height to Normalcomputes the normal based on the physical size of the terrain - New nodes
Terrain SplatmapandTerrain Material Splatmapfor texturing heightmaps - New nodes
Terrain Slope SelectorandTerrain Elevation Selectorfor creating masks from a heightmap - New node
Terrain Previewfor previewing a heightmap with a configurable PBR material - New terrain topology masks:
Terrain Landform,Terrain Residual MapandTerrain Curvature - New node
Height Inflateto inflate or deflate a heightmap based on the slope - New node
Height Collapseto an inward or outward erosion based on the slope - New node
Height Stratificationto apply a terracing filter on the heightmap - New node
Height Contour Linesto create contour lines from a heightmap - New node
Height to Cone Step Map nPassto compute a cone step map - New node
Normal To Angleto compute the slope and angle of a normal map - New node
Procedural Placement Densityto generate a probability map based on the height or humidity - New node
Procedural Placement Layerto create a procedural placement layer on a heightmap - New node
Procedural Placement Collisionto perform collision of multiple placement layers - New node
Scene Procedural Placementto spawn meshes dynamically within a scene - New node
Scene Compareto compare two scenes similar toMesh Compare - New node
Stylized Filterto produce a stylized effect with various modes like Kuwahara Mix Blendadded Oklab option- New node
Postprocessing Effectsto add effects such as boom, lens flare and glare, chromatic aberration and vignette - Added postprocessing effects and raytraced shadows to
Material Showcasenode Mesh Polygon Masknode supports per-axis scaling and rotation and multi-point selectionUV Shell Masksupports more position input parametersMesh Blurnow has an option to blur across seamsMesh From Heightadds a new Adaptive option for reduced triangle count- New node
Mesh Vertex Color Maskto create a mask from vertex colors - New node
Mesh Light Maskto bake in faux lighting - New node
Mesh Shadows Maskto bake in raytraced shadows - New node
Mesh Compute Packed BVHto compute the BVH of a mesh in arrays - New node
Mesh Image BVHto compute the BVH of a mesh in textures Mesh Rendernow supports raytraced shadows, area lights, sheen and anisotropic materials- New node
Mesh Random Transform Submeshto apply a random transform to submeshes - New node
PointCloud from Volumeto create a Point Cloud from analytical shapes - New node
PointCloud Bezier Generatorto create a Point Cloud from a Bezier curve compatible with the curves nodes - New node
PointCloud Position Generatorto create a Point Cloud using Poisson disk sampling - New node
PointCloud Circle Generatorto create a Point Cloud using a circle or spiral - New Point Cloud filtering nodes:
PointCloud Cull Normal,PointCloud Cull Plane,PointCloud Cull MaskandPointCloud Cull Position - New node
PointCloud Image Samplerto sample Point Cloud attributes from an image - New node
Get Image Bit Depthto retrieve the bit depth and texture format of an image - New node
Mesh Extract UDIM Tileto retrieve the mesh at a specific UDIM tile - New node
Height to Curvatureto create a curvature mask from the height data in the layer stack of all preceding layers - New node
Crystal Slicesto generate a chaotic, irregular pattern with hard edges - New grunge node
Moisture Spotsto add moisture-like details to a roughness map - New grunge node
Swiped Outfor brushed off or worn out surfaces - New grunge node
Brushed Overwith a hand-painted style - New grunge node
Scratchedto create a fully scratched and worn-out surface - New grunge node
Flecksfor surfaces that need to be detailed with dried moisture or mold - New node
Mesh Voxelize Per Submeshto voxelize each submesh of an input mesh independently while preserving the names of the submeshes - The
Mesh Bakenode supports submesh filtering Bluris now accessible as an effect in Layering projectsRope Fibersnow provides a more realistic pattern for the threadsTilealpha blending support- New noise nodes:
Gaussian Noise,Wavelet NoiseandMesh Wavelet Noise Weave Pattern Generatornow supports UV mapping- Scatter nodes now provide a clamping option
- Grayscale Scatter nodes now have support for alpha blending/masking with an alpha input map
Random Scatteradded options for per-tile offsets and rotation advance- Several new nodes JSON parsing:
JSON Parse Float,JSON Parse String,JSON Parse Arrayand other - New node
String From Resourceto open a text file as string - New string and array processing nodes:
String Array Append,String Array Find Compute Histogramadded options to compute the median and/or mean- New node
Material Multi Blendfor blending PBR materials Summed Area Tablesupport for borders- New node
HDRI Mesh Equirectangularto render a mesh using an Equirectangular projection - Preserve aspect ratio for
Tilenode - Many fixes and improvements to existing nodes and baker
- New nodes for editing curve paths/splines:
-
Canvas
- The default double-click behavior is changed to preview outputs instead of opening nodes
- When previewing a node with a double-click multiple times, the next available output is selected
- A new shortcut ("V" by default) enables toggling through all outputs of a selected node
- Importing a mesh file by dragging it into the Canvas can now spawn it as an
ElementScene - Support for Element String as nPass variable
- Quick Search: A new preference determines which inputs are prioritized when dragging a connection
- Corrected an issue where the Canvas can appear disabled after working on a layering project after application startup
- Corrected Link Category connection matching for parameters with incompatible types
- Support for copy-pasting for Link Category connections
- Corrected an issue where spawning a mesh in an Atom created an image
- The width of connections can be configured in the Preferences to improve rendering on low-DPI screens
- Comments can be rendered with a transparent background with the new "Text Only" preset
- Corrected an issue with the comment stack order after sending a comment to back or bringing it to front
-
Viewport
- Support for raytraced effects (shadows, global illumination, reflections)
- Improved emissive bloom rendering
- Support for Anisotropic and Sheen materials
- Support for specular reflectivity and specular tint maps
- Support for Clearcoat materials
- The middle value for displacement rendering can be configured in the Viewport Settings
- Support for user-imported IBL environment maps
- Support for Opacity rendering per layering material section
- Zooming by default anchors to the mouse cursor; this can be configured in the Viewport tab of the Preferences
- In addition to first-person camera navigation with WASD, the camera can be moved up and down with Q and E
- Improved Viewport mesh caching when switching between projects
- Mesh Vertex Color Mask supports picking colors from the Viewport
- Corrected an issue with tonemapping during screen-color-picking from the Viewport
- Configurable offset and color for the viewport grid
- Configurable camera speed
-
Mesh Baking
- New disk sampling based Curvature baker
- New Bevel Normals baker
- A cage mesh can be loaded from a separate file/resource
- The source/target and meshes can be selected from the current package for non-Layering projects
- Corrected an issue with mesh filtering by name failing when inputting empty meshes
- Corrected an issue where the Opacity baker leaves a blank row of pixels at the bottom
-
Output Export
- Materials and packages can be directly uploaded to Polyverse
- Option to export with cached render state without rerendering the entire graph
- 8bit/16bit images can be exported based on the file extension
- Exporting a layering project with a template and the bit depth is set to
Inheritedoutputs textures in the correct format - Newly added custom layer channels appear immediately
- The color space for custom layer channels is displayed correctly
- The format settings correctly appear for Material Layering projects
- Duplicated templates can be correctly edited
- Name conflicts for templates are resolved
- Option to remap individual RGBA channels when configuring a template
- Exported files are created with lowercase file extensions
- Templates from read-only user directories no longer appear as editable
-
General
- 8bpp color images always use sRGB encoding
- Removed the Radeon Pro Render integration in favor of raytracing in the real-time viewport
- Resource files can be placed in the
Assetssubfolder of a user data directory to be quickly accessible as external assets - Packages can be downloaded from Polyverse and imported into the user library
- Floating license entitlement support
- Corrected issues with Image Viewer tonemapping for some grayscale images
- Image Viewer A/B compare supports vertical compare alignment
- Corrected an issue where the Image Viewer is waiting for execution although the selected output is already available
- Zooming the Image Viewer with the right mouse button is no longer constrained by the screen edges
- When a parameter is hidden by a visibility expression in the currently active project, it is grayed out in the Graph Object Editor
- A scale factor can be set in the Graph Variable Editor to control how numerical values are displayed
ElementStringvariables can be forced into one line with a new option in the Graph Variable Editor- Redesigned dropdown selection
- The resource picker window can be resized by dragging the edges
- Default package file name suggestions are based on package or project names
- Deleting an object from the edited package always requires user confirmation
- Corrected an issue where reordering output parameters in the Graph Object Editor changes the category
- Built-in library graphs can be saved as a project copy
- A package can be imported into the user library
- The user library can be manually refreshed to detect changes
- Corrected an issue where reimporting an existing resource through dragdrop did not update all projects that reference it
- Corrected an issue with Point Cloud resources appearing as Mesh resources in the Package Management
- Corrected an issue with non-FBX assets appearing as generic in the user library
- When automatic rendering is disabled, the lock icon flashes in the toolbar
- File dialog for resource selection filters for supported file formats
- Corrected an issue when showing a user library package in the Windows Explorer
- Windows file association works when the application is already running
- On application startup, user library directories are verified for packages that are not placed in the "Library" subfolder
- Corrected an issue where deleting package resources while an auto-save is performed in the background could cause a crash
- Corrected an issue where the available VRAM was incorrectly detected on systems with dedicated and integrated GPUs
- Corrected a compatibility issue with the Grammarly Desktop application on Windows
-
Materialize Image
- The input crop rotation is displayed in degrees
- Corrected an issue with inverted grunge
-
Preferences and shortcuts
- Favorites are loaded from all user data directories configured in the Preferences
- Reworked the UI elements used to configure user data directories
- Reorganized Canvas page layout
- Shortcuts can be filtered by key combination
- Improved error handling when attempting to assign the same shortcut twice
- Unlit render mode can be triggered with a shortcut in the Viewport
- A new shortcut can be assigned to quickly put the Canvas, Image Viewer or the Viewport into the center stage
- A new option controls mouse wrapping in the Image Viewer
- The undo history size limit can be set
-
Localization
- Texture channel names are no longer localized
- Corrected issues with clipped text labels in localized UI
-
Windows Installer
- Corrected an issue where the MSVC 2019 Redistributable is detected as compatible instead of the required MSVC 2022 Redistributable
- Improved uninstaller performance
-
SDK and Pipeline
- The InstaMAT C++ SDK is available as a separate download
- InstaMAT Pipeline is available as a separate download and is no longer bundled with InstaMAT Studio
¶ InstaMAT for Blender
-
General
- Support for Blender 4.4
- Support for Blender 4.5
- Improved graph execution performance
- Improved plugin initialization
- Applying mesh transforms when setting as graph input
- Corrected an issue when removing a User Path in Blender 4.2
- Fixed an error when setting a mesh that has no UV as graph input
- Added option to disable auto-saving user preferences
- Fixed an occasional error when connecting a graph instance to the active material
- Fixed crash when using USDC meshes as input from a graph inside a package
- Fixed an issue with displacement textures not being connected to the active material correctly
- Removed behavior that was automatically enabling 'Auto-Save' for user preferences
- Added support for External Assets directories
- Floating license entitlement support
-
UI/UX
- Added support for input categories in Graph Instance UI
- Added option to lock width and height from Graph Instance
- Added option to rename graph instances
- Improved graph instance description spacing and graph icon size
- Fixed incorrect spacing between graph instance list and action buttons
- Improved multiline text rendering to better use available space
- Improved button for resetting graph instance to default values
- Improved metadata panel in Graph Instance UI
- Added new Outputs panel in Graph Instance UI with most useful graph outputs
- Improved order of fields in settings panel
- Improved search bar UI
- Reduced the initial height of the Library browser panel
- Custom rotation option when exporting textures to disk
- Improved Settings panel UI
- Enhanced support for Enum options using PascalCase naming
¶ InstaMAT for Unreal Engine
-
General
- Support for Unreal Engine 5.6
- Improved plugin initialization
- Fixed an issue where textures saved to disk were black
- Fixed issue where default displacement was incorrect for graphs without Physical Size metadata
- Corrected an issue that imported package resources when performing Drag & Drop
- Added support for External Assets directories
- Floating license entitlement support
- Improved setting image as input
-
UI/UX
- Automatically selecting InstaMAT Graph Instance in Content Browser instead of resource outputs when creating new instance of a graph
- Improved Library Browser entries UI and resizing issues
- Corrected an issue where Library search was not being applied within category items
- Resolved an issue where categories with the same name but different cases were duplicated
- Improved usability of int and float sliders without minimum and maximum values
- Improved selection of InstaMAT installation path
- Improved paddings and spacings for some UI panels
- Improved authorization window UX during startup
¶ InstaMAT for Autodesk Maya
-
General
- Support for Autodesk Maya 2025
- Support for Autodesk Maya 2026
- Support for Mesh output
- Support for Scene output
- Improved plugin initialization
- Improved several error messages and error handling
- Corrected an issue with resolution settings not being saved correctly
- Added several missing translation strings
- Fixed an issue with mirrored graph outputs
- Added support for External Assets directories
- Floating license entitlement support
- Corrected issue when closing InstaMAT Library Browser window
-
UI/UX
- Corrected an issue where some graphs were not being displayed in the Library browser
- Improved UI tabs in Library Browser and Settings windows
- Improved list view UI from Library Browser
- Added table view UI for Library Browser
- Improved Library Browser search UI
- Added JPG quality setting when exporting textures to disk
¶ InstaMAT Integrations 2025 — Released on 23rd January 2025
This release contains the following improvements and changes.
¶ InstaMAT for Blender
- ADDED: Support for Blender 4.2 and Blender 4.3
- ADDED: Support for meshes as input nodes type
- IMPROVED: Loading custom user packages immediately after a new User Path is set
- IMPROVED: Plugin initialization and automatic loading of InstaMAT Library
- FIXED: Support for loading custom images as input of a graph
UXFIXED: Cursor getting stuck when interacting with UIUIFIXED: Search behavior when performing sequential searchesUIFIXED: Global search hiding graph categories toolbar UIUIIMPROVED: User Paths settings UI and custom packages handlingUIADDED: Option to export textures to a custom pathUIADDED: Maximum execution size settingUIADDED: Quality parameter when exporting textures to disk as JPGUIADDED: Support for graph Tags in Meta Data UIUIADDED: Deauthorization option through the Settings panelUIFIXED: Several different input types errorsUIFIXED: Translated strings typos and messagesUIFIXED: Grayscale values not workingUIFIXED: Color sliders from the color picker not workingUIFIXED: Unsigned integers minimum range valuesUIFIXED: Removed search persistence when saving blend fileUIIMPROVED: Custom graphs category panels- IMPROVED: General error handling and messages
- IMPROVED: Initialization and interface load process
- FIXED: Plugin unloading errors
- FIXED: Errors when loading .blend files from disk
- FIXED: Occasional crash when generating previews on slower machines
UXIMPROVED: Changed loading text to spinning iconUXIMPROVED: Drawing gamma-corrected UI color picker to match visualized colors betterUXIMPROVED: Disabled by default popup message when updating a graph instanceUXIMPROVED: Immediately displaying instance settings when creating a new instanceUXIMPROVED: Grayscale values as percentage slidersUXIMPROVED: Automatically updating instance when update type is set to Automatic
¶ InstaMAT for Unreal Engine
- ADDED: Support for Unreal Engine 5.4 and Unreal Engine 5.5
- IMPROVED: Significantly reduced overall package size
- FIXED: Memory leak related to UV scaling
- IMPROVED: Loading custom user packages immediately after a new User Path is set
- IMPROVED: Removed Graph Instances dependencies from Graph object
- FIXED: Crash when creating instances of graphs with unsupported input types
- IMPROVED: Plugin initialization and automatic loading of InstaMAT Library
UIFIXED: UI jumps when modifying graph instanceUIADDED: Mesh preview for graph output nodesUIIMPROVED: Search behavior with filters and local searchUIIMPROVED: Name suggestions when creating graphs and instances to follow Unreal Engine styleUIIMPROVED: Hiding texture settings if a graph does not output textureUIFIXED: Invalid slider values for some specific propertiesUIFIXED: Incorrect minimum and maximum values for some specific propertiesUIFIXED: Incorrect height of graph Tags UI elementUIADDED: Support for graph Tags in Meta Data UIUIADDED: Support for local searchUIADDED: Plugin icon- FIXED: Issue preventing graphs from being renamed
- FIXED: Progress window representing incorrect progress
- FIXED: Pressing "Cancel" when creating a new instance would still create a new instance
- FIXED: Inverted UVs on specific meshes when used as input
- FIXED: Support for grayscale textures
- FIXED: Dynamic textures not saved correctly when saving all assets
- FIXED: Occasional crash when deleting graph instances
- FIXED: Incorrect grayscale values when executing graph for the first time
- IMPROVED: Assigning default material to output mesh from graph
UXIMPROVED: Opening File Explorer/Finder when exporting textures to diskUXIMPROVED: Using Content Browser when importing graphUXIMPROVED: Using Content Browser when creating graph instanceUXIMPROVED: User Path list modificationsUXIMPROVED: Navigating Content Browser to InstaMAT Graph Instance object when creating new graph instance
¶ InstaMAT Early Access 3 — Released on 29th February 2024
This release contains the following improvements and changes.
-
Layering
- Added a new type of
Referencelayers - Projection painting supports rotation of the image
- Painting honors backface culling setting of the viewport
- New masks
Mesh UV Shell MaskandMesh Polygon Maskto create a mask based on a mesh UV shell and a mesh polygon selection. UV shells and polygons can be easily picked in the viewport - Massive UDIM performance improvements and reduced memory pressure
- Strong improvements to painting performance
- Corrected an issue that could lead to bake texture assignments to be lost in UDIM projects
- Preventing updates to the 2D view while painting
- Improved re-rendering of affected UDIM tiles after bake
- Corrected an instability for some meshes in
Multi-Material (Unified)mode - Improved color-space handling when picking colors for
Mesh ID to Mask - Improved progress report when baking or loading large meshes
- Holding alt/option when modifying the blend-stack of a layer adjusts all channels at once
- Copying the mesh to the package by default for new projects
- Improved solo-channel render mode in the viewport for UDIM projects
- User control for the normal intensity of the height channel
- Corrected an issue where using a template graph can lead to incorrect results
- Nested graphs support visibility expressions in the layer editor
- Corrected an issue where using the eraser with a tablet can lead to the application of color
- Added a new type of
-
Canvas and nodes
- Many improvements to existing nodes
- Improved dragging of values in the Canvas
- Nodes can be spawned from the context menu in the library
- New Node
Symmetry Sliceto mirror an image over a plane - New Node
Triangle Patterncreates interesting irregular patterns of triangles - New Nodes to convert Hex colors to InstaMAT color values such as
Hex to Color - Improved the UX of the
Blendnode by hiding advanced controls - New Node
Mesh Set Normalto assign vertex normals to a mesh - New Node
Mesh Transfer Attributeto transfer vertex attributes from one mesh to another by ray-casting or search - Add RMB action to "solo" the selected node
- New outputs for
Mesh Tilefor properties such as normals, vertex colors and texture coordinates - New Node
Mesh Target Scaleto automatically adjust the size of one mesh based on a target mesh - Improved accuracy of
Auto Cropfor elongated shapes LevelsandCurveshave a new parameter to control the blend opacity- Added crack-free support to
Mesh Subdivision - New nodes for SIMD comparators in Atom graphs
- New node
HDRI Composeto compose two high-dynamic range images - New node
HDRI Convoluteto precompute HDRI convolutions - New node
Mesh Closest Pointto find the closest point to a mesh within a specified radius - New category of nodes to do array manipulations in the Element Graph such as
Array of UInt32 - Quick search hides materials by default, this can be disabled in the preferences
- Scatter nodes support preserving the aspect ratio of the input image if the tile is non-square
- New node
Mesh Select Polygons By Volumeto select an array of polygons based on a 3D volume - New node
Mesh Select Polygons By Directionto select an array of polygons based on a 3D direction - New node
Mesh Extract By UV Shellto extract a submesh based on the UV shell - New node
Mesh Extract By Polygonsto extract a submesh based on an array of polygons - New node
Mesh Delete By Polygonto delete an array of polygons from the mesh - New node
Mesh Polygon To Vertex Selectionto convert a polygon selection to a vertex selection - Added polygon/vertex array support to
PointCloud from Meshto create a point cloud based on an array selection - Improved performance of
Mesh Calculate Normalsif the mesh contains a large number of degenerates - New node
Mesh Delete Degenerate Polygonsto remove degenerate polygons from the mesh - Improved support for using the paint engine via
Mesh Paintingin the canvas
-
General
- One or more resources can be reimported in the Package Navigator
- Maximum bit-depth can be configured when exporting images in the Export Window
- Projects can be cooked in a "secure" mode that prevents opening the package
- Improved project cloning
- Improved stability of slider overrides
- Improved the design of the main toolbar to indicate toggle buttons
- Improved UI and UX for many widgets and windows
- Improved multi-monitor support
- Improved image-viewer UX
- Increased the number of actions that support shortcut customization
- The Output Log is hidden by default
- Using OS native file dialogs for load and save operations
- Improved stability of the auto-updater
- Translation can be loaded from application directory as override of built-in translations
- Using the name of the project when saving a package for the first time
- Improved the icon of UV scale
-
Tutorials
- Element Graph:
Scatter Bake, learn how to dynamically scatter meshes over a plane and use them for material design - Material Layering:
Old Grassy Pavement, learn the basic workflows of Material Layering in this starter project
- Element Graph:
-
Integrations and Plugins
- Initial release for
InstaMAT for Blender - Initial release for
InstaMAT for Autodesk Maya - Initial release for
InstaMAT for Unity - Initial release for
InstaMAT for Unreal Engine
- Initial release for
-
Localization
- Improved Japanese (thanks to community user 'Rapilias')
- Improved Chinese translation (thanks to community user 'Chengxiao')
¶ InstaMAT Early Access 2 — Released on 7th February 2024
This release contains the following improvements and changes.
-
Localization — InstaMAT's user interface is now localized with the help of AI translation.
-
Layering
- Improved Performance for painting with lower latency and higher performance.
- Improved Performance for large UDIM meshes in layering
- New mask: "Mesh Vertex Color Mask"
- Improvements to cooking projects
- Changed "Mesh Projected Mask", the default value for
Projection Modeis nowTri Planar.
-
Canvas and nodes
- Auto-complete for input parameters
- Improvements to context sensitivity hide irrelevant nodes when editing an Atom graph.
- Performance improvements for "Scene Render"
- Floodfill accuracy for "Brick Generator"
- "Height Slice" has a new
SmoothandSegment Countparameters - Lerp nodes feature a slider to control
X - Performance improvements when changing active tabs with custom preview meshes
- Default behaviors for double-clicking resources can be customized
- Comment shortcuts required canvas focus
- Improved presentation by removing diagnostic data
- Double-click is supported for graph output
- Renamed "Mesh Constructive Solid Geometry" to "Mesh Boolean" to aid discovery
-
Mesh Baking:
- Support for meshes without material assignment
- Average normals work on all meshes
- Stability improvements when UVs are outside the 0 tile
-
Materialize Image
- User interface initializes correctly in all situations
-
General
- A global scale option is now available that can be used to scale the entire InstaMAT UI
- Many new shortcuts are available to customize actions
- Refinements to the presentation of the resource picker make it easier to pick masks, filters and generators.
- Viewport dolly using Alt/Option+RMB
- Viewport gizmos are now rendered when in single-channel view-mode.
- Resource picker can copy and paste URLs
- Stability improvements when importing large ascii FBX files into a package
- Improved and clarified data collection window
- Improved information as to why a license authorization failed
- Custom Icon for InstaMAT Packages files
- Improved string entry on macOS
- Accessibility incompatibility issues on macOS
- Improved conflicting shortcuts
- Fixed issues with macOS notarization
-
New tutorials
- Element Graph: Twisted Cables (Procedural Meshes)
- Element Graph: Physics Simulation