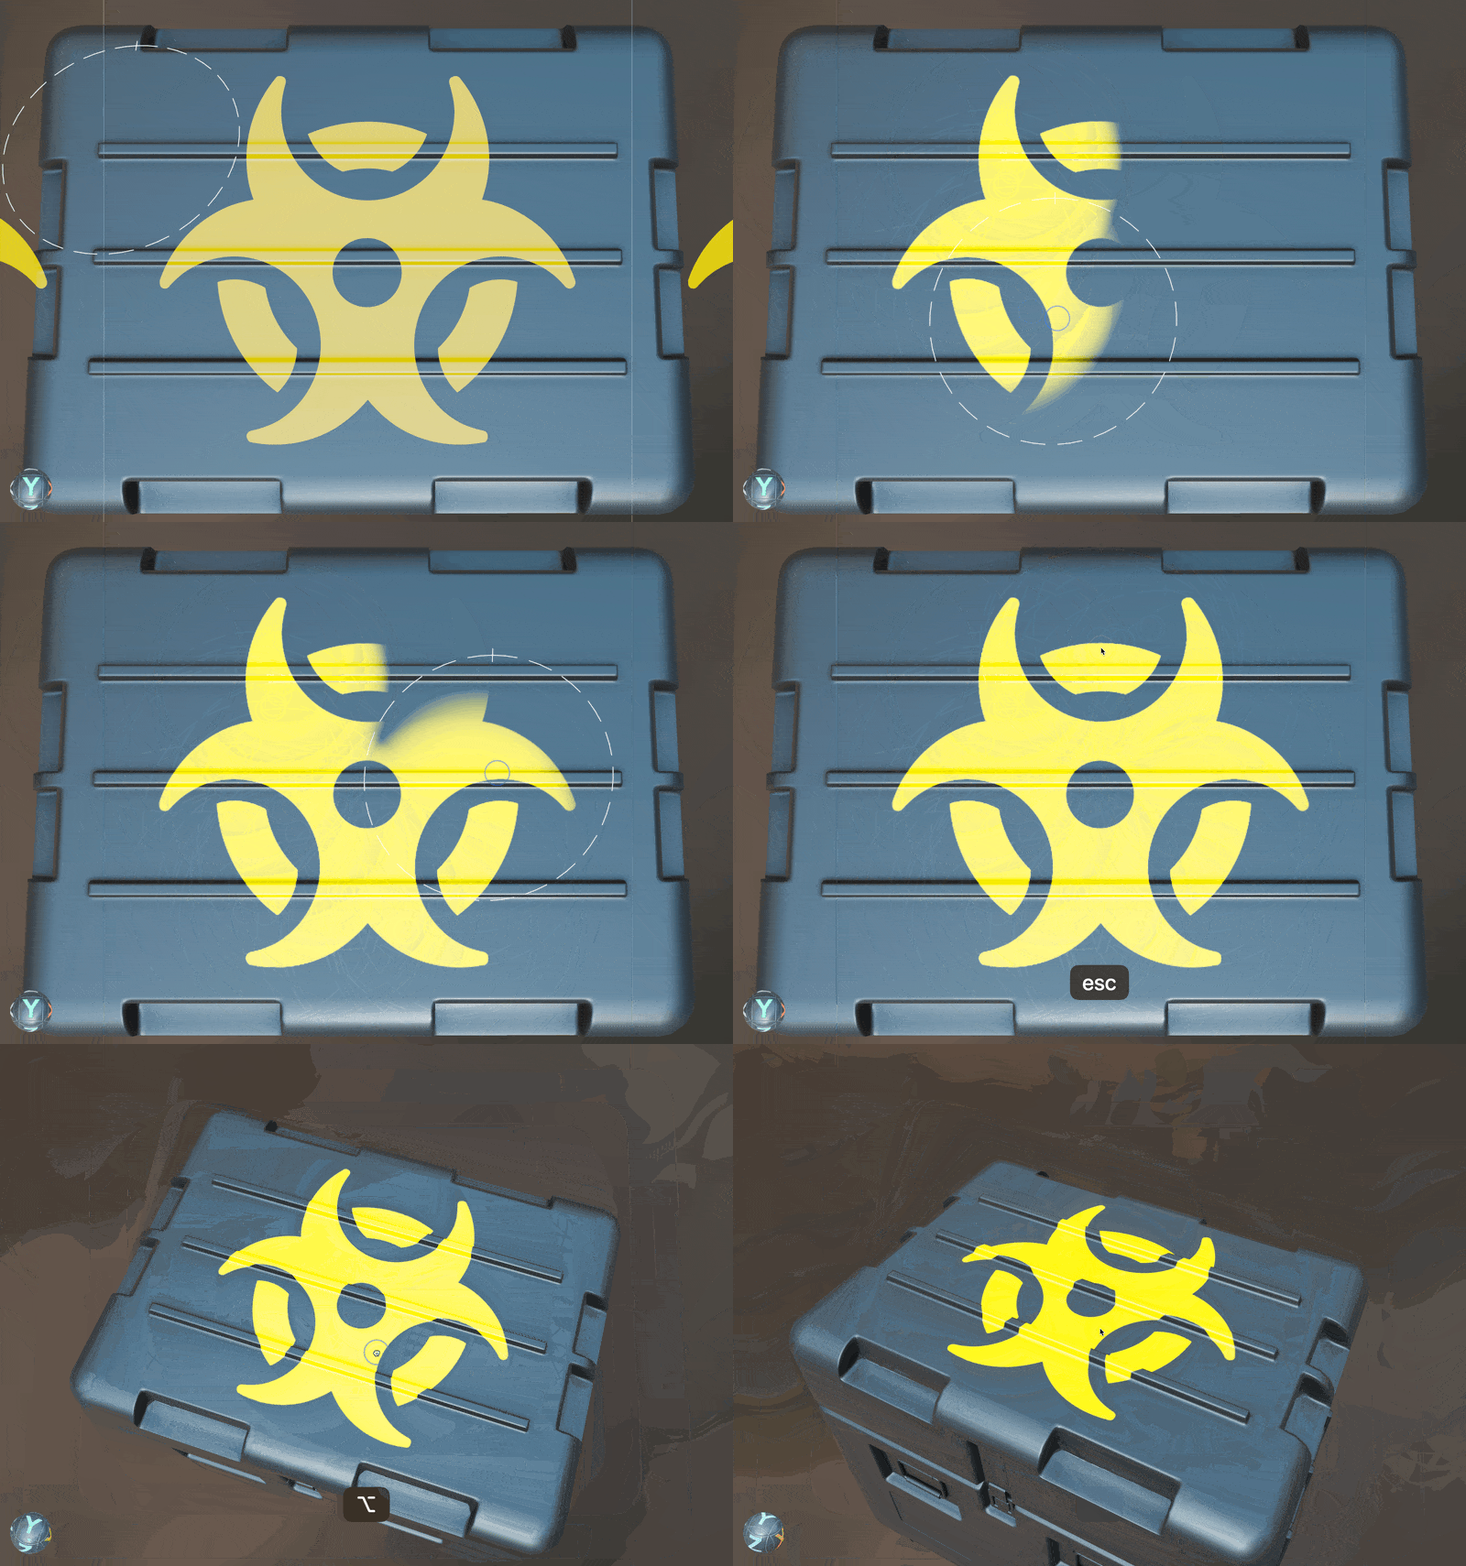
InstaMAT Studio's painting engine lets you paint directly onto the surface of a 3D model with multiple channels of material information. This article explains how to quickly get started with painting using InstaMAT Studio's Asset Texturing project.
¶ Creating a Brush Layer
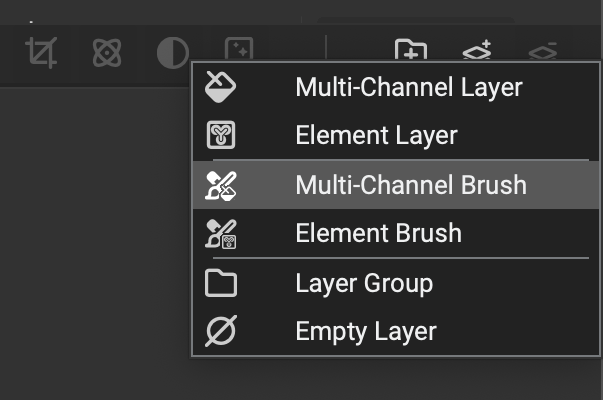 To begin painting, a brush layer must be created. To create a brush layer:
- Click the
Add Layerbutton located below the Layer Stack. - From the popup menu, select either a
Multi-Channel Brushor anElement Brush.
Once added, the brush layer will appear in the Layer Stack. With the layer selected, you can begin painting directly onto the mesh in the Viewport.
¶ Brush Layer Types
There are two types of brush layers in InstaMAT: Multi-Channel Brushes and Element Brushes.
¶ Multi-Channel Brush Layers
Multi-Channel Brush layers provide increased control over the texture information that is applied when painting. With the Layer Channels panel, brushes can be configured to paint with any of the available channels in the Asset Texturing project.
Each channel can be configured with an element, color, or image and has its own Blend Opacity and Blend Mode. Channels can be disabled for the brush by setting its Blend Opacity to 0%.

To quickly set the
Blend OpacityorBlend Modefor all channels at the same time, hold Alt/Option while adjusting one of the channels.
¶ Element Brush Layers
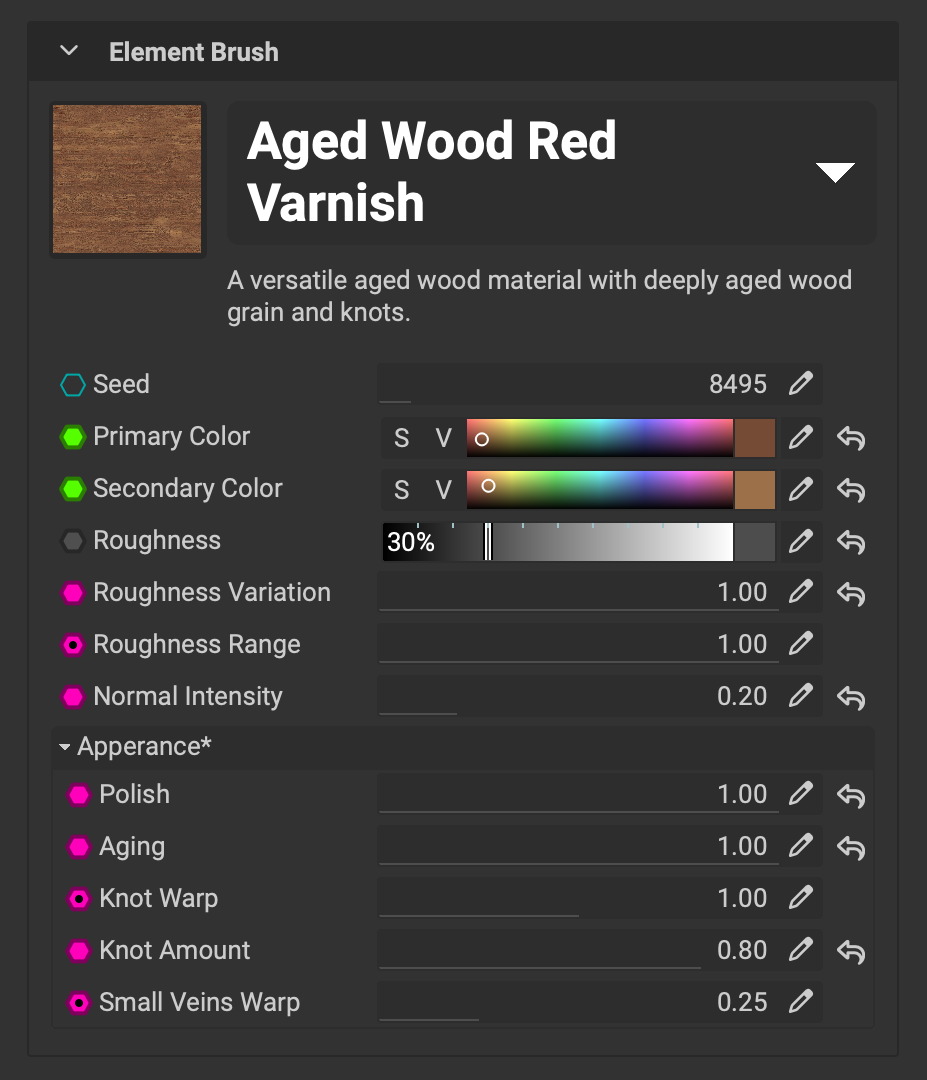
Element Brush layers simplify the process of applying a full material when texturing by directly mapping the outputs of an element to the channels for the brush. The Layer Channels panel displays all dynamic parameters for the loaded element, making it easy to configure a material while painting.
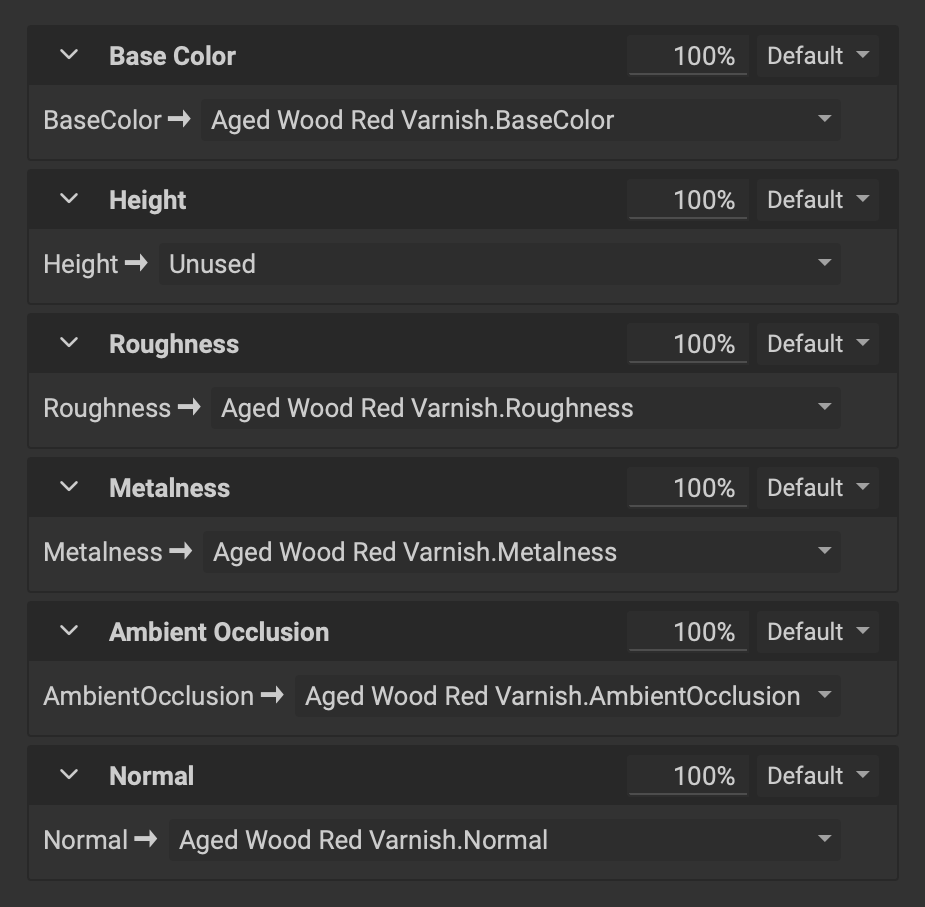 Each output of the loaded element can be mapped to a particular channel for the brush.
¶ Configuring the Brush Mask
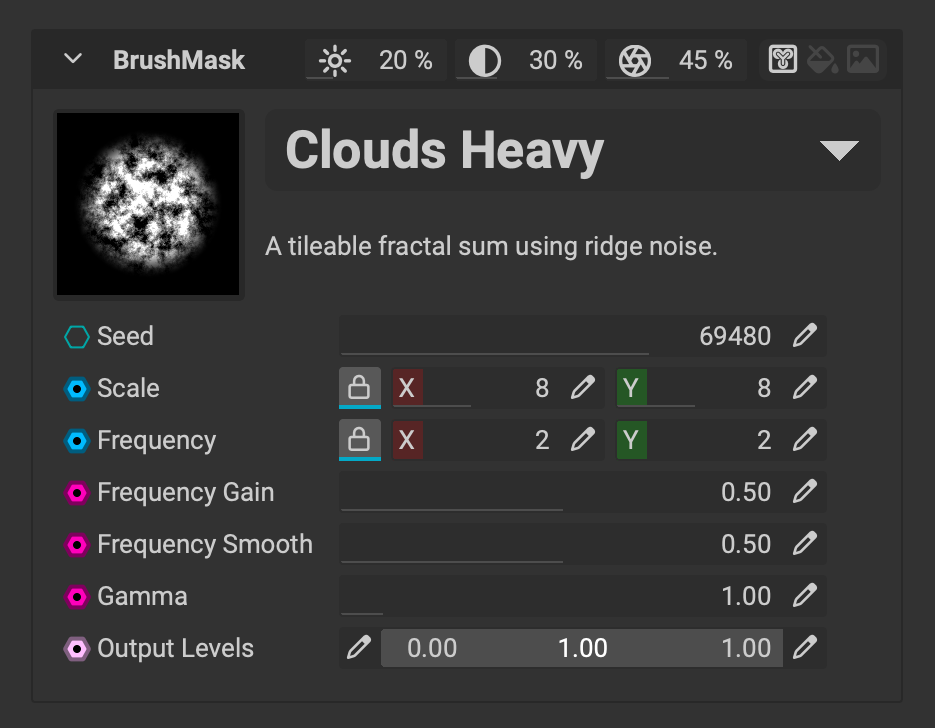 The brush mask determines where texture information is applied for each paint stroke. A brush mask can be assigned using an element, grayscale value, or an image.
When using an element as a brush mask, the element's dynamic parameters appear for quick configuration to dial in the mask.
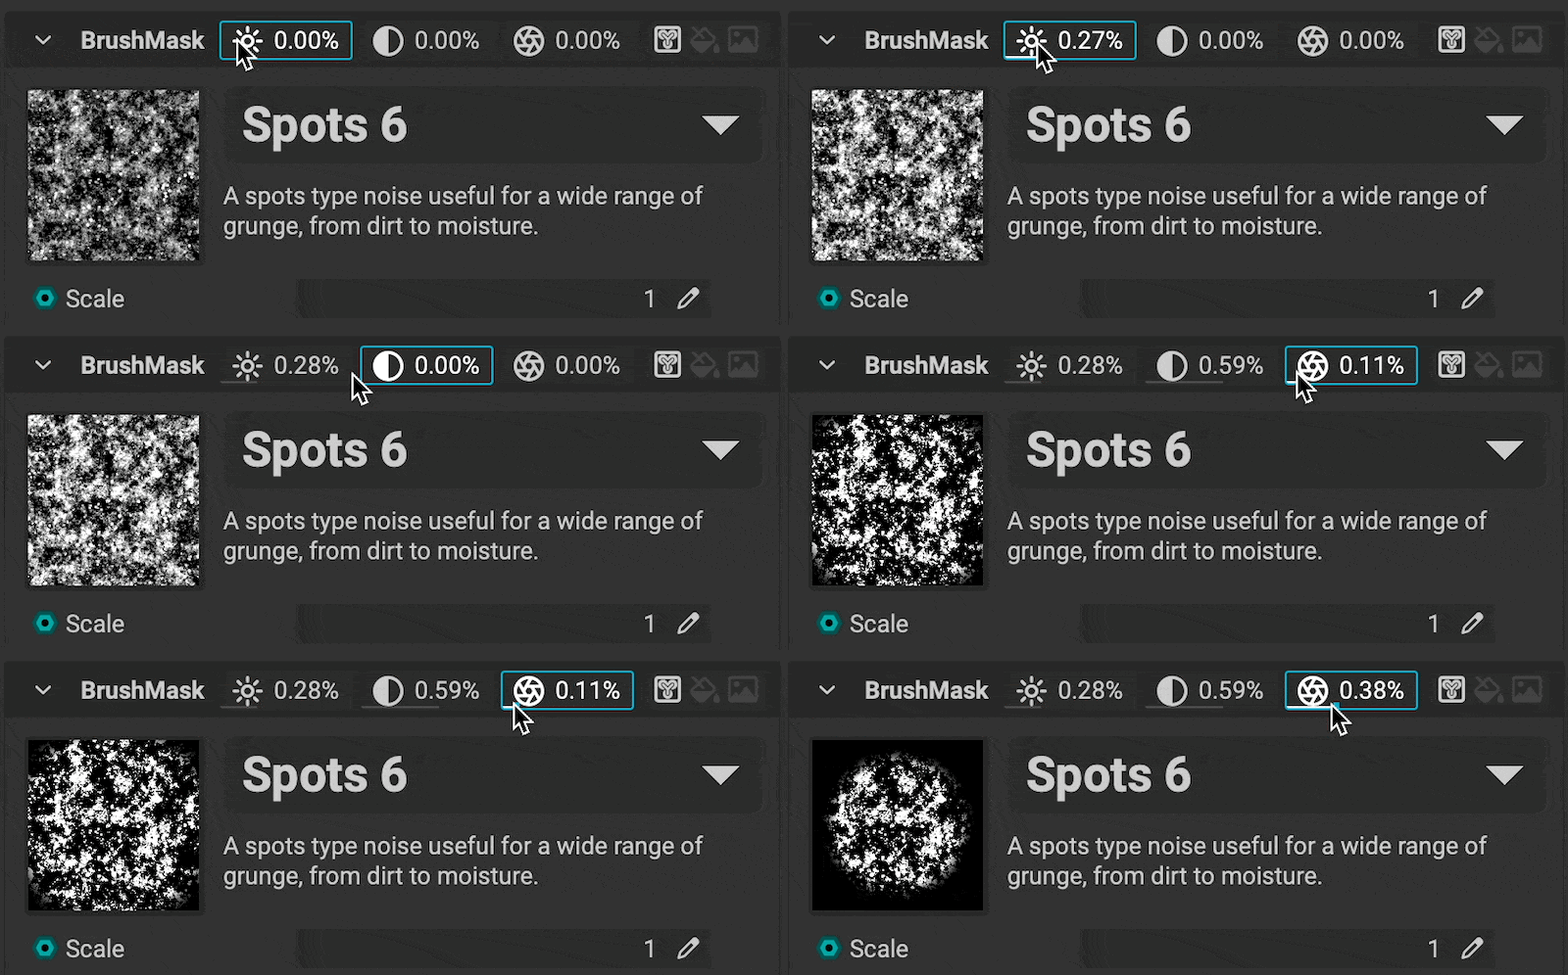 The brush mask's
 Brightness, Contrast, and Vignette can quickly be adjusted from the dedicated widgets in the title bar of the Brush Mask settings.
¶ Brush Properties
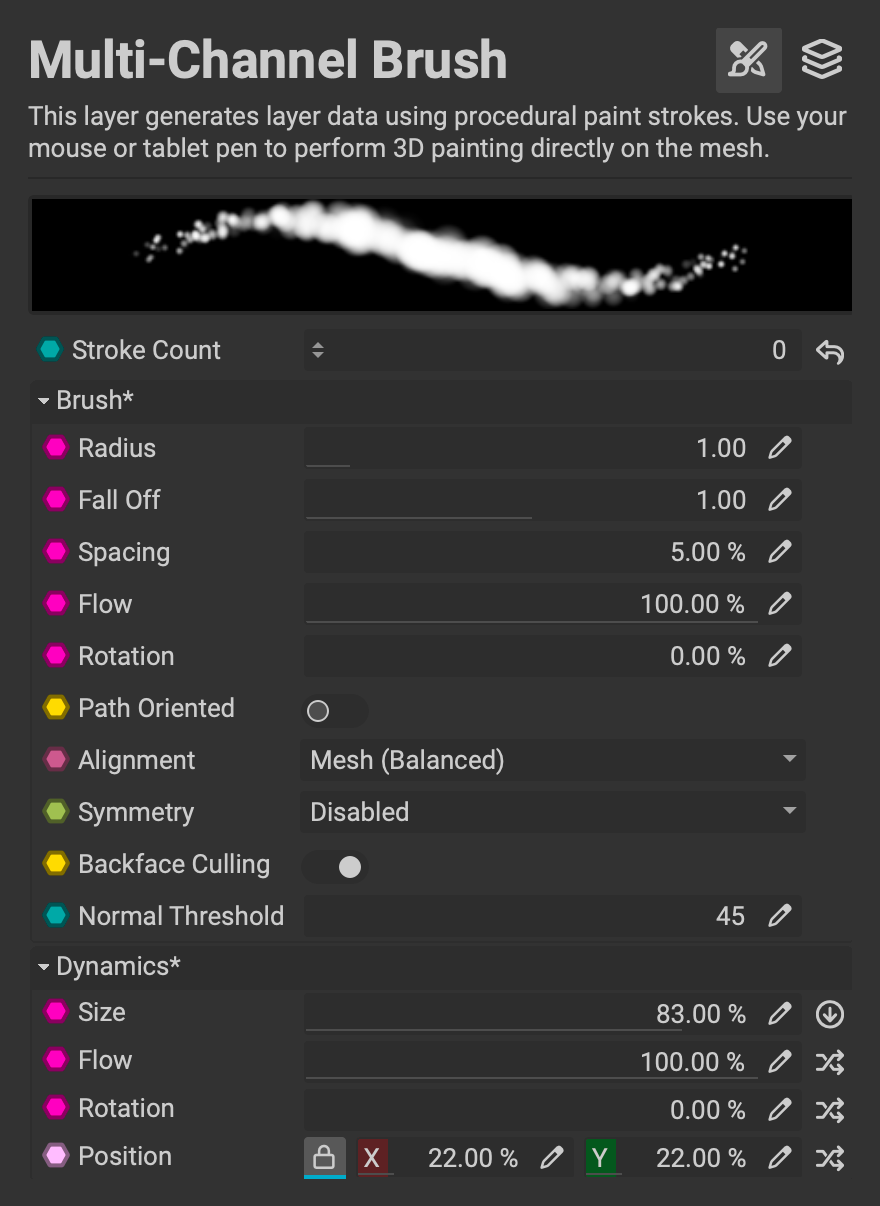 The Brush Properties panel provides access to the settings for the selected brush such as the radius, spacing, and flow as well as the brush dynamics settings to control many attributes with pen properties or randomization. Use this panel to configure the brush's behavior when applying strokes and to activate painting settings such as
 Symmetry and Backface Culling.
The radius and flow of a brush can be controlled directly in the 3D Viewport with the following keyboard shortcuts:
- Radius: Cmd/Ctrl + Left-click and drag
- Flow: Cmd/Ctrl + Right-click and drag
¶ Brush Dynamics
InstaMAT's brush Dynamics settings offer precise control over the application of paint strokes using a set of pen tablet properties or randomization. Increase the slider percentage to adjust the influence of the dynamics setting. Use this section to control brush properties such as Size and Position with pen properties such as pressure or tilt.
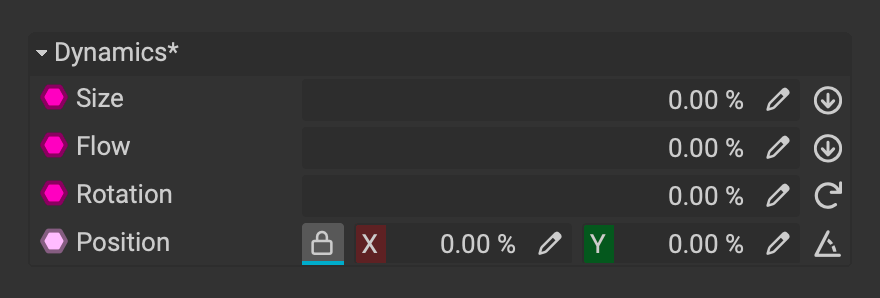
To learn more about brush dynamics, please read our article on the Brush Properties panel.
¶ Painting Toolbar
InstaMAT's layering UI features a dedicated painting toolbar that provides quick access to essential brush controls. It consolidates settings such as brush radius, flow, rotation, lazy radius and Symmetry in one place, streamlining your workflow. The toolbar updates automatically based on the active layer, showing only relevant controls and keeping the interface clear and focused.

¶ Painting Straight Lines
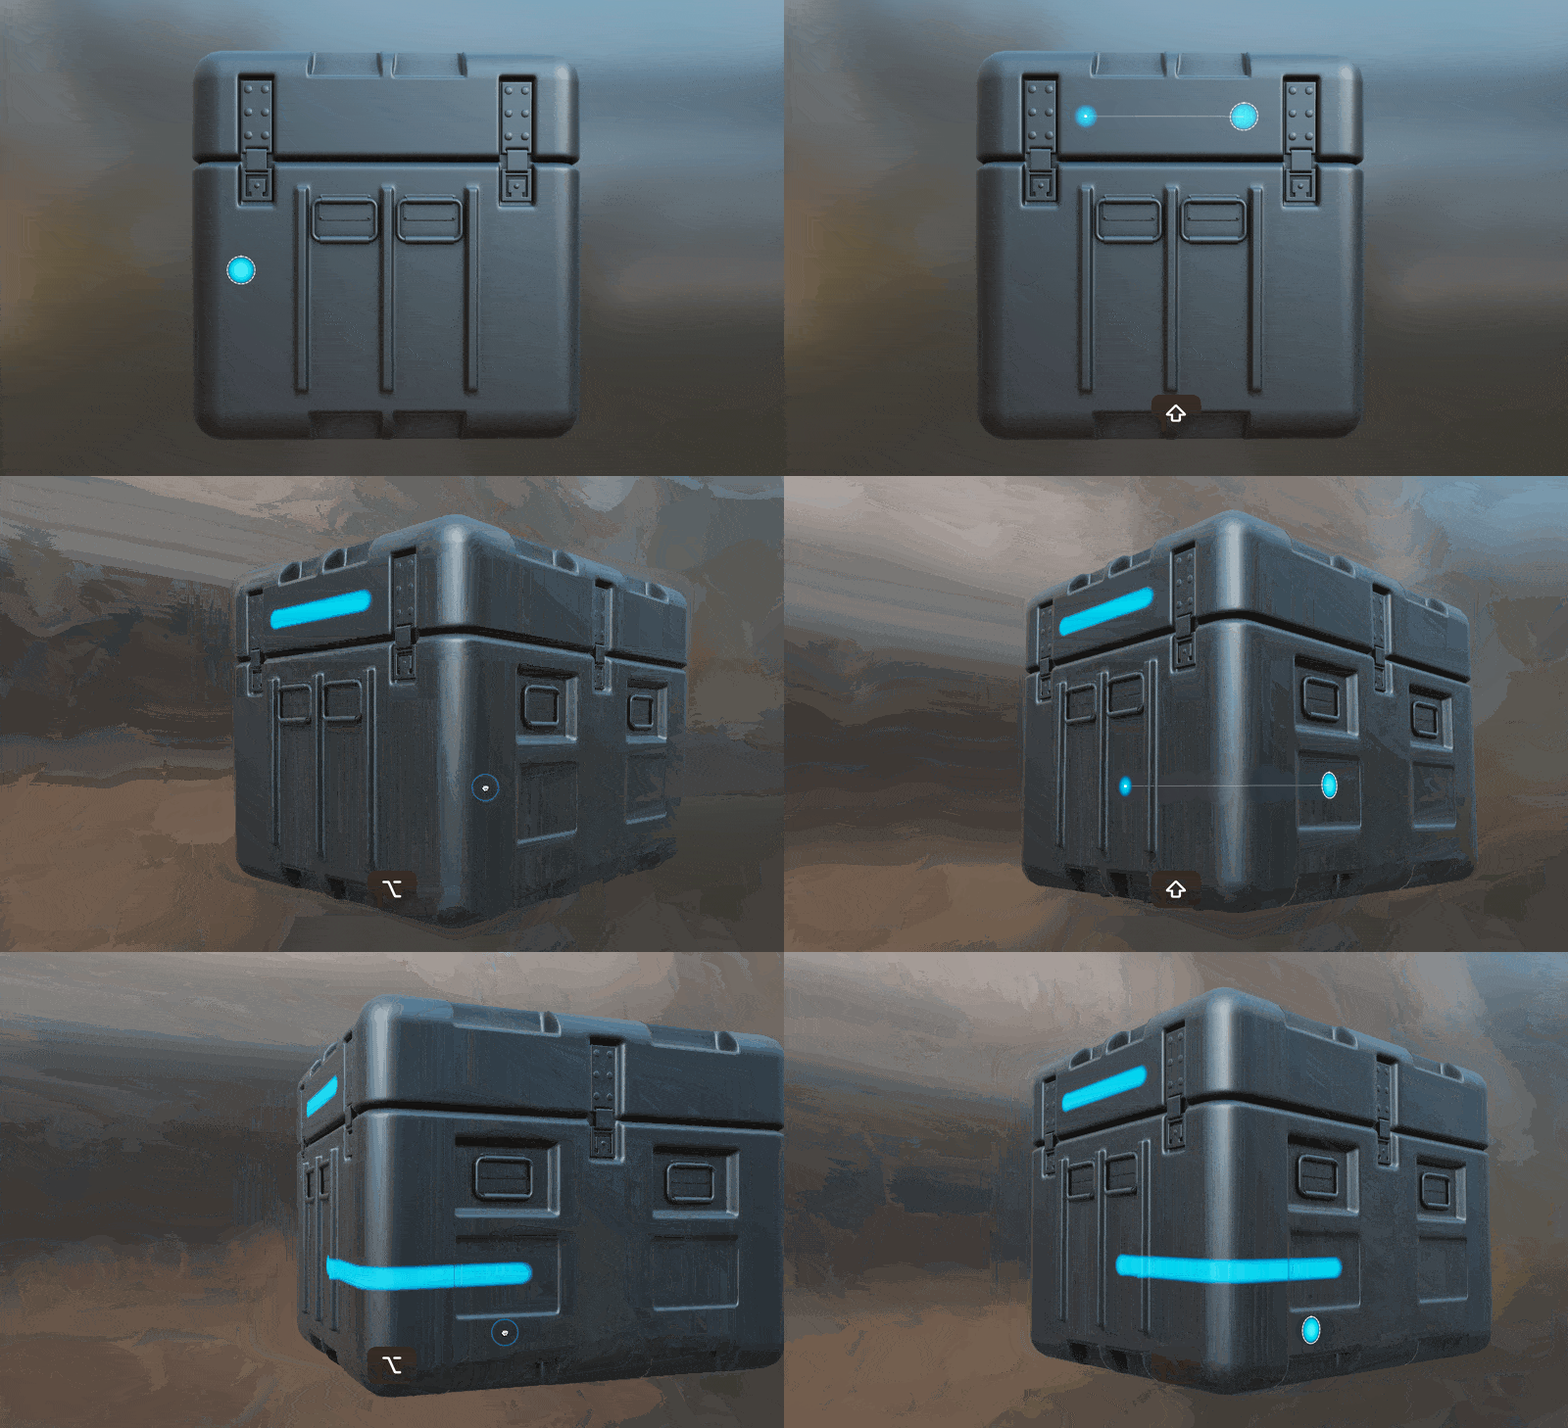
InstaMAT Studio makes it easy to paint straight lines even across corners. Simply click to place the first stroke, then hold Shift and click where the line should end.
¶ Lazy Stroke
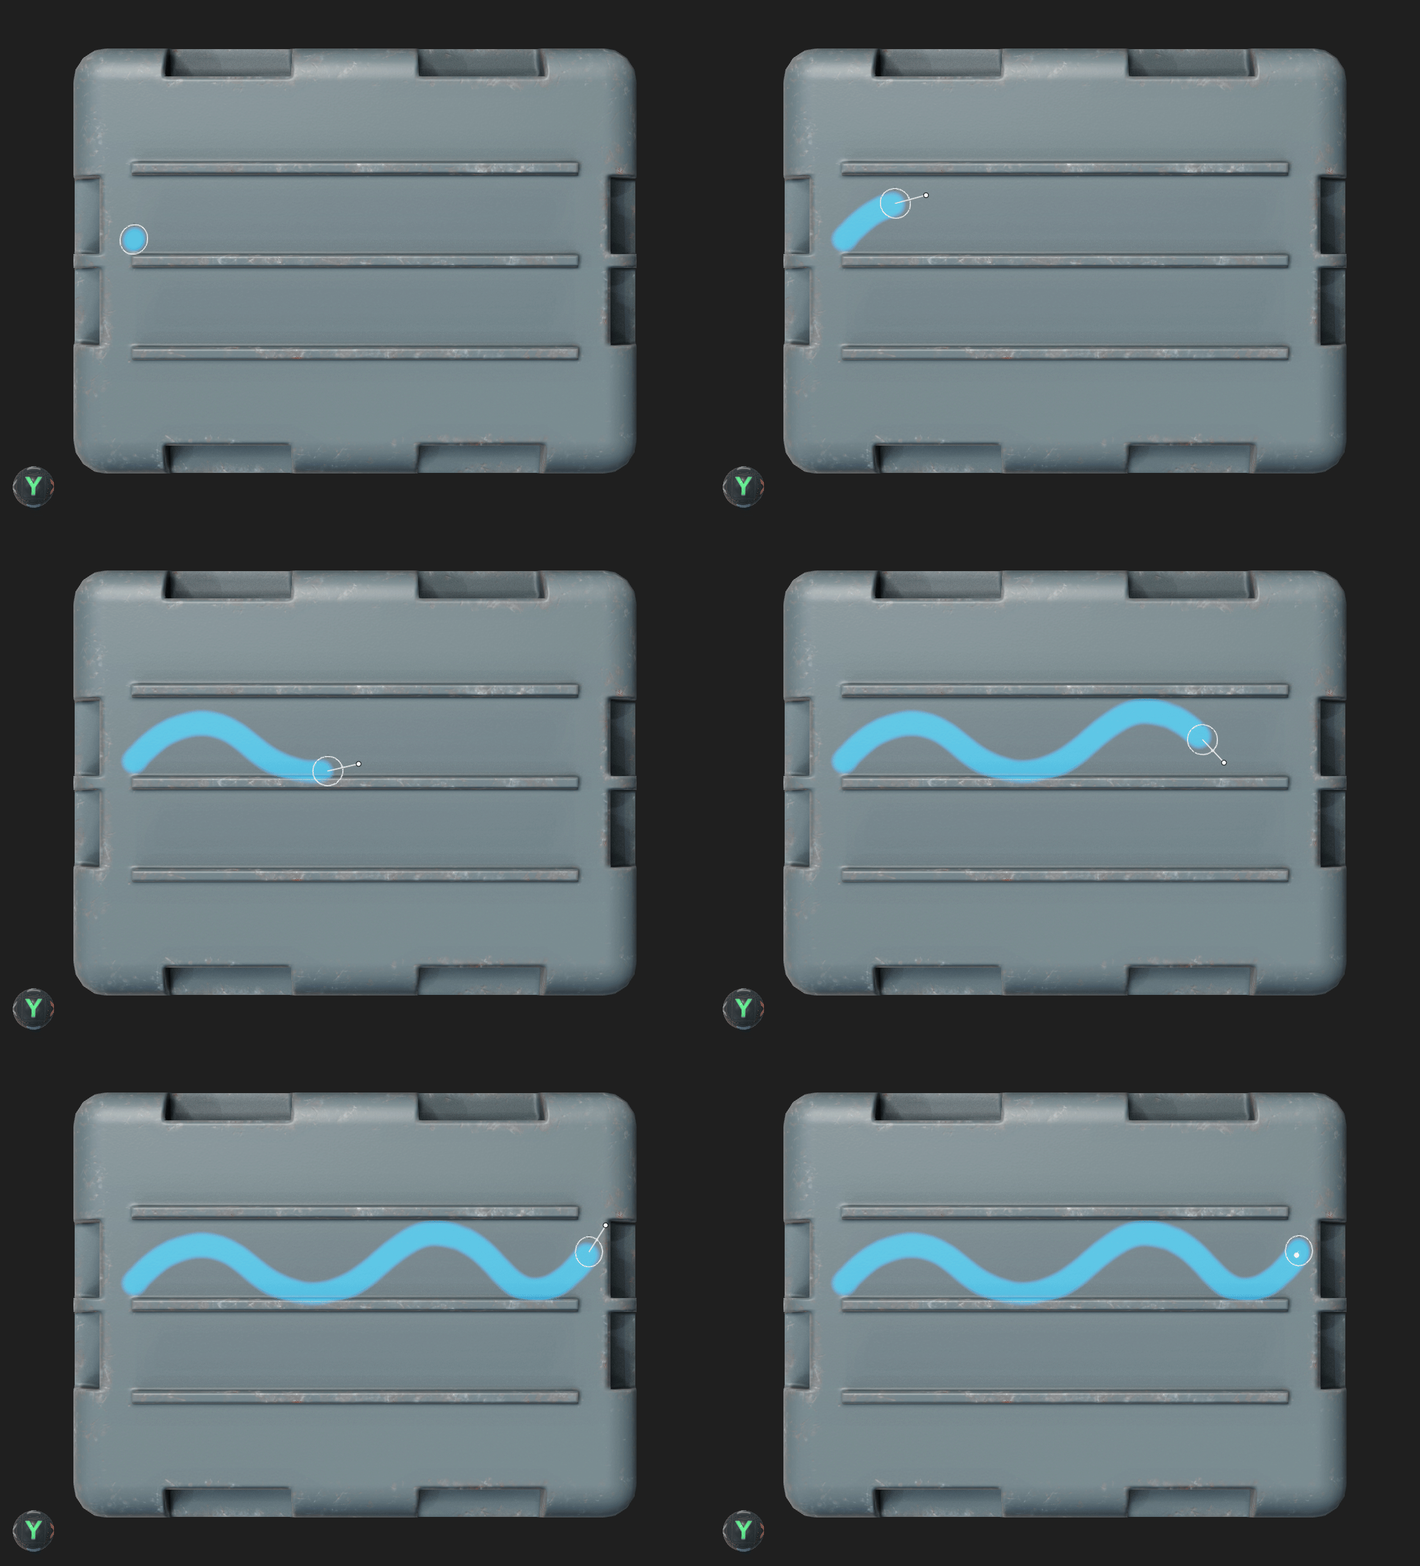
Lazy stroke is a brush smoothing feature that helps create cleaner, more controlled strokes by dampening hand movements and cursor jitter. When enabled, the brush follows the cursor at a slight delay determined by a configurable radius, automatically smoothing out shaky movements to produce fluid lines. The feature can be enabled in the Brush Properties or the Painting Toolbar by using the Radius (Lazy) slider.
¶ Projection Painting
The Paint Projector, located in the Viewport toolbar, can be used to project a material or an image onto the surface of a mesh. This can be useful when wanting to add additional texturing details or to help cover seams.
To learn more about using the
Paint Projector, please read our dedicated article on Projection Painting.
