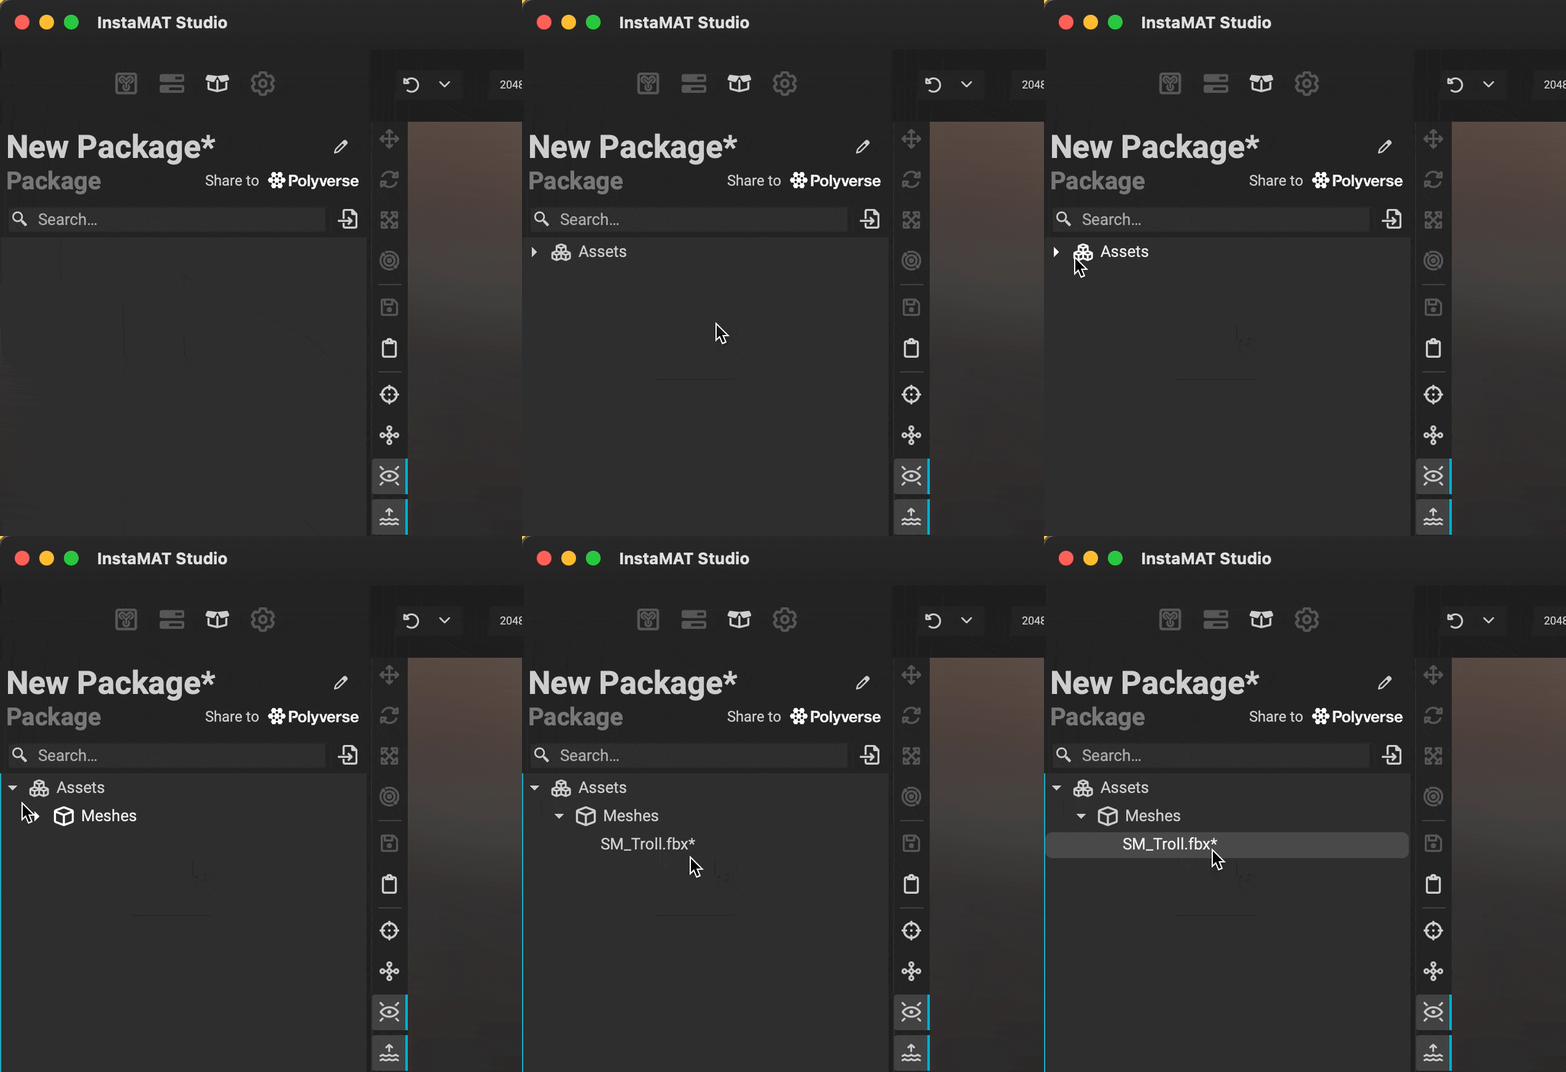
There are two ways to import a 3D model into InstaMAT Studio for texturing using InstaMAT's layer-based Asset Texturing project type: you can import the model into an InstaMAT package or link it directly to a local file on your computer.
¶ Importing a Mesh into an InstaMAT Package
InstaMAT packages (.IMP files) can contain multiple projects and resources. This simplifies sharing projects and files with others while making it easier to track multiple projects that use the same resources.
To import a mesh into an InstaMAT package:
 1. Create a new package by going to
 File > New Package, or open an existing one by going to File > Open Package.
2. On the left side of the InstaMAT Studio UI, navigate to the Package Management panel.
3. Drag and drop the resource from your computer's file system onto the panel to import the resource. Alternatively, you can use the Open Resource button to use your system's file browser to import a file.
For projects using workflows that require multiple meshes—such as both high-poly and low-poly models—you can import both into the package for use during the baking process.
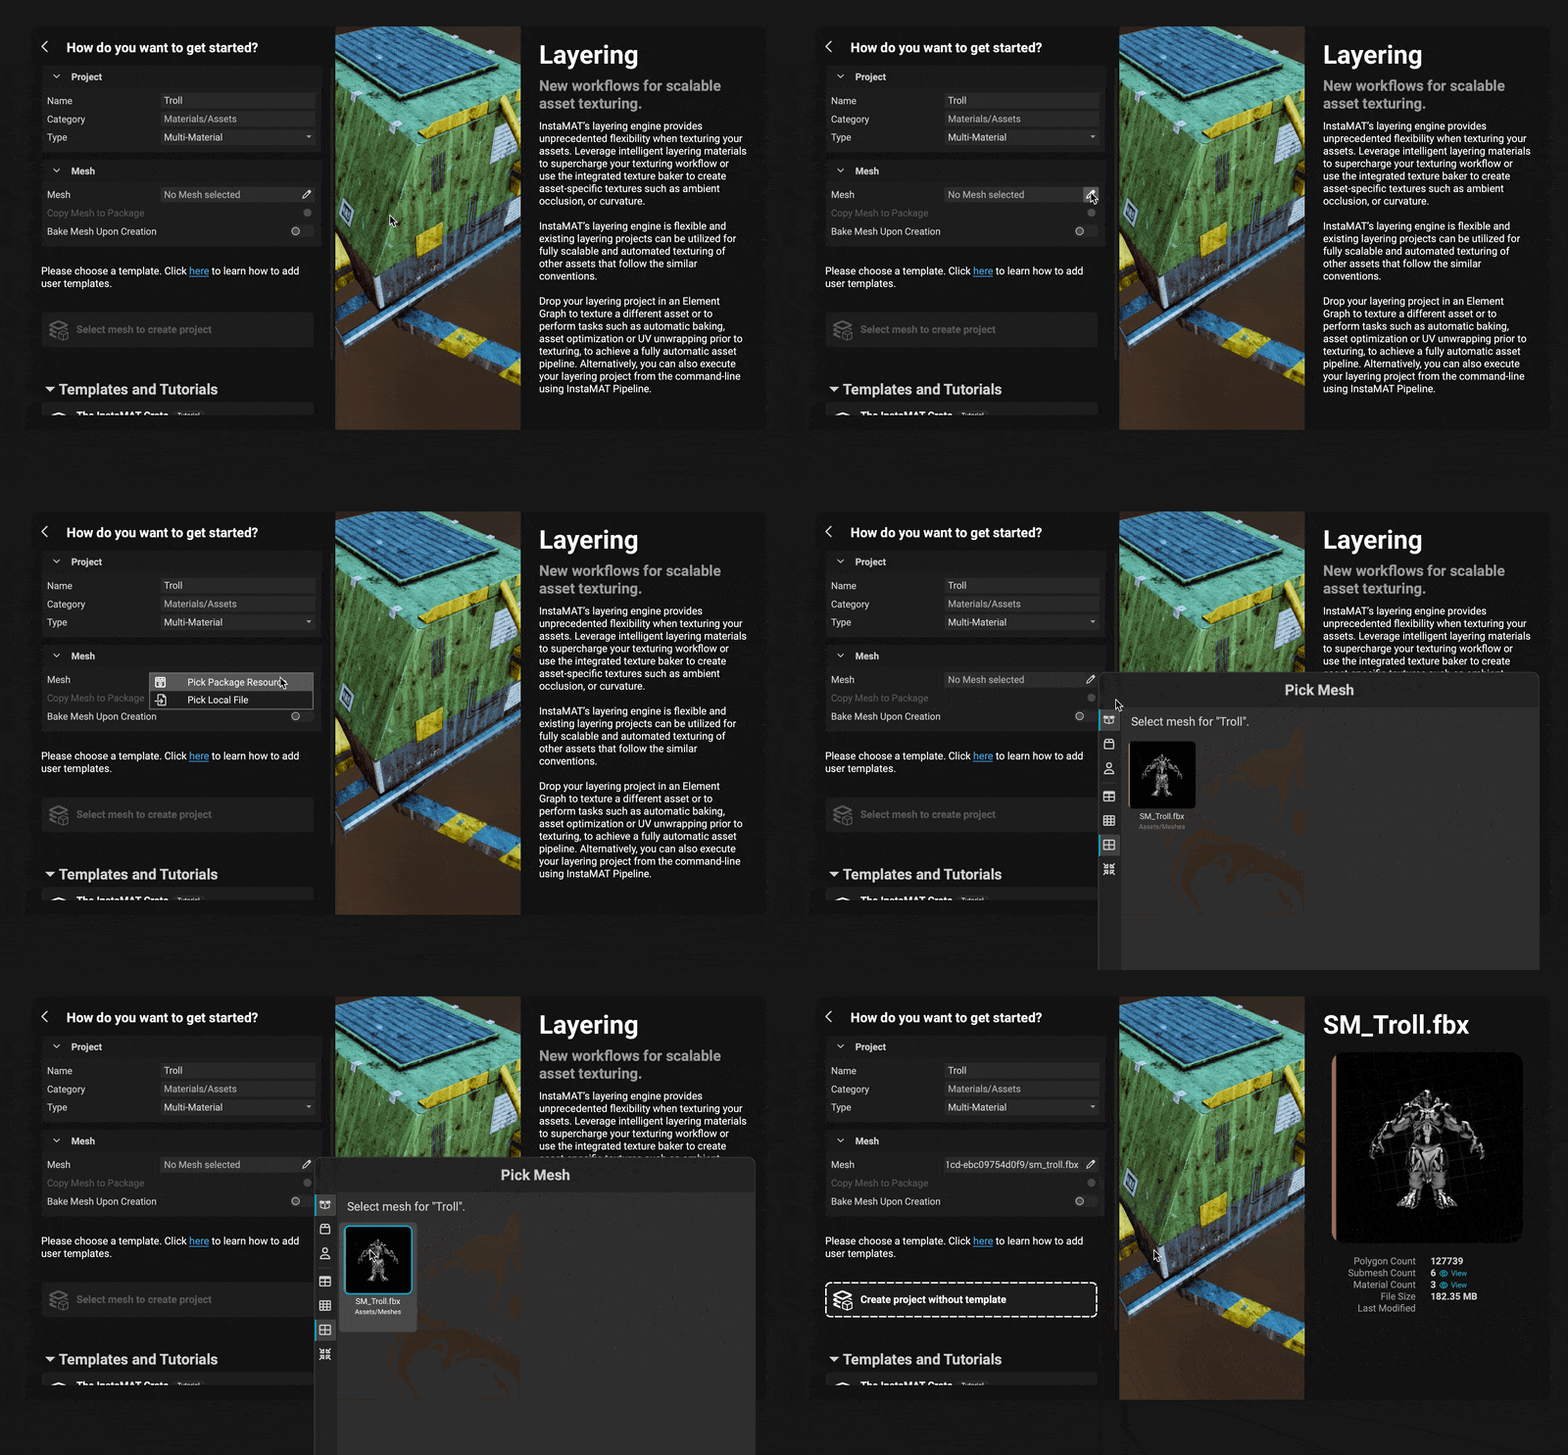
- Once your mesh files have been imported, create a new Asset Texturing project.
- When configuring the project, under the
Meshcategory, click the pencil icon and choosePick Package Resourcefrom the dropdown menu. - Use the Resource Picker to select the mesh for the project. To filter the panel and show only models from the currently active package, enable the
Show Objects from the Current Packagebutton in theResource Picker's toolbar. - Once your mesh has been selected, you can create the project.
When working in a high-poly to low-poly workflow, the mesh selected here is typically the low-poly mesh.

¶ Importing a Mesh as a Linked Local File
Asset texturing projects can be created using meshes that are linked to local files on your computer.
To create a project using a linked local mesh:
 1. Create a new Asset Texturing project.
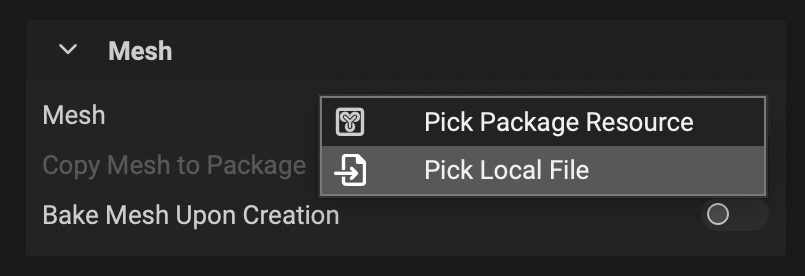
2. When configuring the project, drag the mesh from your file system directly into the Mesh widget to use it as the working mesh. You can also click the pencil icon and choose Pick Local File from the dropdown menu.
3. Once your mesh has been selected, you can create the project.
To learn more about applying textures and materials to 3D models with InstaMAT's Asset Texturing project type, please read our article on Creating Your First Layering Project.