InstaMAT's project types are designed to integrate seamlessly together. Asset Texturing projects can be used within Element Graphs to extend their procedural functionality. Inversly, materials that are created with an Element Graph can be used directly as a layer in Asset Texturing projects. Materials that were generated from a photo using a Materialize Image project can be added directly to a Material Layering project to add more visual complexity. Integrating projects in this manner provides flexibility to the artist, giving many approaches to texturing an asset.
¶ Asset Texturing to Element Graph Project Integration
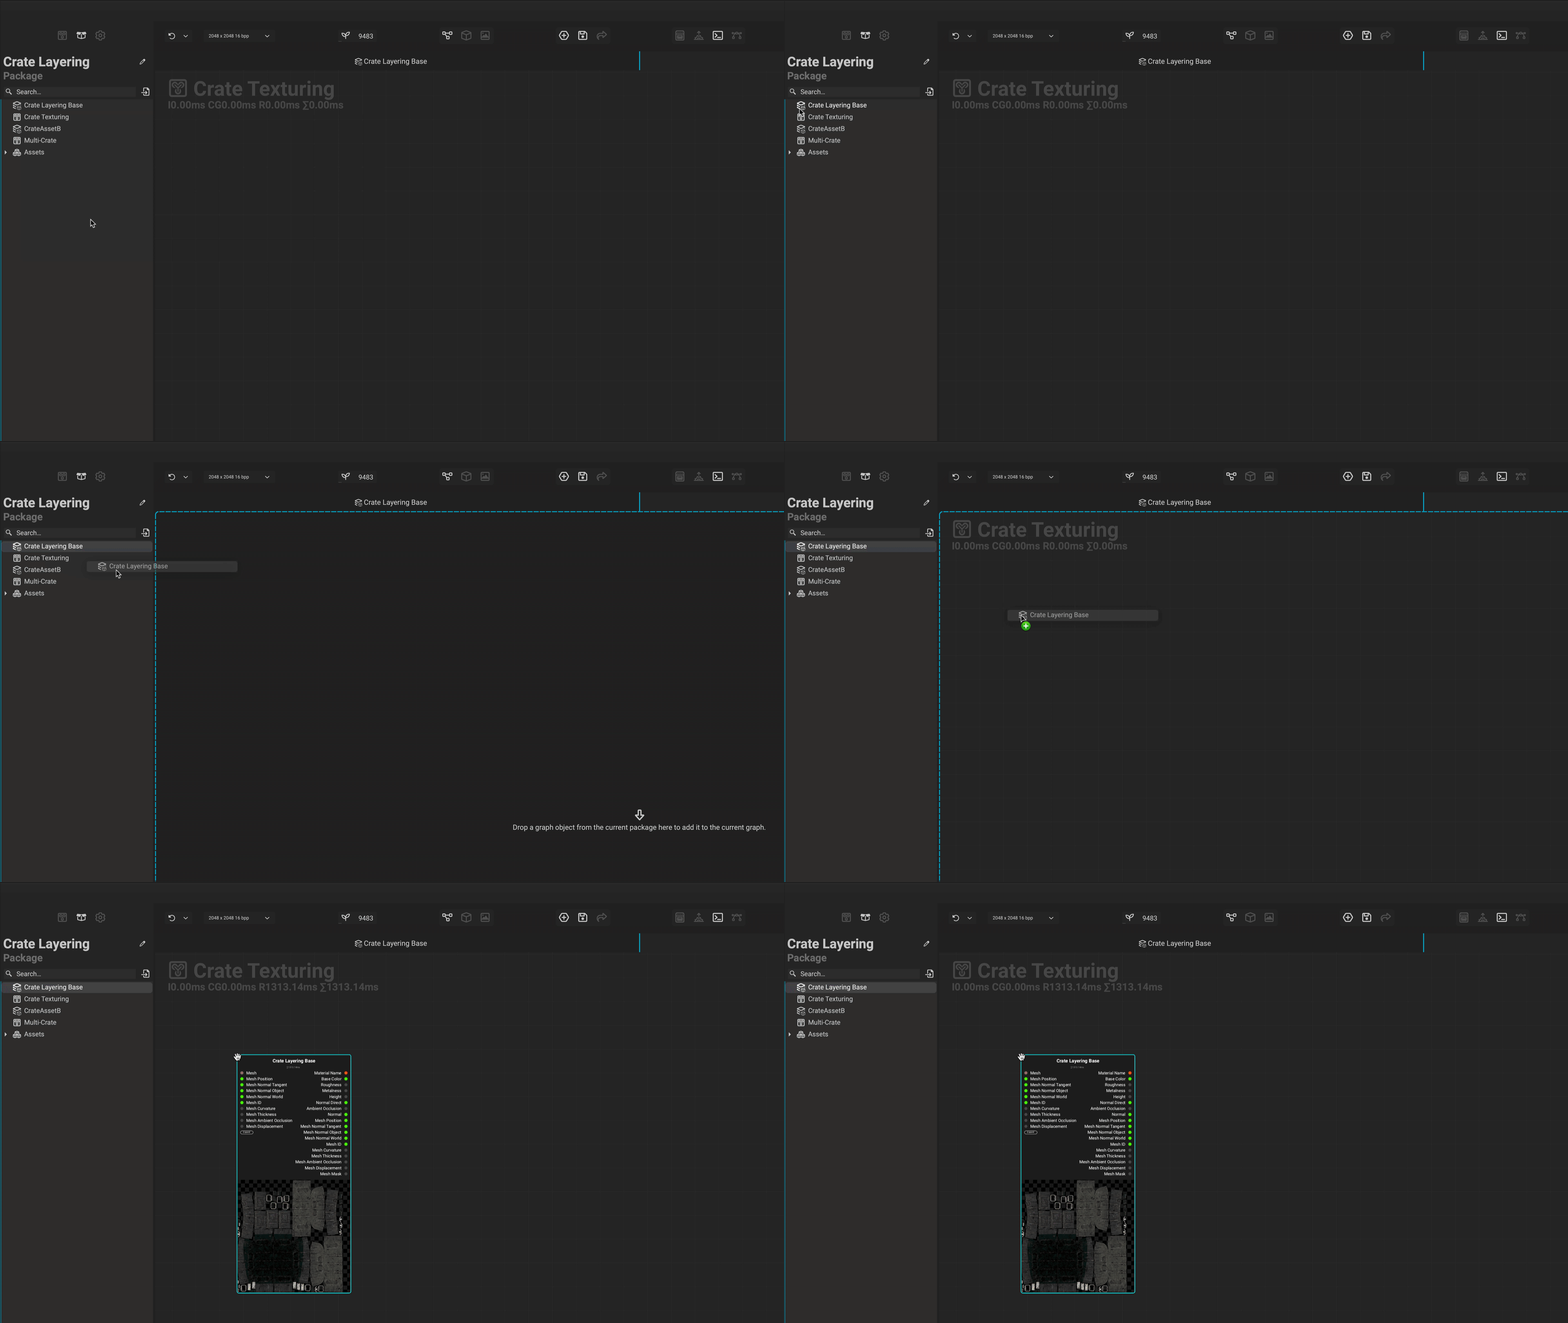 The Canvas makes Asset Texturing project integration as easy as a drag and drop. To bring an Asset Texturing project into an Element Graph, drag it from the Package Management panel directly into the
 Canvas. The Asset Texturing project will become a node and provide all of the necessary graph inputs and outputs.
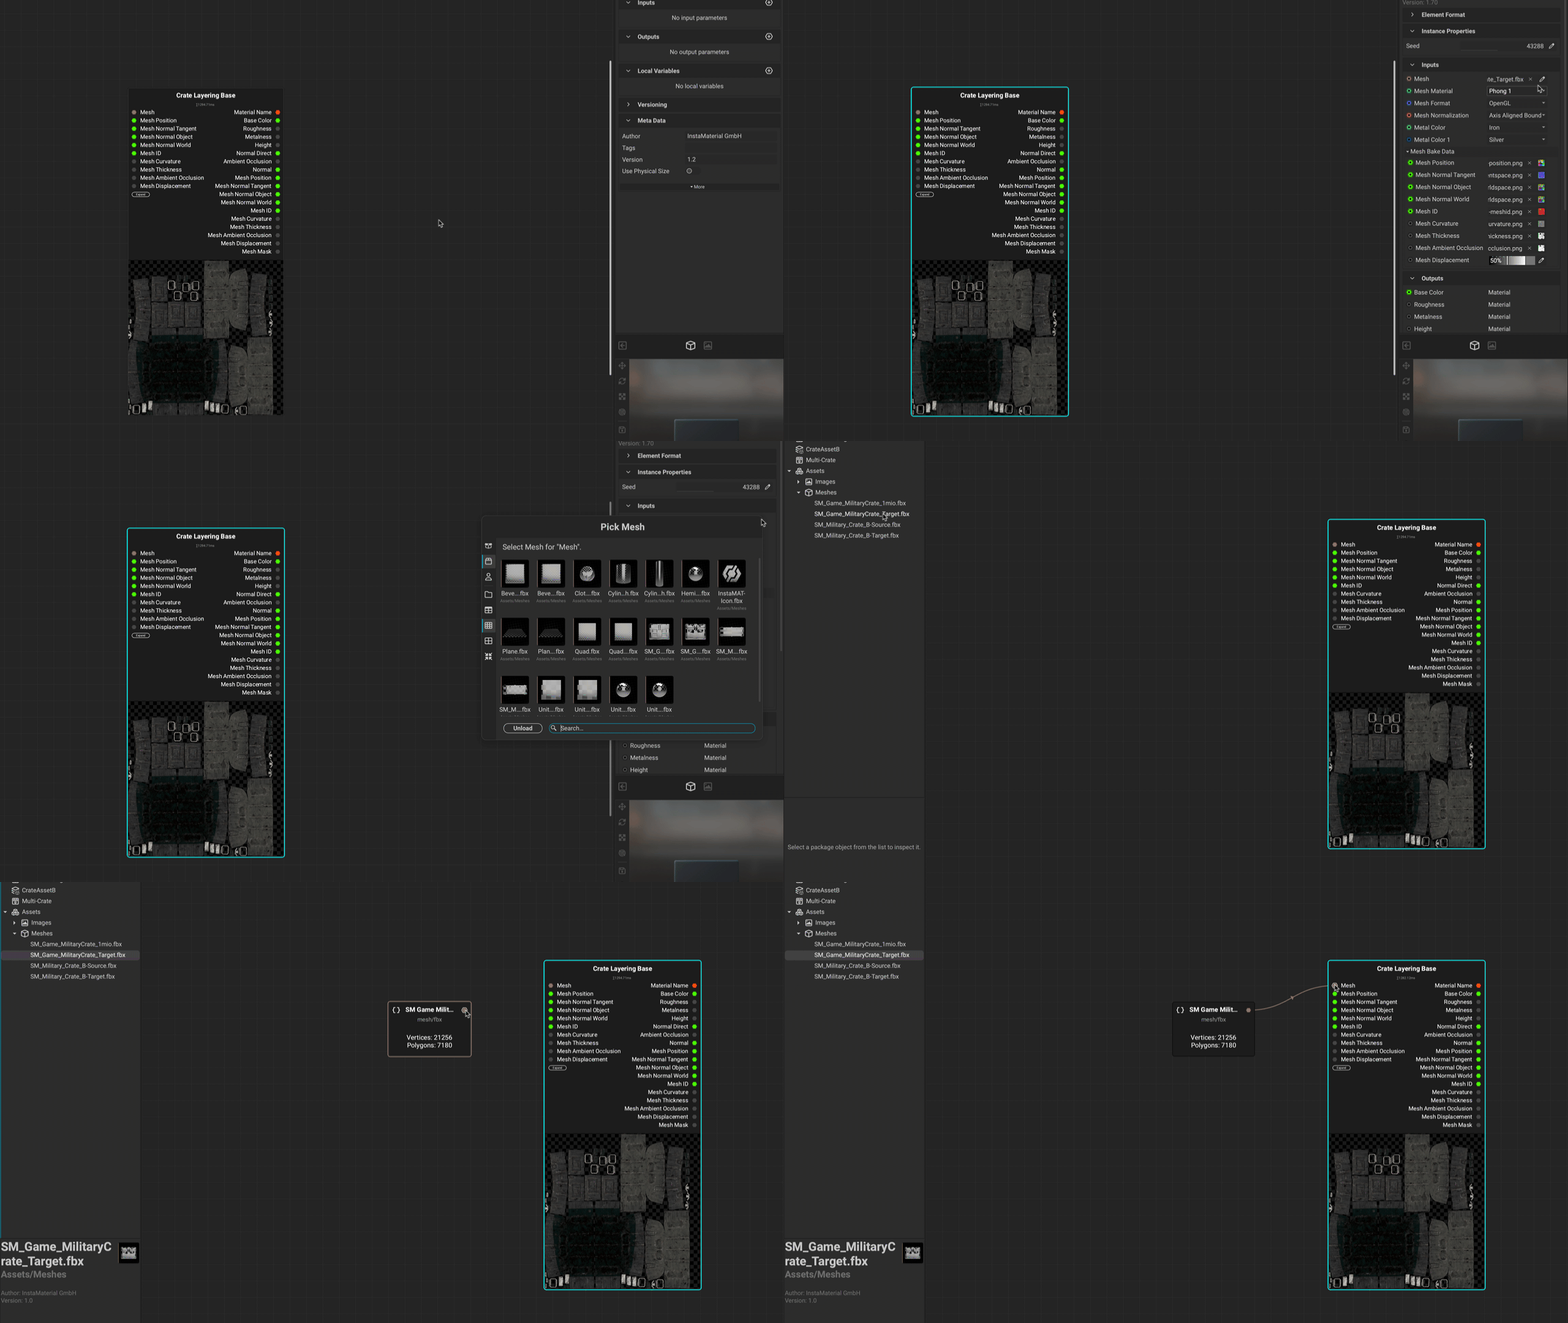 To visualize an Asset Texturing project on a mesh in the
 Canvas:
- Select the new Asset Texturing project node that was instanced in the
Canvas. - Navigate to the Graph Object Editor and pick a mesh using the
Meshinput and the Resource Picker panel. This will provide the Asset Texturing project with its mesh data and adapt its contents accordingly. - Left click on the
Meshinput pin in theCanvasto view the mesh in the Viewport. Additionally, a mesh can be dragged into theCanvas. This mesh will become a node and its output can be connected to a Asset Texturing project node'sMeshinput.
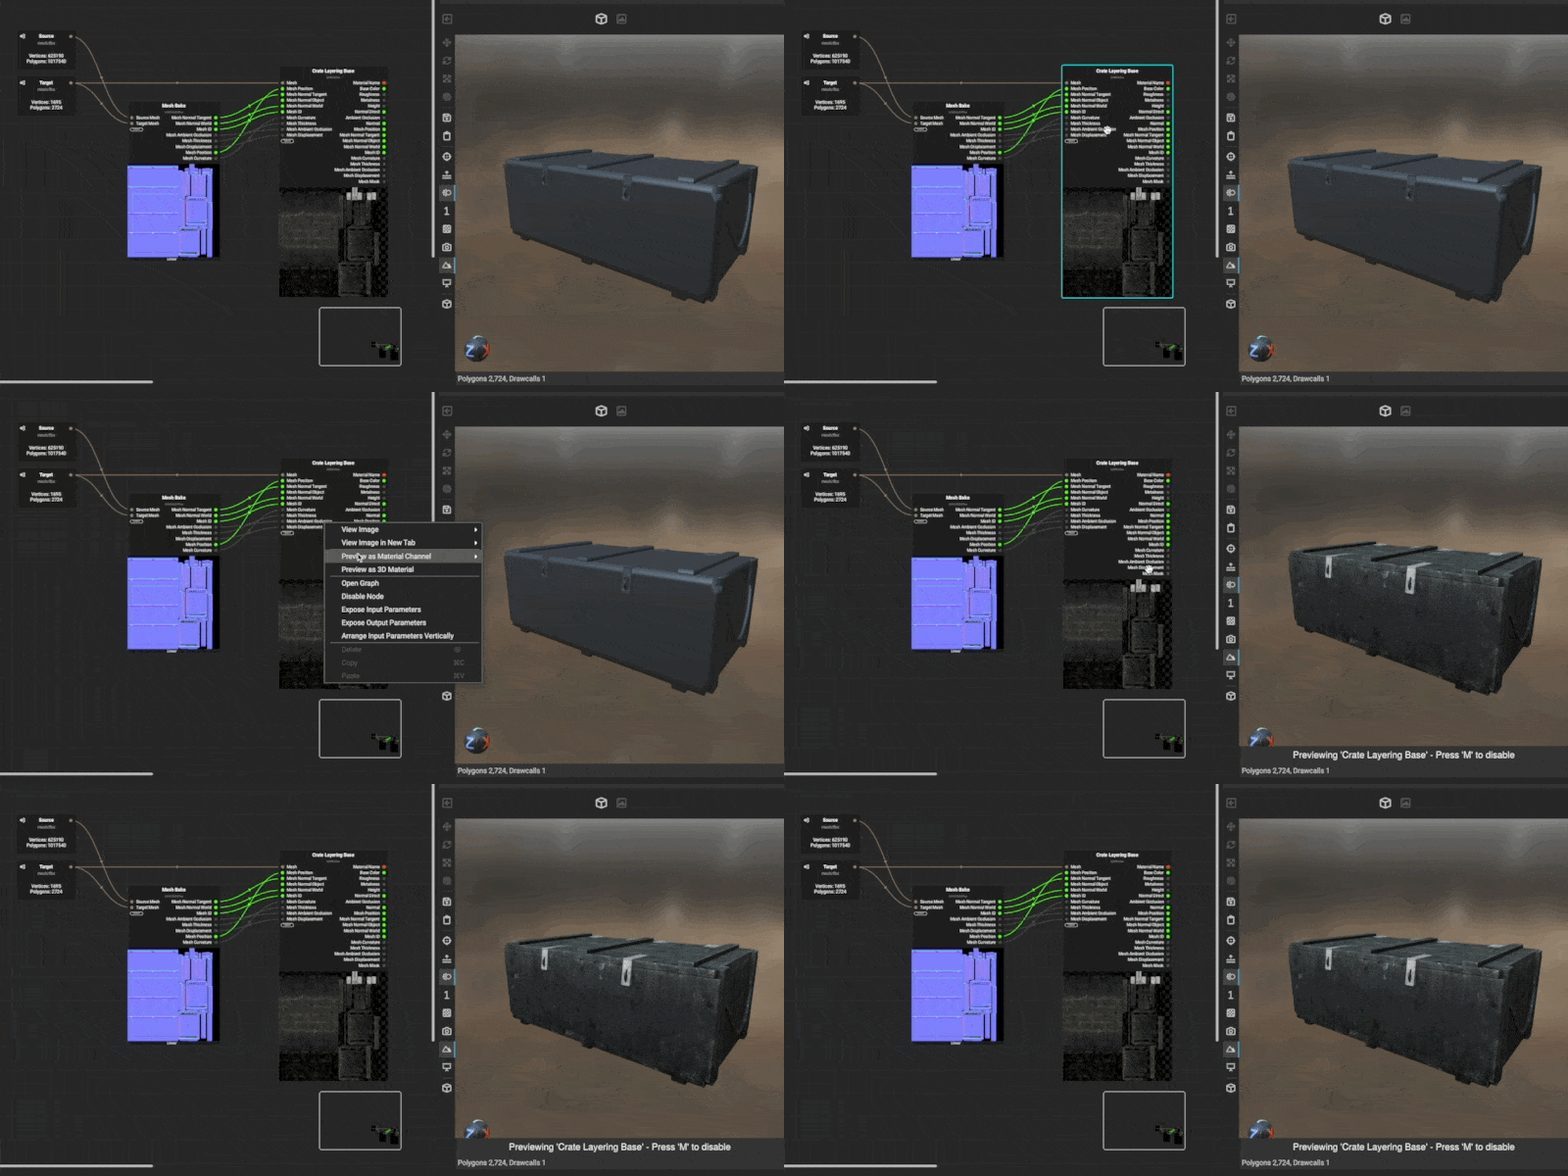 Right click on the Asset Texturing project node and select
 Preview as 3D Material.
Left clicking on an input or output pin is a common convention in InstaMAT Studio to view its contents in either the 3D Viewport or the 2D Image Viewer.
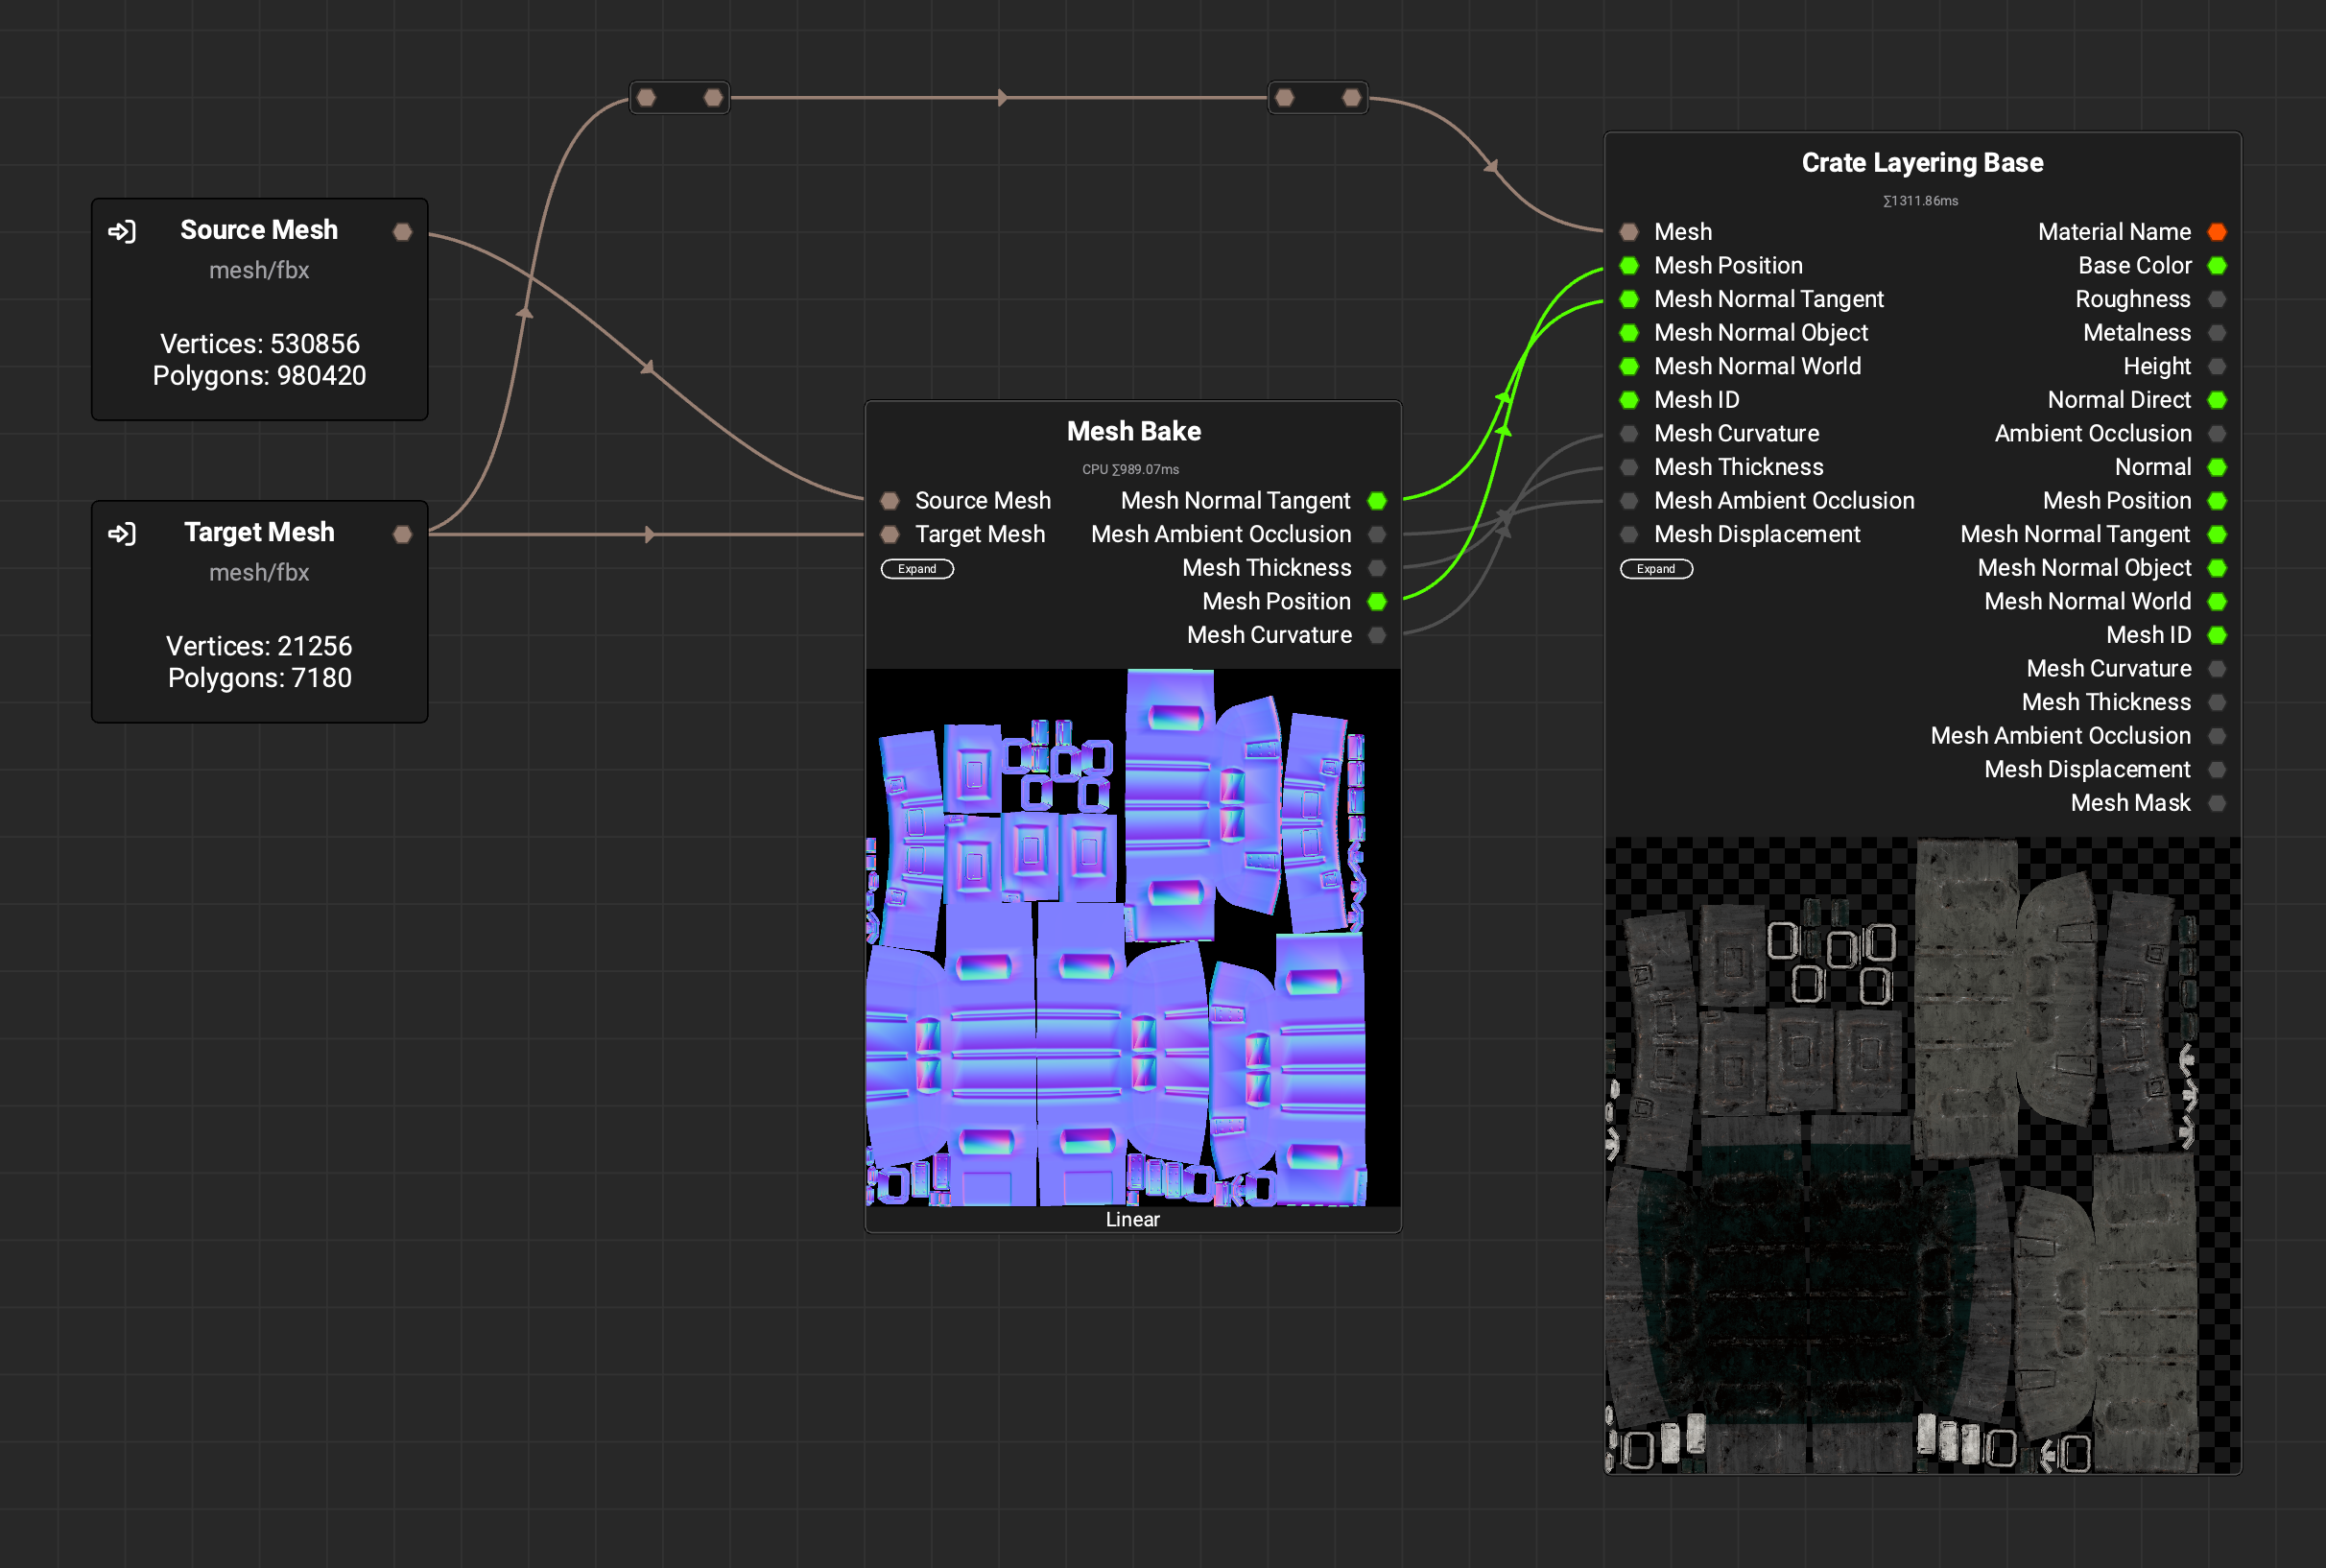 If the Asset Texturing project relies on any baked mesh maps, these can be generated using a
 Mesh Bake node. With this node, mesh maps such as Curvature, Thickness, World Position, and Ambient Occlusion can be generated from Source and Target mesh inputs. These maps can be directly connected to the corresponding inputs on an Asset Texturing project node to provide the necessary data.
The Mesh Bake node provides extended mesh processing functionality to an Element Graph. When used in conjunction with other mesh processing nodes such as Mesh Optimize and Mesh UV Unwrap, an Element Graph can generate LODs, unwrap UVs, and texture assets from within a single graph.
Integrating Asset Texturing projects into Element Graphs enhances them with all of the
Canvas'sprocedural functionality and flexibility. You can apply masks, effects, and mesh modifier nodes while also exposing additional graph inputs to easily adjust settings using sliders.
¶ Element Graph to Asset Texturing Project Integration
Elements created from an Element Graph can be used in many different facets of Asset Texturing projects. A PBR material can be used as an Element Layer or Element Brush. In fact, any channel from a PBR material created in InstaMAT Studio can be utilized in a Multi-Channel Layer. The Roughness channel can be taken from a "Dirty Iron" material while the Base Color channel can be taken from an "Aged Wood". The integration of Element Graphs and Asset Texturing projects provides immense flexibility giving you the power to texture assets with the method that best suits your way of working.
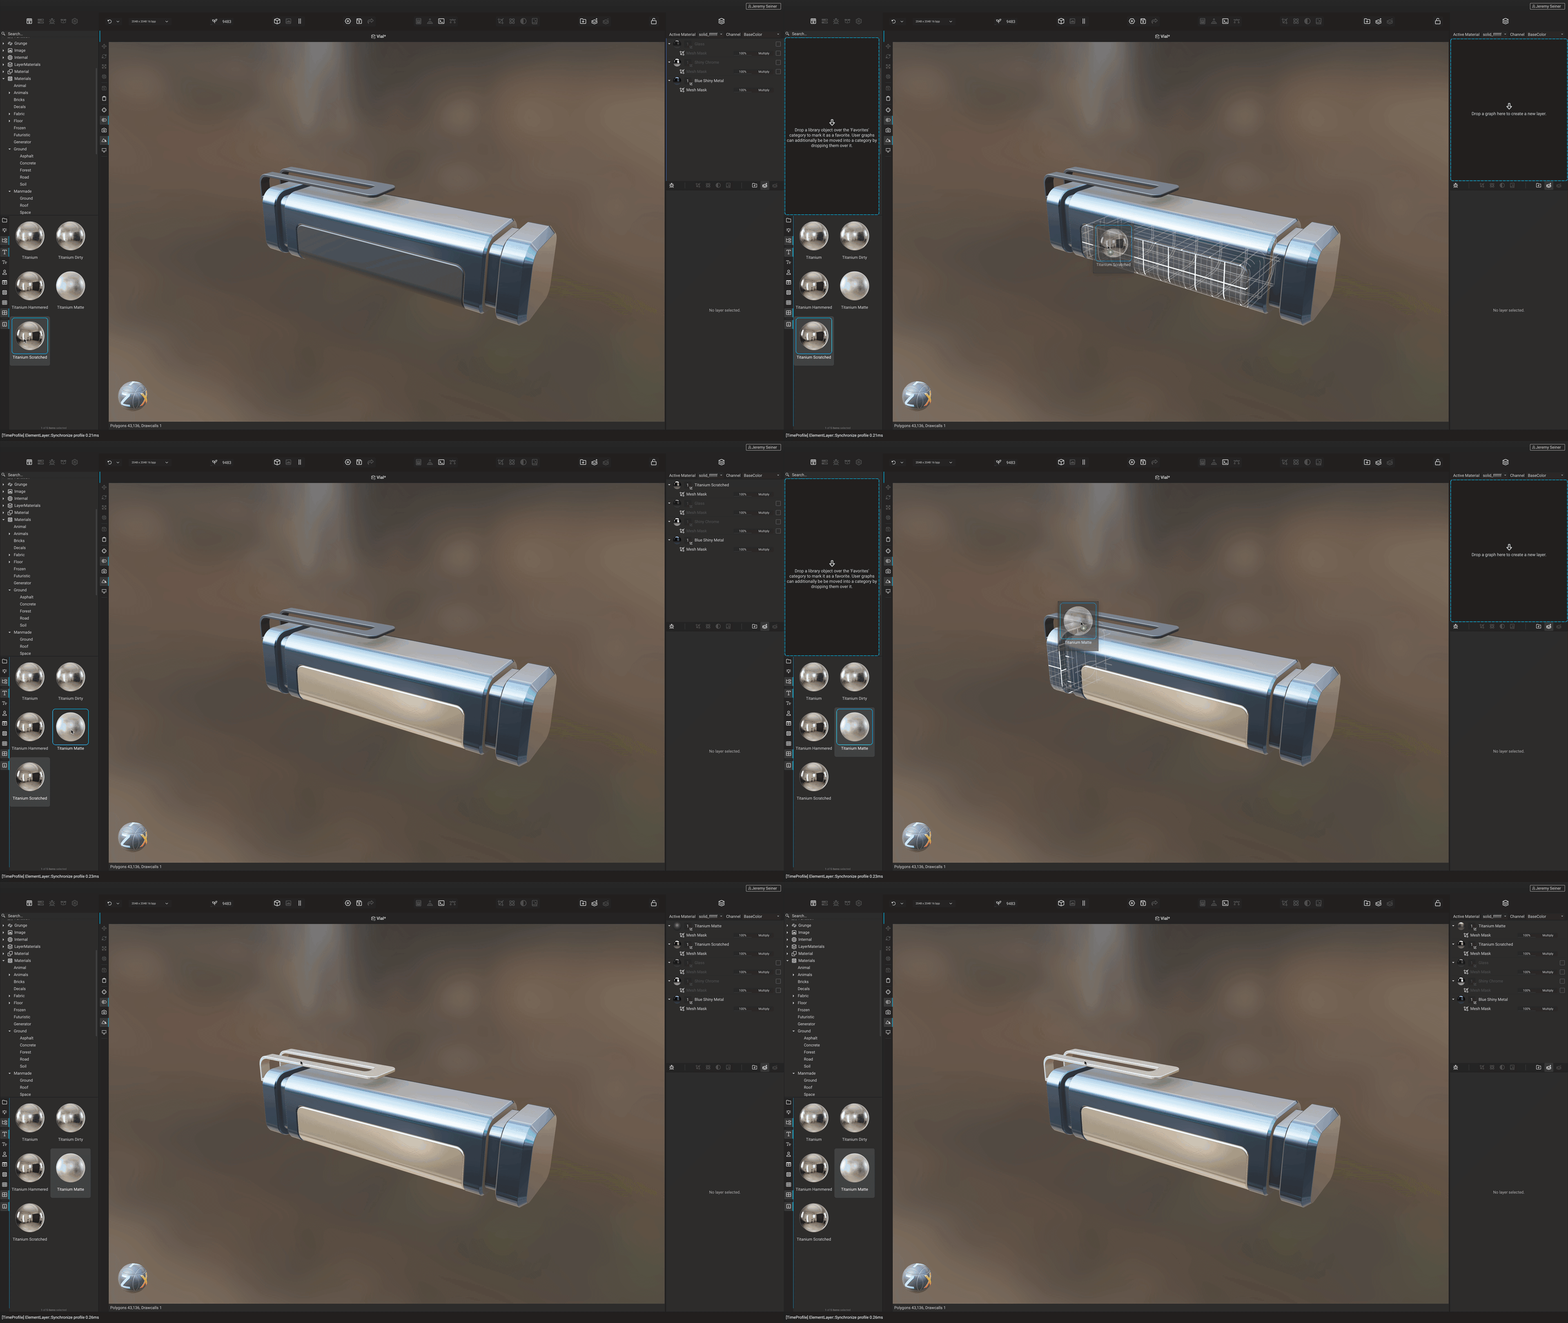
There are four ways to bring materials created from an Element Graph into an Asset Texturing project:
- Drag a material from either the MAT Library or the Package Management panel onto a mesh in the viewport. This will apply the material to the specific mesh or sub-mesh and mask off others.
- Drag a material into the
Layer Stack. This will fill the entire material slot with a newly-createdElement Layer. - Click the
Add New Layerbutton below theLayer Stackand selectElement Layer. Pick the element from the Resource Picker panel. - Click the
Add New Layerbutton below theLayer Stackand selectMulti-Channel Layer. Open theLayer Channelstab. Next to any channel, select theGraph Resourceicon to pick an element and utilize a matching output- For example: If picking a material, the Base Color output of the chosen material can be used as the Base Color channel for the
Multi-Channel Layer.
- For example: If picking a material, the Base Color output of the chosen material can be used as the Base Color channel for the
This is only the beginning. Masks, grunges, brushes, stencils, decals, filters, generators, and effects can all be created using the Element Graph and can be easily integrated into Asset Texturing projects.
¶ Materialize Image Project Integration
Materials generated from a photo using the Materilize Image project type can be treated just like any other material in InstaMAT Studio. Once created, a materialized photo can be imported into an Asset Texturing project by either dragging and dropping it or by clicking the Add New Layer button and selecting Element Layer.
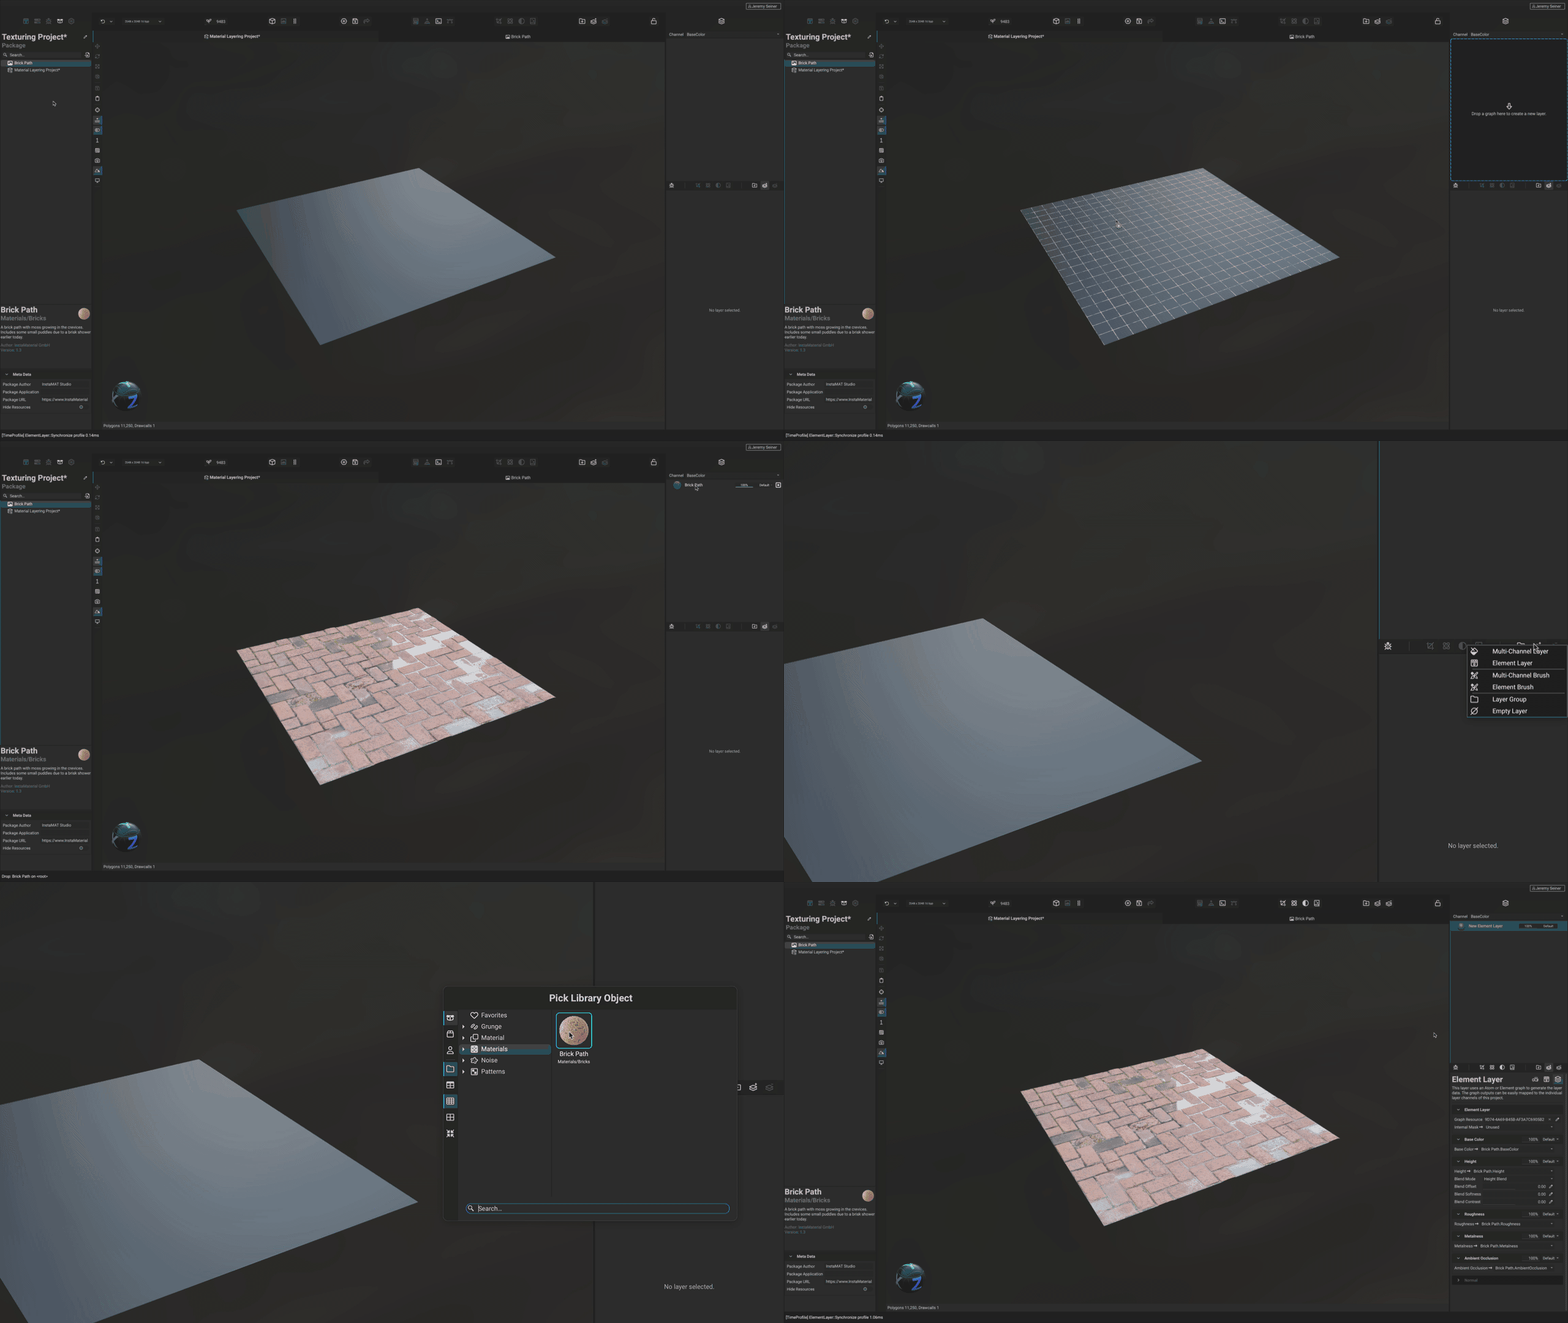
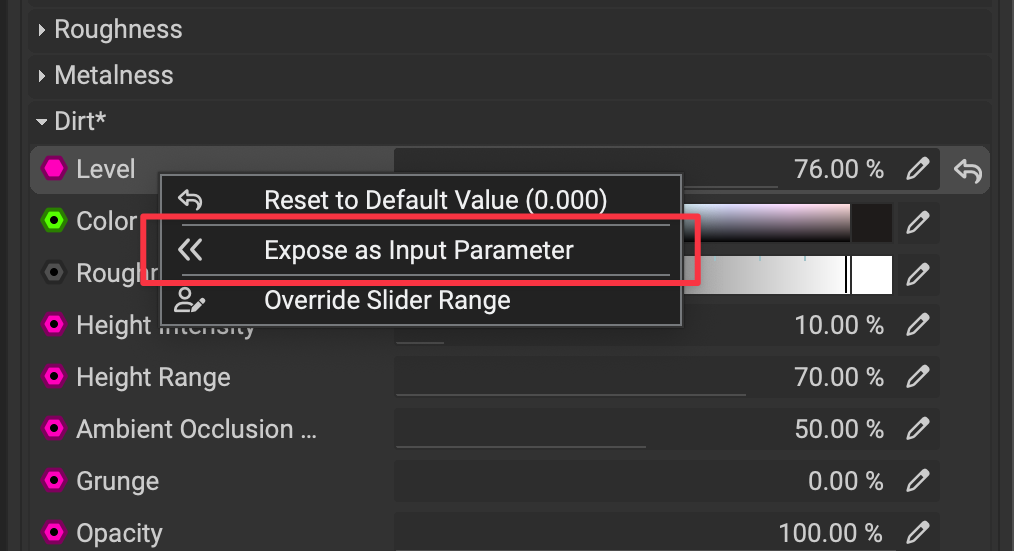
These materials can be blended together in an Element Graph by dragging them into the Canvas where it will become a node or used in a Material Layering project as a layer. Additionally, properties of the Materialize Image process can be exposed as parameters for use later on. This can be done in the Materialize Image project by right clicking a property in the Graph Object Editor and choosing Expose as Input Parameter. The exposed parameter will be available for tweaking once the node or layer is selected in its new respective project.
