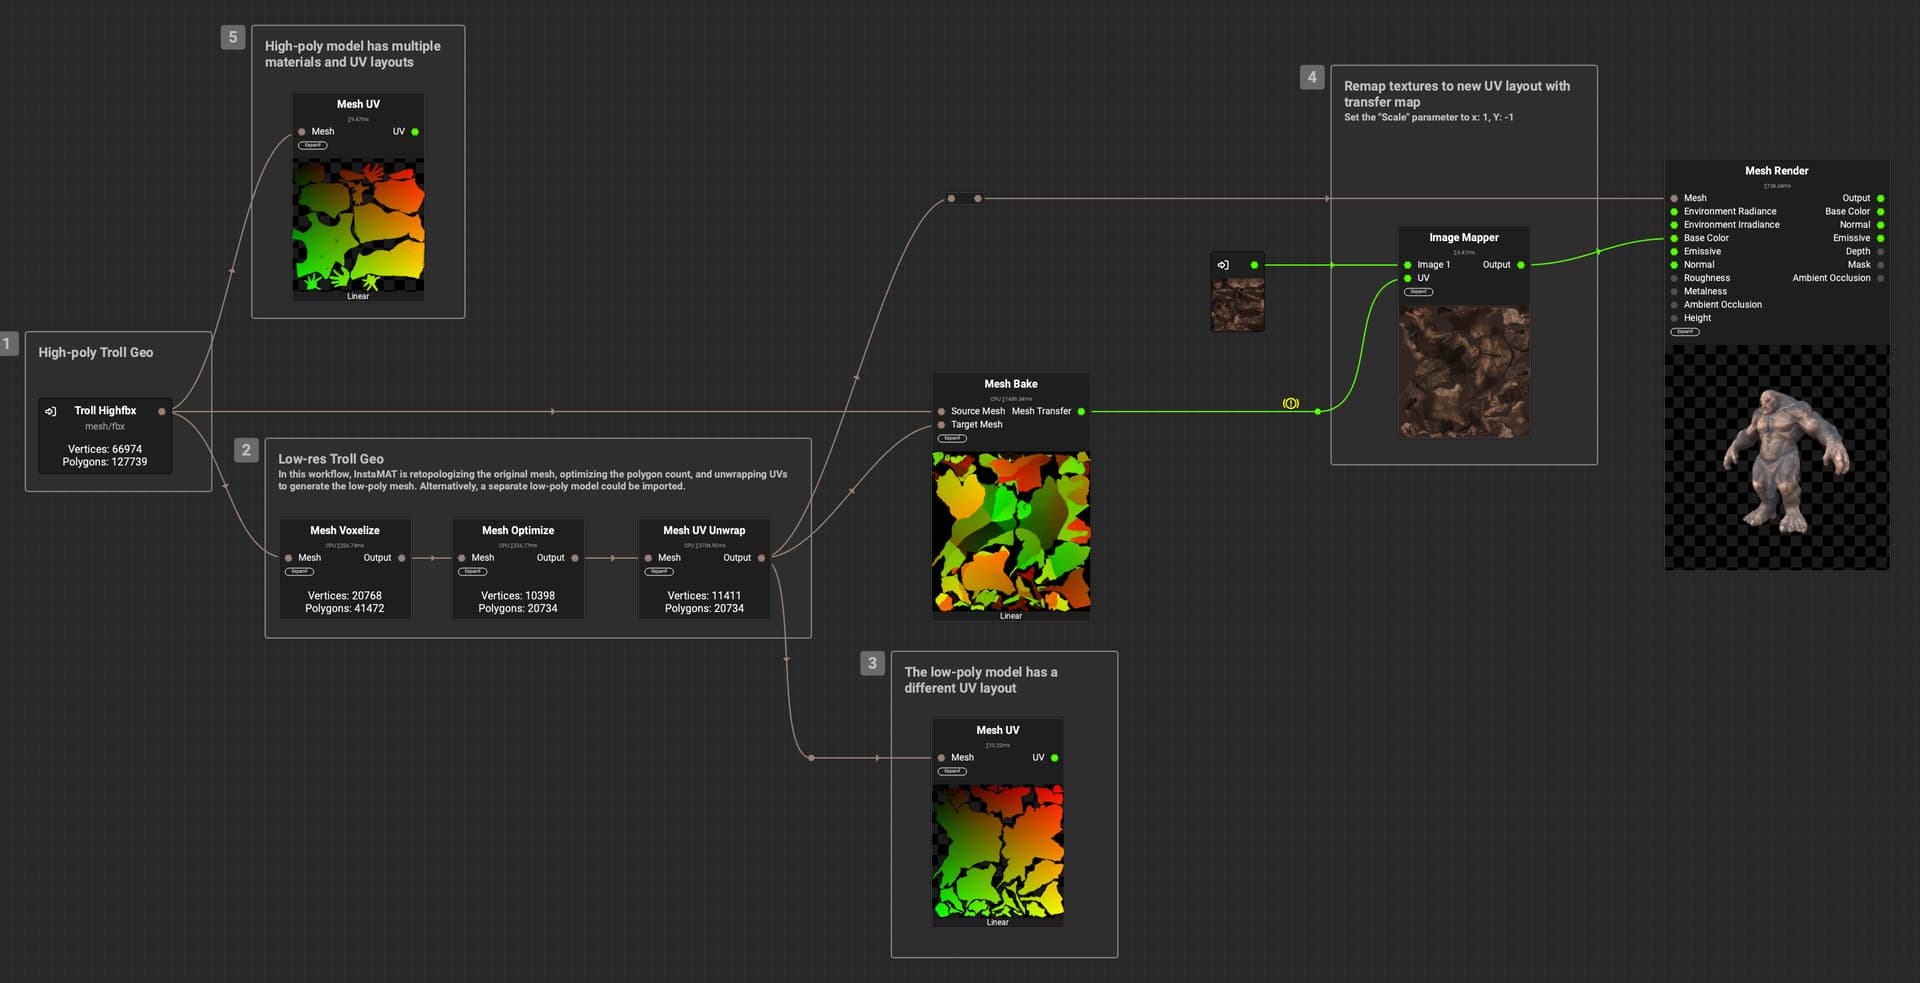
InstaMAT Studio makes it possible to transfer textures from one model to another by baking a transfer map, even after the UVs have changed. An example of where this is useful is when optimizing and texturing scan data that contains color texture information.
The following explains how to first bake the transfer map with the Mesh Bake node, then use the Image Mapper node to remap the original texture to the new mesh's UV layout.
Please note that baking Transfer maps is currently available for CPU baking only.
¶ How to Bake a Transfer Map
To bake a transfer map:
- Create a new Element Graph project.
- Use Quick Search or the MAT Library panel to bring a
Mesh Bakenode into the graph. - Import the original high-poly mesh into the graph. This can be done by dragging the mesh from your computer's file system and dropping it either into the
Canvasor the Package Management panel.
If you dragged the mesh into the
Package Managementpanel, be sure to then drag the model from thePackage Managementpanel to an empty area in theCanvasto represent it as a node in the graph.
- Import the low-poly mesh into the graph as well.
- Connect the high-poly mesh to the
Mesh Bakenode'sSource Meshinput. - Connect the low-poly mesh to the
Mesh Bakenode'sTarget Meshinput. - Click on the
Mesh Bakenode to bring up its settings in the Graph Object Editor panel, and enableTransferto bake a transfer map.
Make sure
Super Samplingis disabled to ensure the best results.
The Mesh Bake node will then generate a transfer map.
¶ How to Remap a Texture with a Transfer Map
Now that the transfer map has been created, it can be used to remap a texture from the original high-poly mesh to the low-poly's UV layout.
- Bring in an
Image Mapperinto the graph. - Select the
Image Mappernode to bring up its settings in theGraph Object Editorpanel, and set theScaleparameter to X: 1, Y: -1. - Import the original texture into the graph to represent it as a node.
- Connect the original texture to the
Image Mappernode'sImage 1input. - Connect the
Mesh Bakenode'sMesh Transferoutput to theImage Mappernode'sUVinput.
The Image Mapper node will then remap the original texture to the new mesh's UV layout using the transfer map.
¶ Example Workflow
The following is an example workflow used to transfer base color information from an original high-poly source mesh to a generated low-poly mesh. InstaMAT is able to retopologize the original high-poly mesh, optimize the polygon count, and unwrap UVs to generate the low-poly version.