The Dope Sheet makes it possible to animate node parameters directly within InstaMAT Studio with keyframes. Once animated, InstaMAT can capture content from either the Viewport or the Image Viewer to render videos.
¶ How to Locate the Dope Sheet
The Dope Sheet can be enabled by going to Window > Dope Sheet from the main menu. Once enabled, it will appear the the bottom of the main InstaMAT Studio UI below the center view area.
¶ How to Animate a Graph Input
In order to animate a node parameter in the Canvas, it first must be exposed as a graph input. Graph inputs can be exposed in two ways:
- In the Graph Object Editor panel, right-click a parameter and choose
Expose as Input Parameterfrom the contextual menu - In the Canvas, drag a connection from a node's input and release in a blank space to invoke Quick Search. At the top, choose
Expose <Input Name> as graph input.
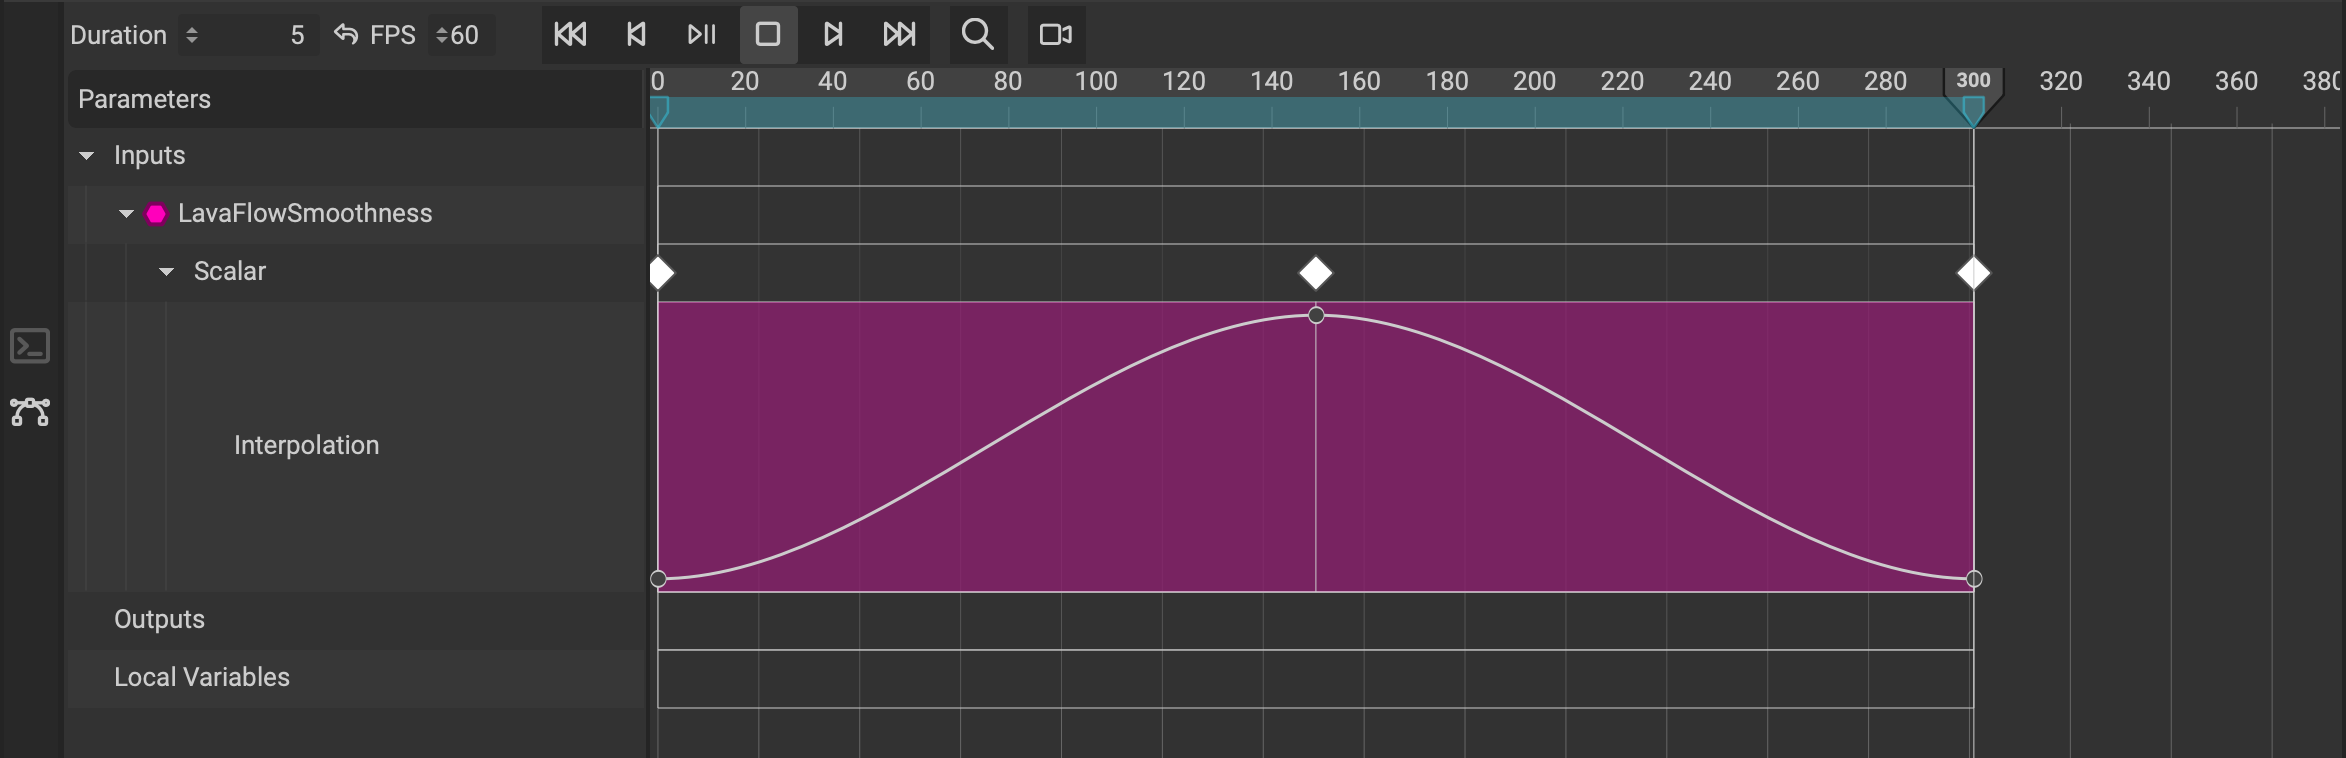
Once the parameter has been exposed, click an empty space in the graph to view its exposed parameters in the Graph Object Editor. Right-click a graph input and choose Add Keyframe to Dope Sheet. This will insert a keyframe with the current parameter value at the position of the Dope Sheet's playhead.
¶ Adjusting the Timeline Settings
The following exlains how to adjust the timeline settings for the Dope Sheet and animation.
¶ Adjusting the Timeline Duration
The length of the timeline can be adjusted with the Duration setting located in the top left corner of the Dope Sheet's toolbar.
¶ Adjusting the Animation Loop Area
The loop area determines the section of the timeline that will continuously repeat during playback in InstaMAT Studio. It also sets the in and out points of the animation when rendering to video.
To set the loop area, drag the blue start and end handles directly below the frame markers along the top of the Dope Sheet.
¶ Adjusting the Animation Framerate
The timeline's framerate can be adjusted with the FPS (Frames Per-Second) setting located in the top left corner of the Dope Sheet's toolbar.
¶ Adjusting the Horizontal and Vertical Zoom of the Timeline Area
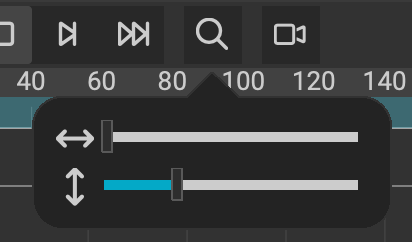 The horizontal and vertical zoom of the timeline can be manipulated in two ways:
- Click the
Zoom Controlsbutton in theDope Sheet'stoolbar and use the sliders to manipulate the zoom settings. - Use the scroll wheel to manipulate the horizontal zoom.
- Use the scroll wheel + Cmd/Ctrl to manipulate the vertical zoom of the interpolation spline area.
¶ Manipulating Keyframes in the Dope Sheet
The following section explains how to manipulate keyframes in the Dope Sheet.
¶ Moving Keyframes
To move a keyframe, left-click and drag the diamond symbol for the keyframe forwards or backwards in the timeline.
¶ Deleting Keyframes
To delete a keyframe, right-click the diamond symbol for the keyframe and select Remove This Keyframe from the contextual menu.
¶ Adjusting the Keyframe Interpolation
To adjust the timing between keyframes, use the toggle next to a keyframe parameter to expand the bezier curve area. Click on one of the keyframe circles to show a keyframe's bezier handles.
- Left click and drag the center keyframe circle vertically to increase or decrase its value
- Left click and drag a bezier handle to move one handle of the bezier curve.
- Left click and hold Alt/Option to manipulate both handles of the bezier curve.
- Hold Cmd/Ctrl to snap bezier handle controls to increments while dragging.
It is possible to create intermediate keyframes by double-clicking the bezier interpolation spline.
¶ Capturing Playback to Video
 InstaMAT Studio is able to capture the playback of the Viewport or the Image Viewer to render out animations to video.
To capture a video:
- Click the
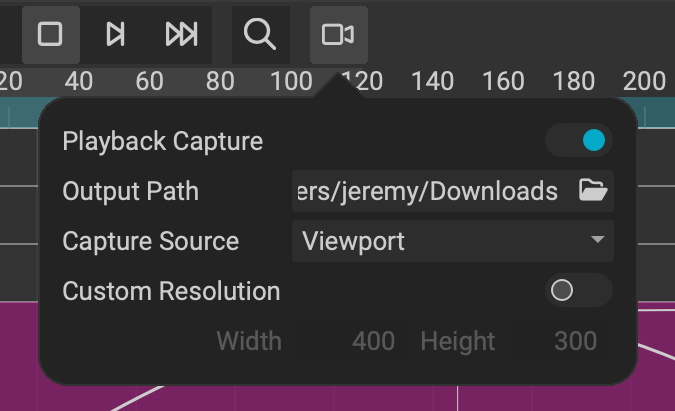
Playback Capture Settingsbutton in theDope Sheet'stoolbar. - Enable
Playback Capture. - Choose
Output Pathwhere InstaMAT will save the video file. - Select between the
Viewportor theImage Vieweras theCapture Source.
By default, InstaMAT will capture the video using the dimensions of either the Viewport or the Image Viewer depending on the chosen Capture Source. To provide a specific resolution for the video's dimensions, enable Custom Resolution and provide the Width and Height in pixels.