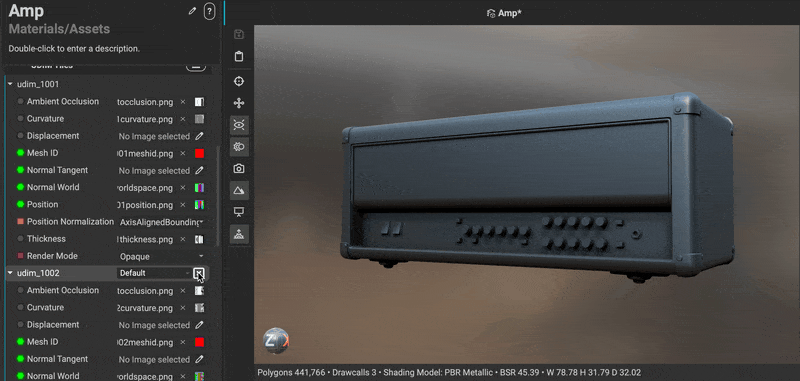
Meshes configured for multiple UDIMs distribute textures across several UV tiles, enabling higher-resolution texturing while maintaining efficient memory usage. Each UDIM tile corresponds to a specific section of UV space, allowing artists to apply different texture densities to various parts of complex models.
InstaMAT's Asset Texturing project type can texture meshes with multiple UDIMs using a single unified layer stack.
¶ Creating an Asset Texturing Project for the UDIM Workflow
To create a Asset Texturing project configured for the UDIM workflow, click the Create New InstaMAT Project button on the Welcome Screen or the (New Project) button in the main toolbar. Then select Asset Texturing from the list of available project types.
From here you can give your project a name and can choose the type of Asset Texturing project to create. From the Type dropdown menu, select UDIM.

You can then supply a mesh, and click Create a project without a template to create the project.
To learn more about creating Asset Texturing projects, please read our dedicated article: Creating Your First Asset Texturing Project.
¶ Enabling/Disabling UDIM Tiles
UDIM tiles can be disabled to improve texturing performance in the Layering Project Editor panel. Click the X next to a UDIM tile to disable or enable it. Meshes associated with a disabled UDIM tile will be hidden in the viewport.
¶ Configuring Execution Resolutions for Individual UDIM Tiles
Each UDIM tile can be configured to render at an independent execution resolution, which further improves texturing performance. The resolution can be adjusted in the Layering Project Editor by hovering over a UDIM tile and selecting the preferred resolution from the execution resolution popup.

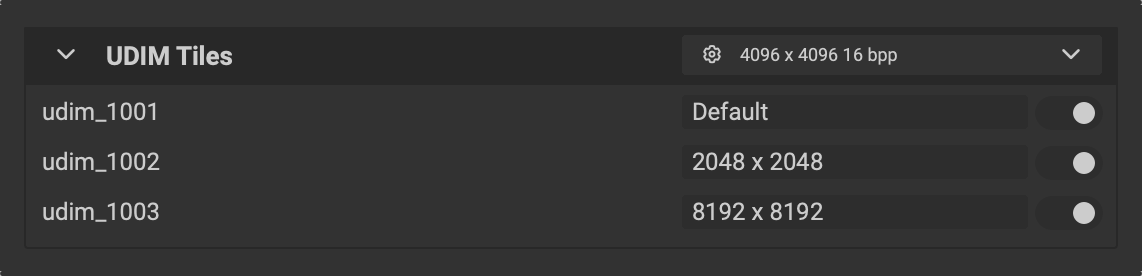
¶ Exporting UDIM Tiles at Various Resolutions
When exporting textures as images with the Image and Data Output Export dialog, the resolution of each UDIM tile can be configured. Click on the dropdown next to the tile to configure its resolution using the resolution popup. Additionally, the switch to the right of each tile can be toggled to enable or disable it for export.