Symmetry painting in InstaMAT Studio lets you paint across multiple axes at the same time. This streamlines the process of texturing symmetrical assets such as characters, and makes it possible to create complex, repeated designs with fewer brush strokes.
InstaMAT supports two types of symmetry painting:
- Planar Symmetry mirrors strokes across a single plane and is well‑suited for bilateral details such as left/right sides of props or characters.
- Radial Symmetry distributes multiple instances of a stroke around a center, perfect for bolts around a hatch, vents, spokes, or ornamental rings.
Both modes are configured via dedicated settings and can be toggled at any time while painting.
¶ Quick Start
To start painting with symmetry:
- Click the
Add Layerbutton located below the Layer Stack. - From the pop-up menu, select either a
Multi-Channel Brushor anElement Brush. - Click the
Symmetrybutton in thePainting Toolbarand select a symmetry mode.
Your paint strokes will mirror or repeat across the mesh based on the chosen symmetry mode
The alignment of the symmetry plane or central radial axis can be configured directly in the
Viewportor with the dedicatedSymmetry Settingspop up. More information on symmetry configuration for each mode can be found below.
Use Shift + Q to toggle between planar and radial symmetry modes.
¶ Planar Symmetry
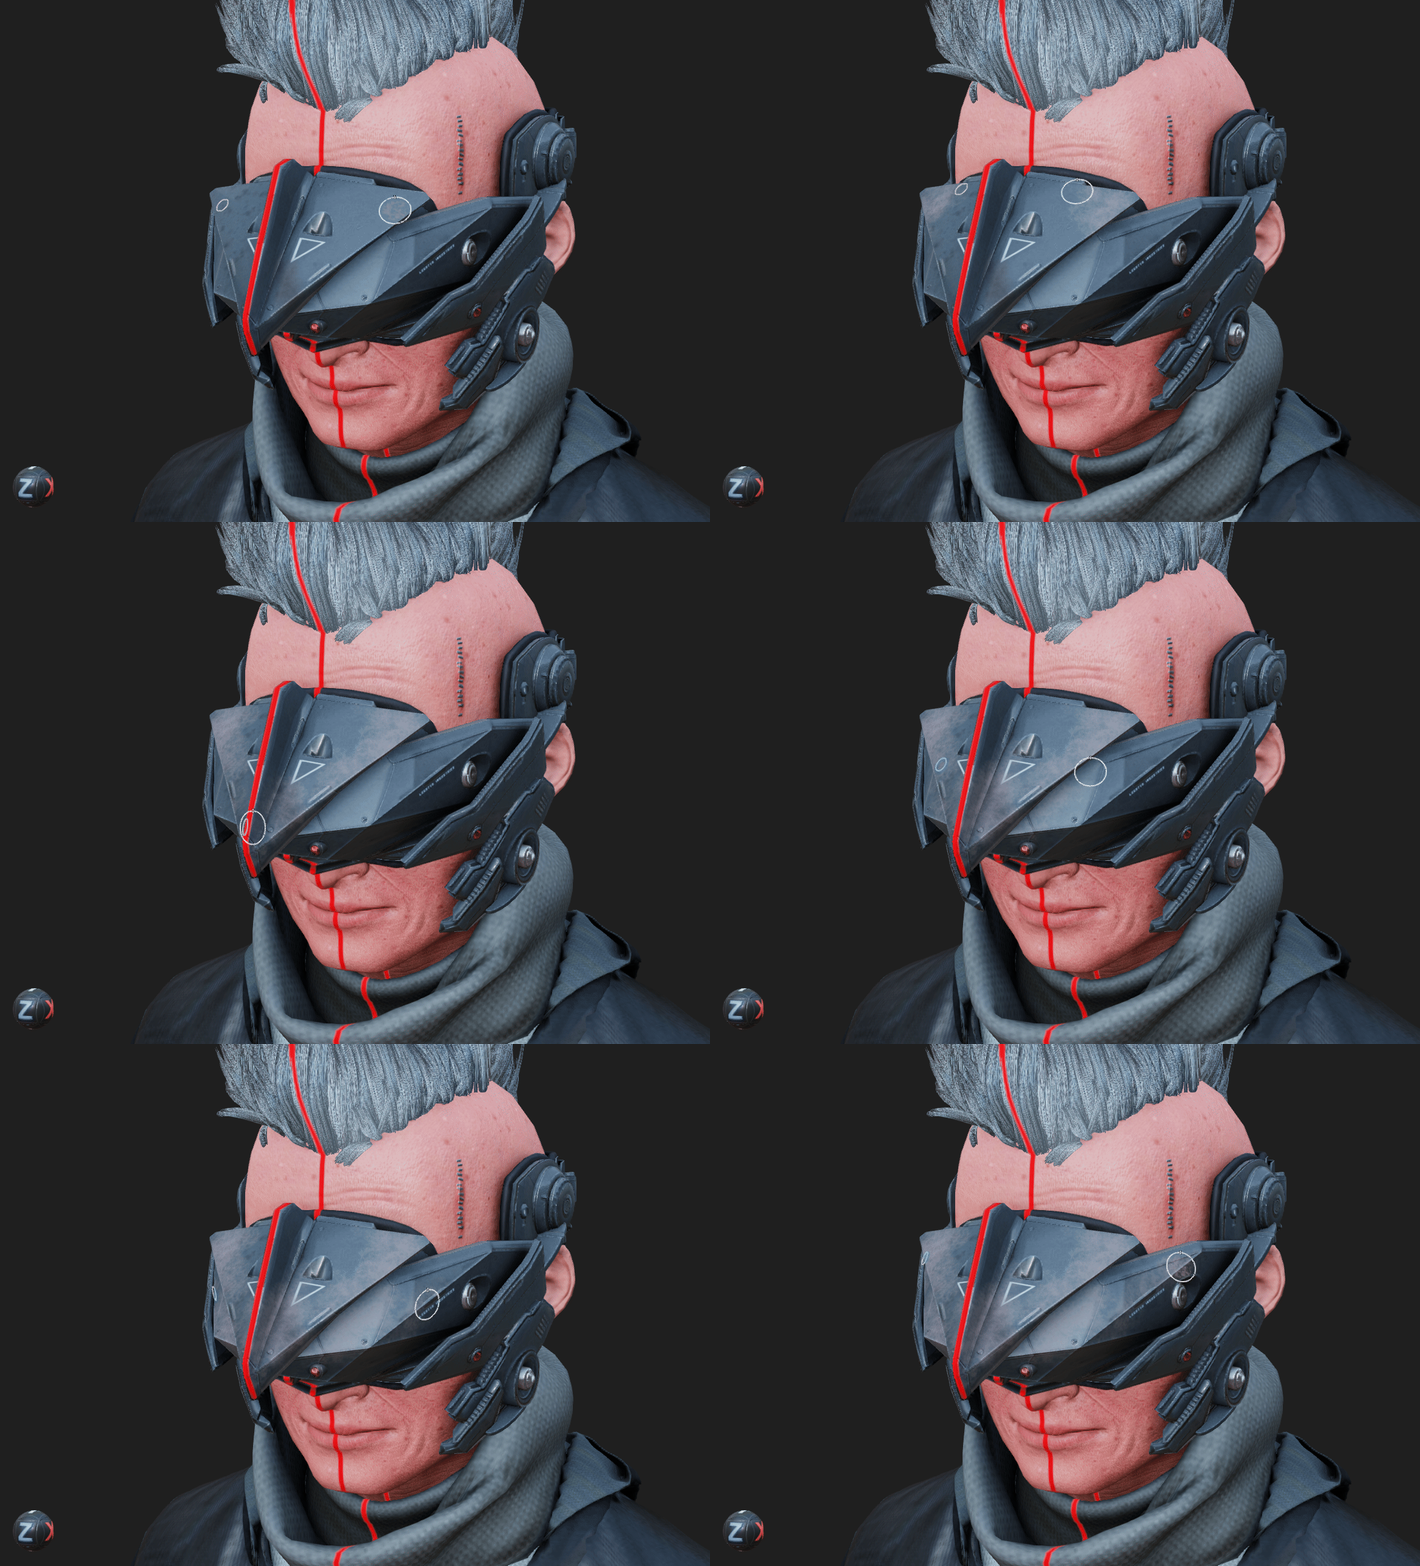
Planar symmetry mirrors strokes across a plane in one axis. This mode is useful when texturing assets that are nearly symmetrical across a singular axis such as characters.
¶ Planar Symmetry Settings
The Symmetry Settings popup can be found in the Painting Toolbar at the top of the main window and contains settings for the visualization and behavior for planar symmetry.
¶ Settings
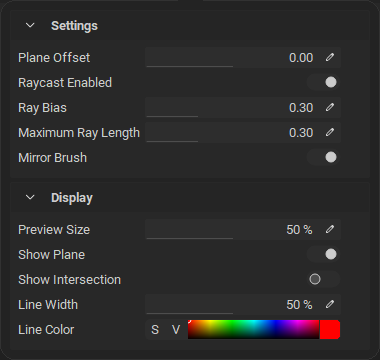 The following settings adjust the behavior of planar symmetry:
- Plane Offset: Shifts the symmetry plane along the selected axis.
- Raycast Enabled: Projects mirrored strokes onto the mesh surface using raycasting.
- Ray Bias: Offsets the ray origin along the surface normal to avoid self-intersection artifacts.
- Maximum Ray Length: The maximum distance a ray can travel when projecting mirrored strokes onto the mesh.
- Mirror Brush: Mirrors the brush stamp across the symmetry plane.
The plane offset may be adjusted directly in the viewport by pressing W to activate the translation gizmo, or by clicking the
Translatebutton on theViewport Toolbar. Press W or click theTranslatebutton again or to disable the translation gizmo to continue painting.
¶ Display
The following display settings configure the visualization of planar symmetry in the Viewport:
- Preview Size: The size of the mirrored brush preview in the viewport.
- Show Plane: Shows the symmetry plane in the viewport.
- Show Intersection: Shows the line where the symmetry plane intersects the mesh.
- Line Width: The width of the intersection line on the mesh.
- Line Color: The color of the intersection line on the mesh.
¶ Changing The Axis
Press Q to quickly switch the symmetry axis or click on the X Change Symmetry Axis button in the Painting Toolbar.
¶ Radial Symmetry
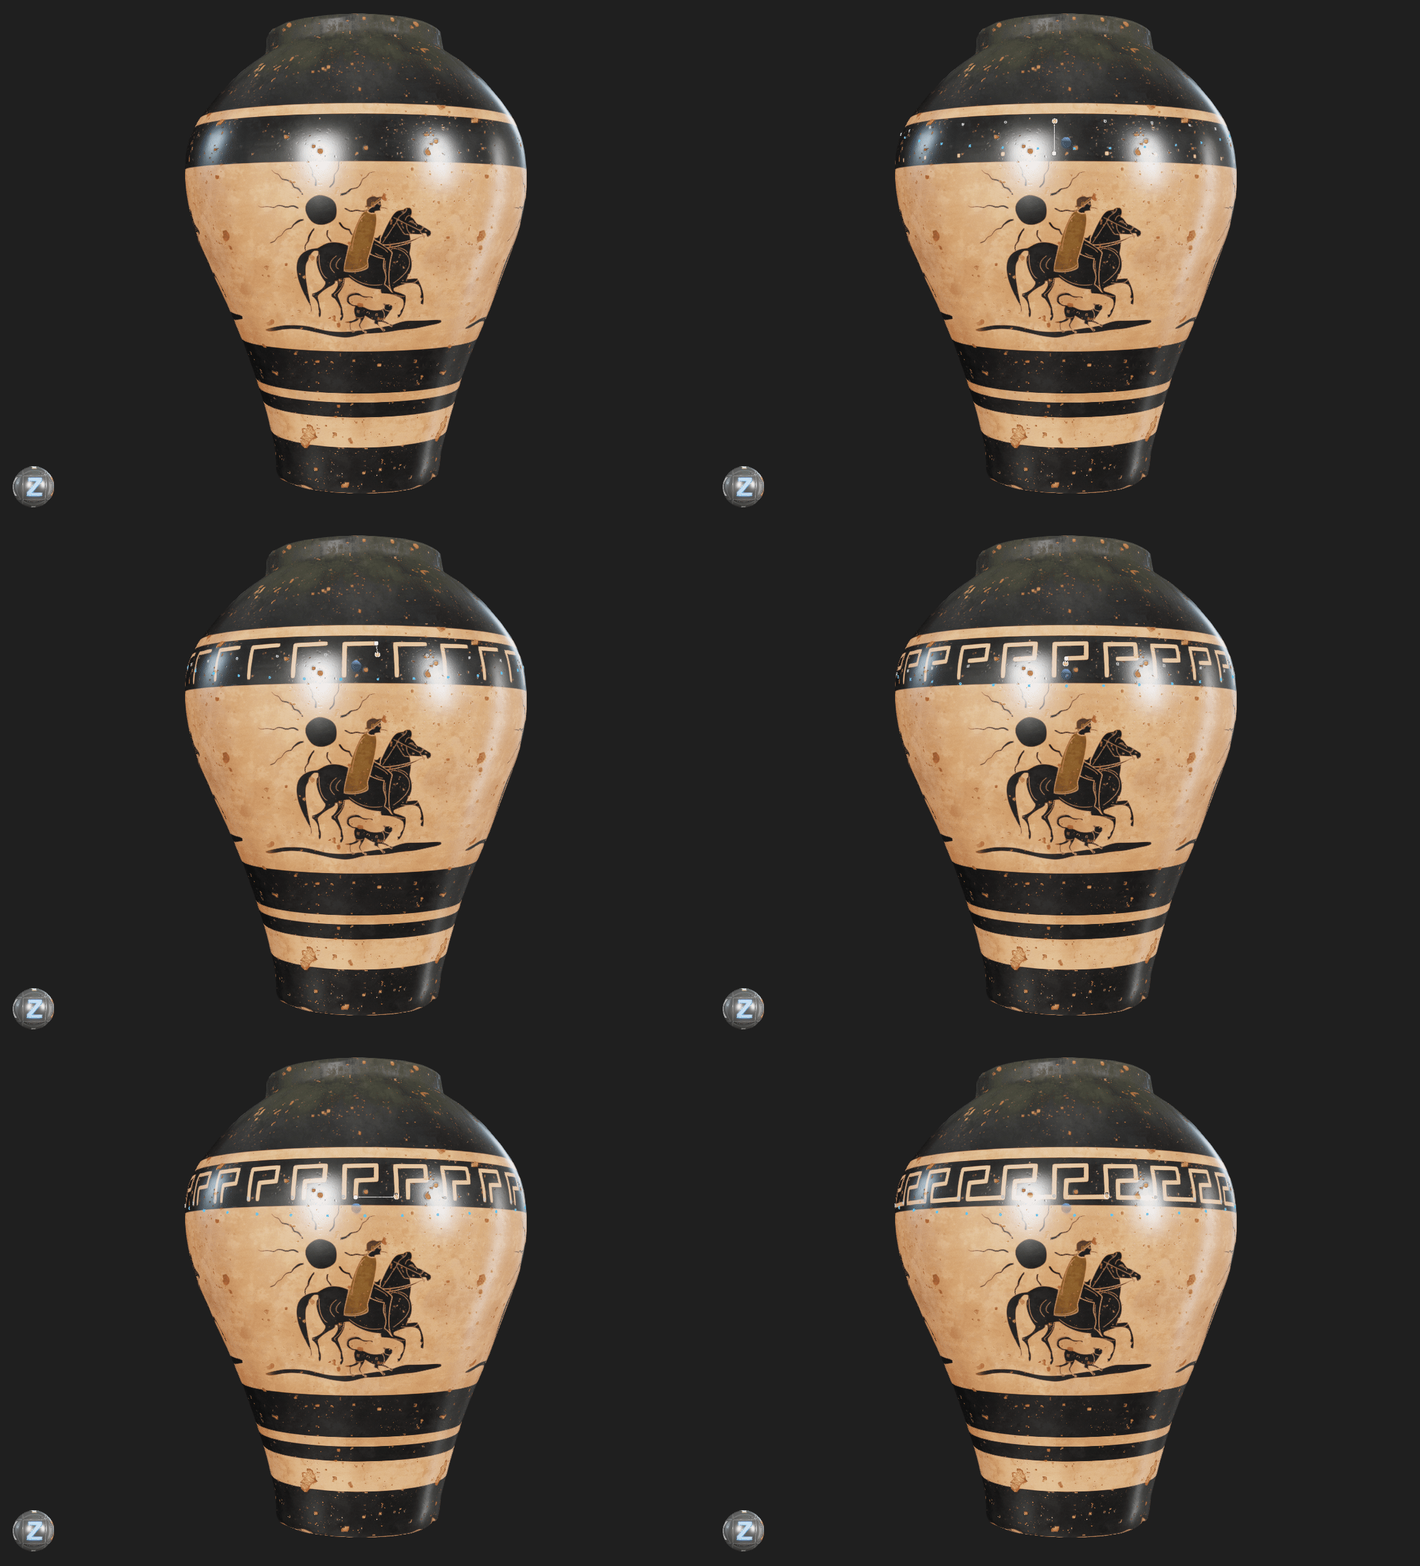
Radial symmetry repeats the stroke around a central axis to create full 360° rings or partial arcs. This mode streamlines the process of creating complex repeated designs along cylindrical and flat surfaces depending on the chosen central axis. The amount of repeated brushes, angle span, and central axis are conigurable.
¶ Radial Symmetry Settings
The Symmetry Settings popup can be found in the Painting Toolbar at the top of the main window and contains settings for the visualization and behavior for radial symmetry.
¶ Settings
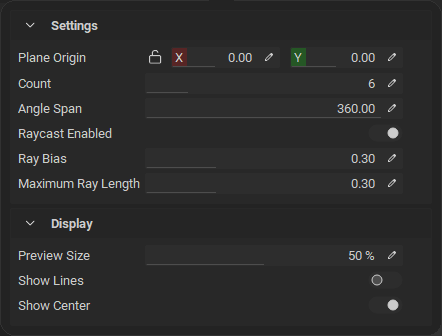 The following settings adjust the behavior of radial symmetry:
- Plane Origin: The center of the radial symmetry on the symmetry plane.
- Count: The number of evenly spaced repetitions around the symmetry center.
- Angle Span: The angular range in degrees covered by the radial repetitions.
- Raycast Enabled: Projects mirrored strokes onto the mesh surface using raycasting.
- Ray Bias: Offsets the ray origin along the surface normal to avoid self-intersection artifacts.
- Maximum Ray Length: The maximum distance a ray can travel when projecting mirrored strokes onto the mesh.
The central axis origin can be adjusted directly in the viewport by pressing W to activate the translation gizmo, or by clicking the
Translatebutton on theViewport Toolbar. Press W or click theTranslatebutton again or to disable the translation gizmo to continue painting.
¶ Display
The following display settings configure the visualization of radial symmetry in the Viewport:
- Preview Size: The size of the mirrored brush preview in the viewport.
- Show Lines: Shows the radial symmetry lines in the viewport.
- Show Center: Shows the center point of the radial symmetry in the viewport.
¶ Changing the Axis
Press Q to quickly switch the symmetry axis or click on the Change Symmetry Axis in the Painting Toolbar.
¶ Ray Bias and Maximum Ray Length
By default, InstaMAT uses raycasting to paint symmetrically. This improves the accuracy of painting symmetrically on meshes that are not exactly symmetrical. The following settings are used to control how InstaMAT uses raycasting to find symmetrical locations on a mesh while painting.
- Ray Bias: Offsets the raycast projection slightly from the surface of the mesh to prevent visual artifacts. If painting artifacts appear, try adjusting the ray bias.
- Maximum Ray Length: Determines how far the raycast projection searches for a surface. If a mirrored stroke doesn’t reach the surface of the mesh, increase the ray length.