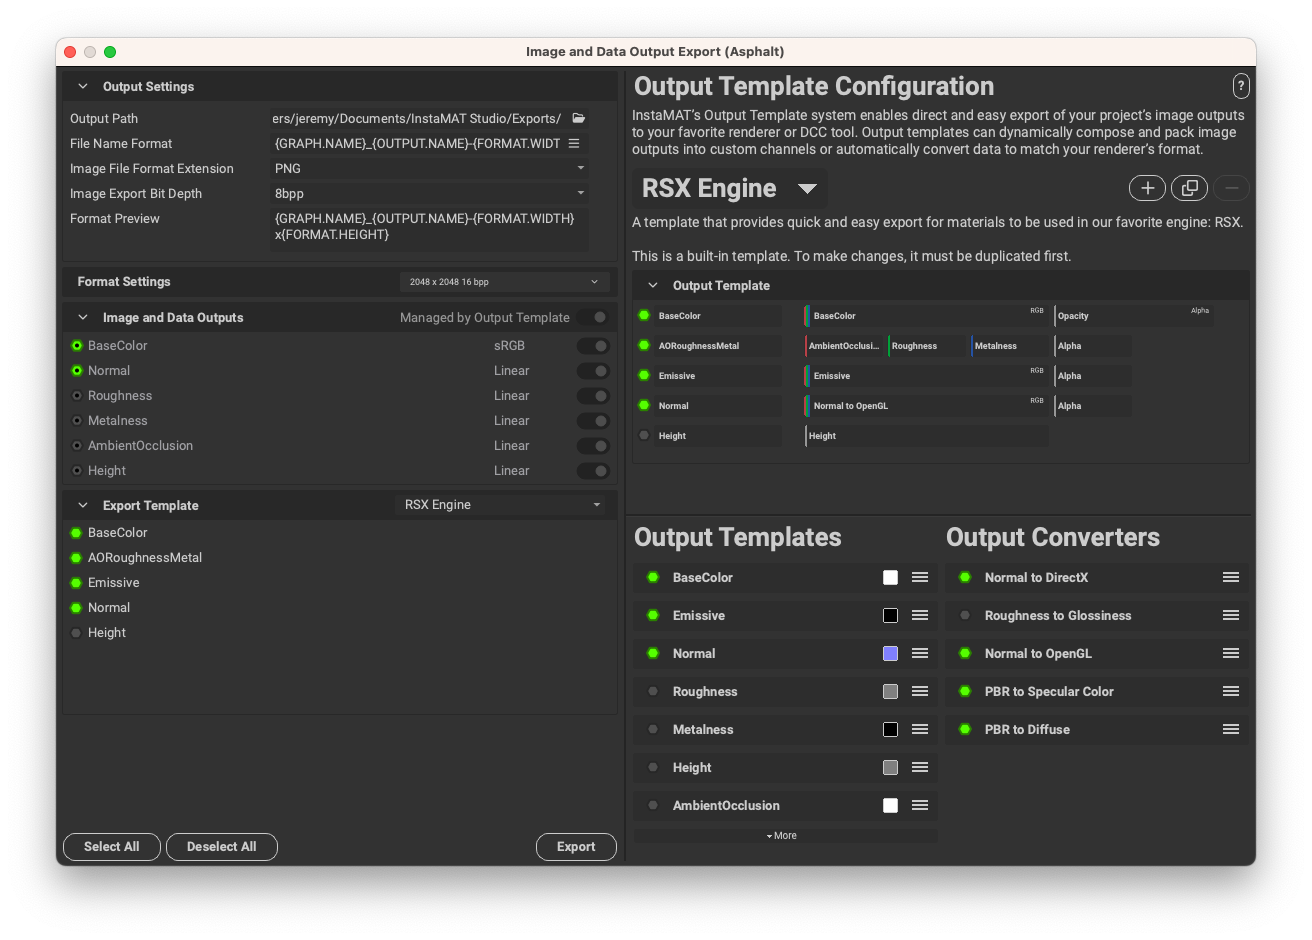
The Image and Data Output Export window is a comprehensive interface for exporting a project's outputs to disk. For images, this includes all maps generated from a PBR material or layering project. In addition to images, meshes and point clouds from an Element Graph can also be exported here.
The template system makes it easy to combine multiple maps into one file through channel packing. This places maps that contain values in the pixels from 0 to 1 into separate red, green, blue, and alpha channels of an RGBA image. This packed image then contains multiple maps of information and reduces the texturing footprint of the asset.
Additionally, many common map conversions can take place during export such as converting an OpenGL Normal map to a DirectX Normal map or switching from a Metallic/Roughness workflow to Specular/Glossy.
¶ Interface Overview
The UI for the Image and Data Output Export window is divided into four parts: Output Settings, Image and Data Outputs, Output Template Configuration, and Export Template.
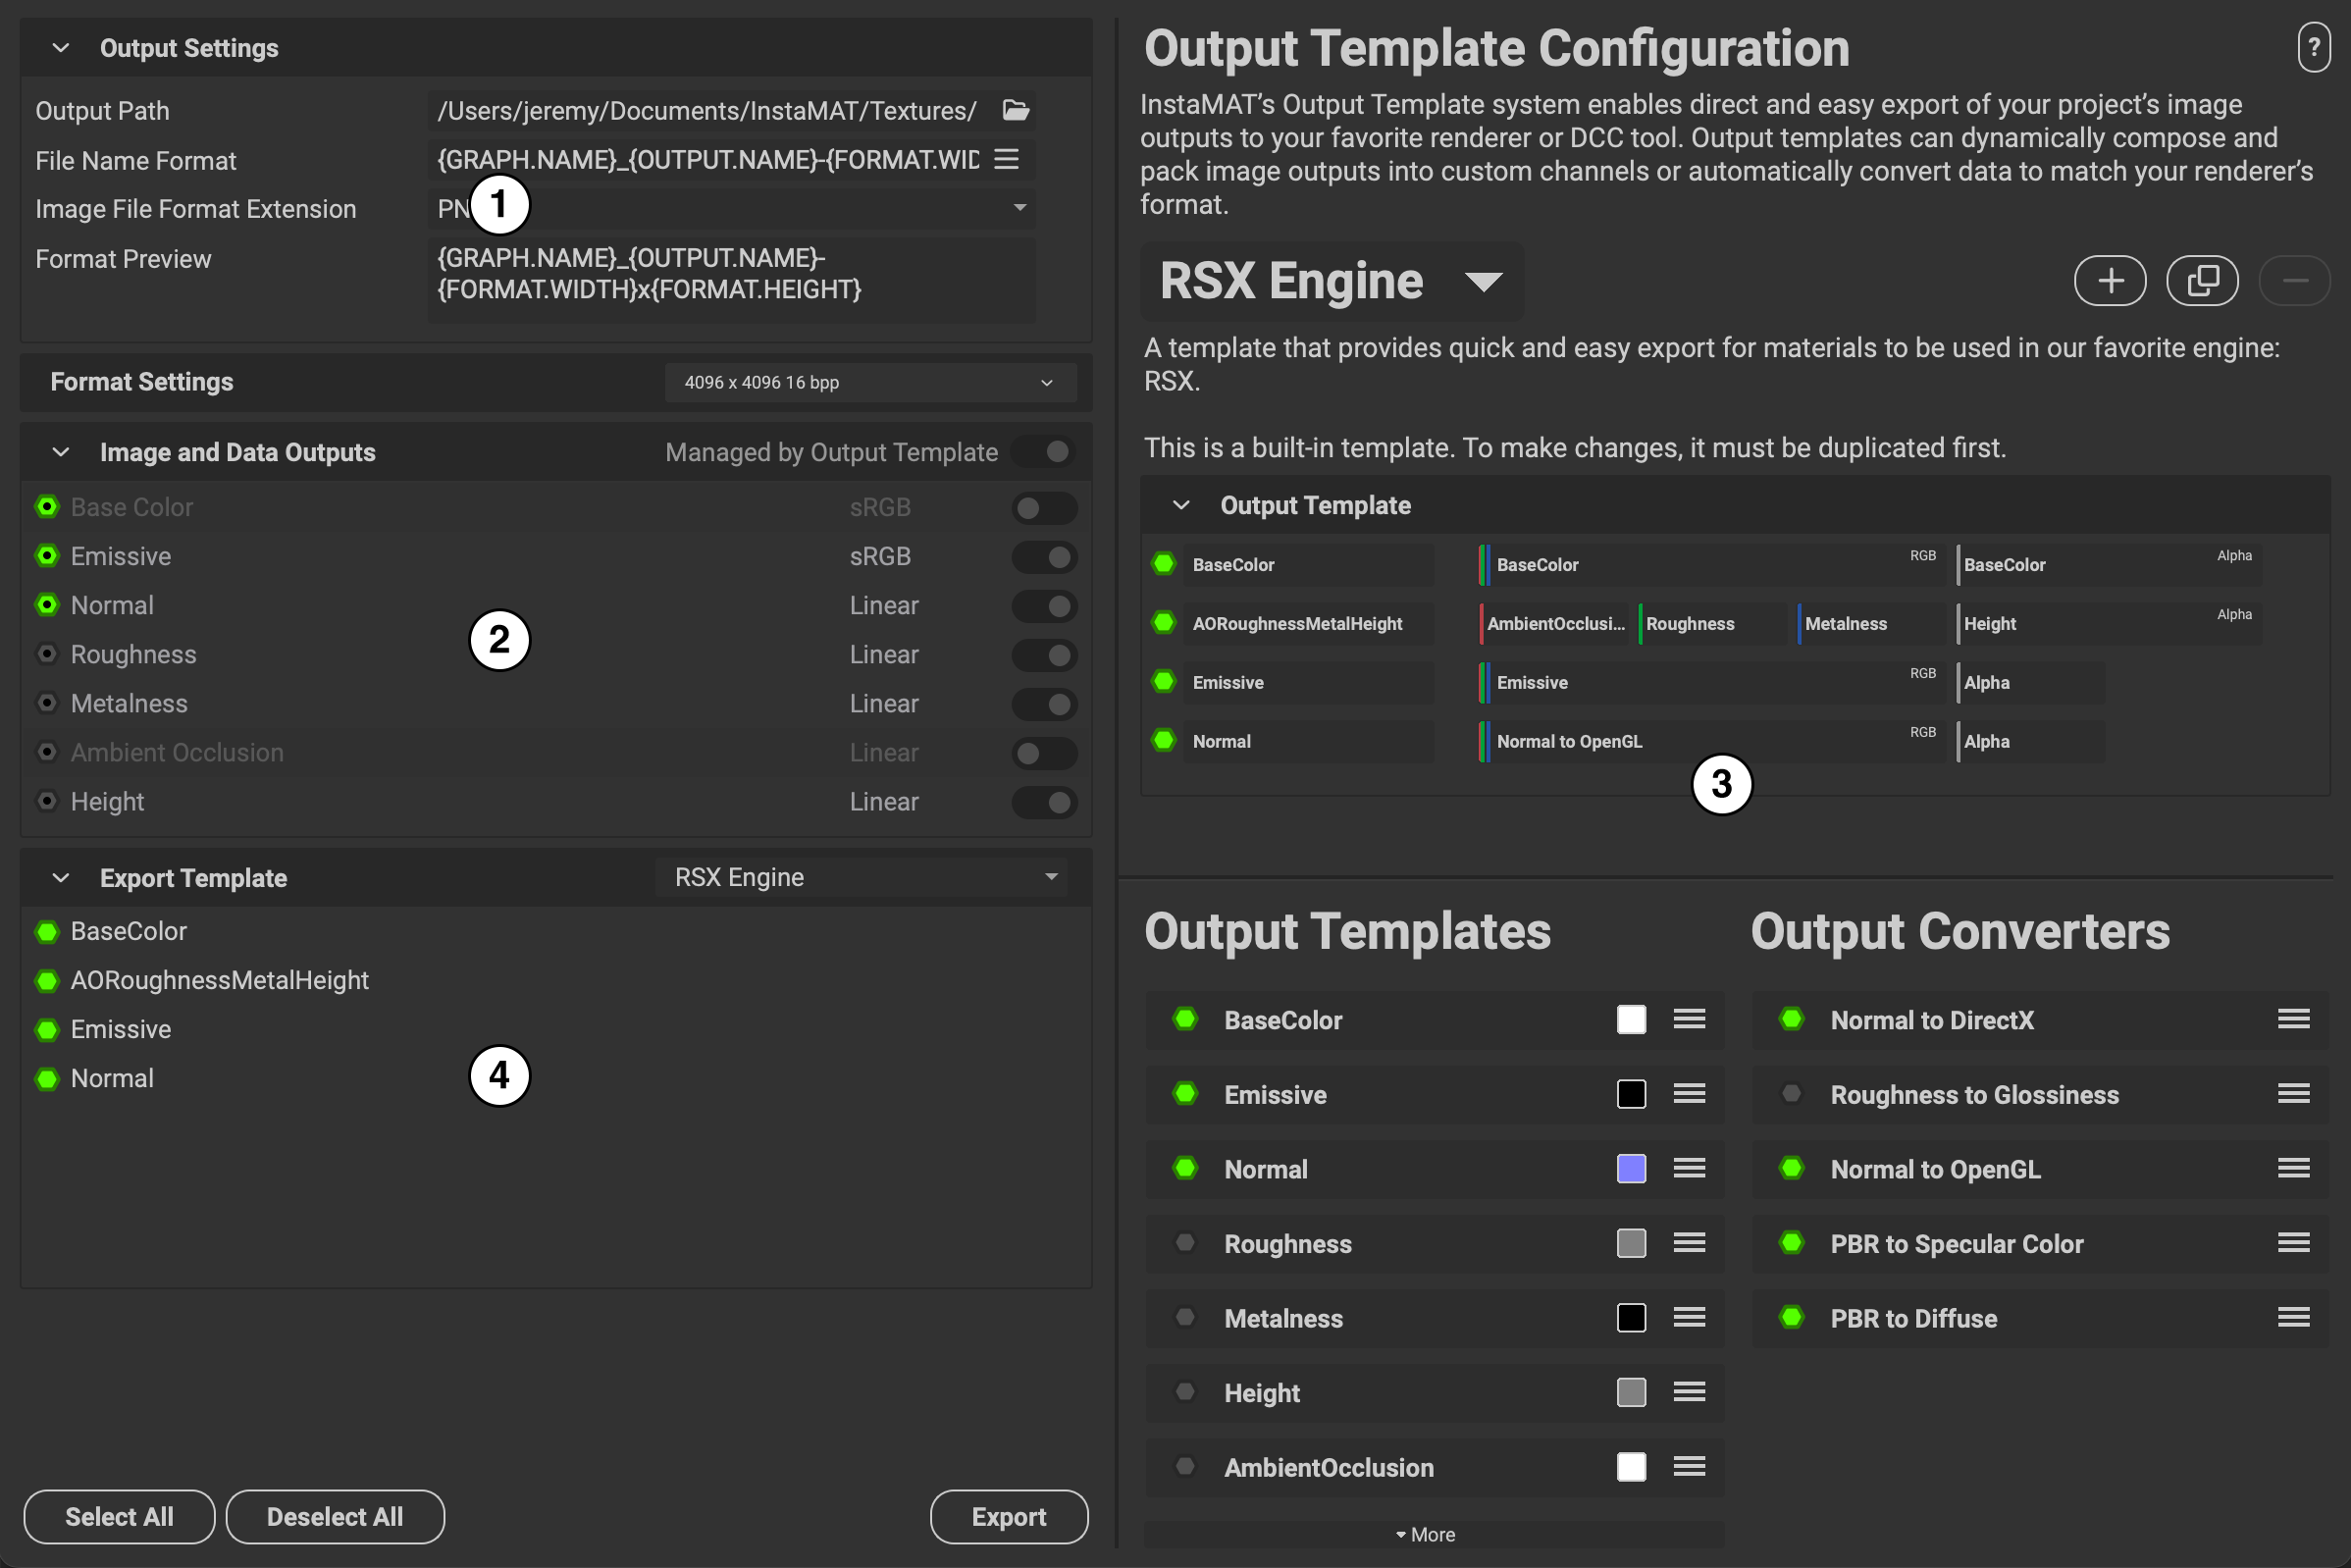
¶ Output Settings
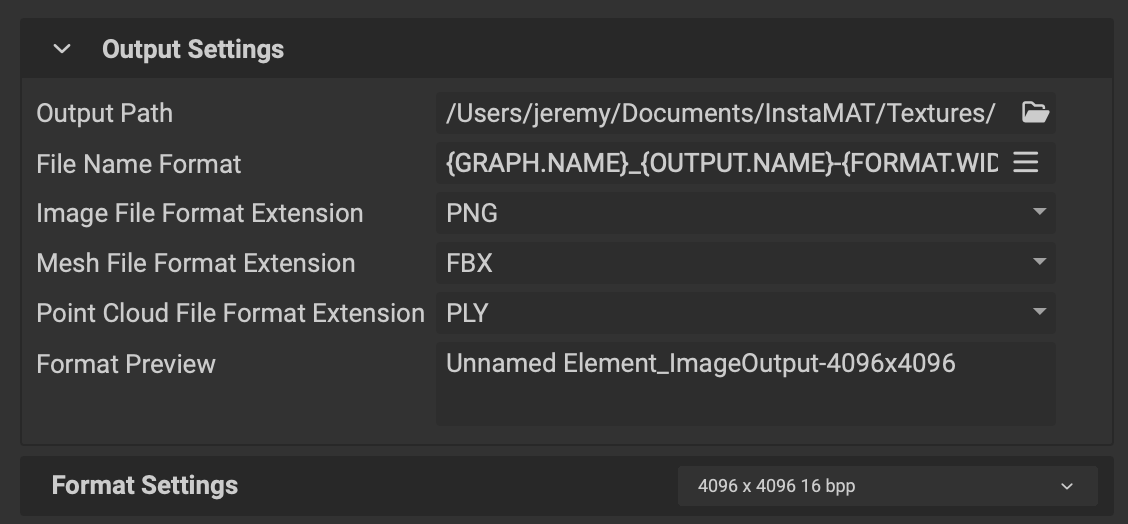 This section determines where to export the outputs, the naming convention for each file, the file's format extension, and format settings.
Format extension dropdown menus will appear based on the type of outputs used for the project. An image output's export resolution and format is determined separately from the project's current execution settings found in the main toolbar of InstaMAT Studio's UI. This means that the export resolution can be different from the working resolution.
- Output Path: Determines the folder location to export the outputs.
- File Name Format: Provides a format using variables for the file name of each baking result. Tokens can be selected using the button located to the right of the input field.
- Image/Mesh/Point Cloud Format Extension: Determines the format extension for the exported file of that type.
- Image Export Bith Depth: The maximum bit-depth when exporting images. For most use-cases 8-bit should be enough. When exporting color-spaced images (eg. sRGB) at higher bit-depths, make sure that your renderer can render color-spaced images at bit-depths higher than 8-bit.
- Format Preview: Provides a preview of the naming convention used in the
File Name Formatsetting. - Format Settings: Sets the export resolution and format of an image output. This setting is separate from the "working" resolution and format found in InstaMAT Studio's main toolbar.
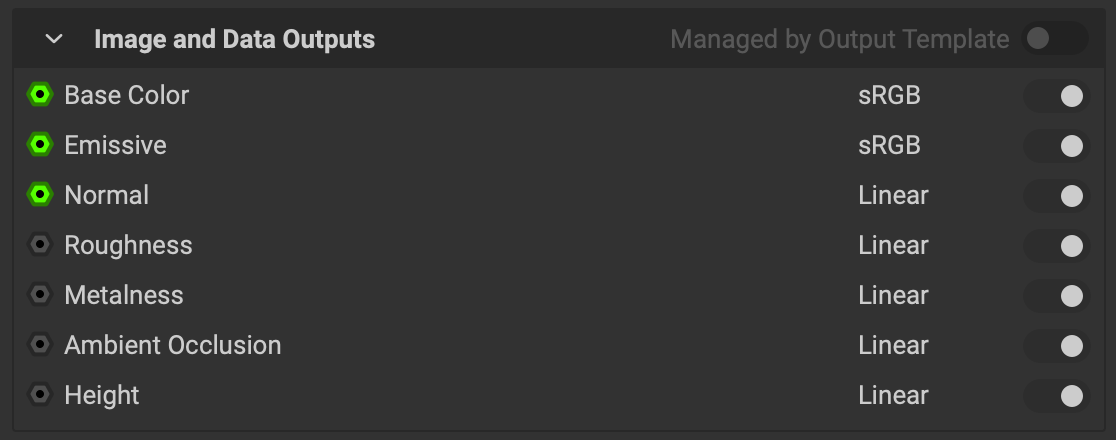
¶ Image and Data Outputs
 This section sets which outputs are exported. Outputs with their toggle enabled "inner circle to the right" will be exported. If an export template is chosen, the
 Managed by Output Template toggle will be enabled and the switches for each output will be toggled based on their usage in the chosen template.
¶ Output Template Configuration
 This section provides access to InstaMAT Studio's powerful template configuration system.
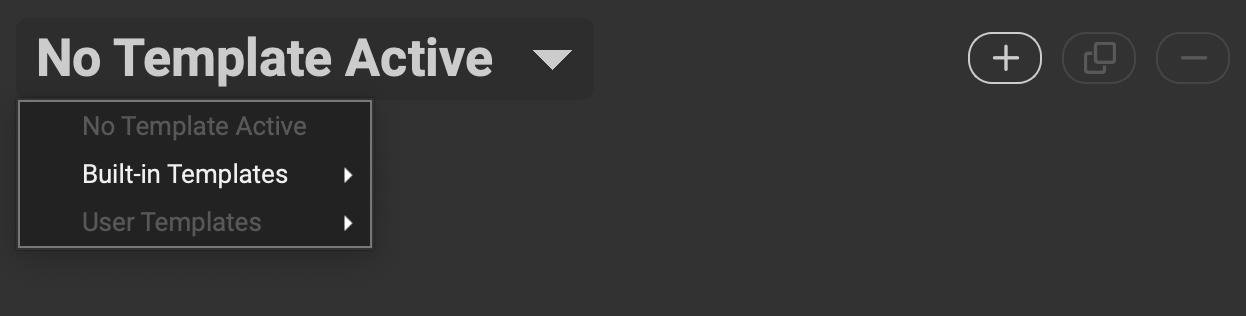 With the large dropdown at the top, a template can be selected. By default this says "No Template Active". Add or remove a template by clicking the or buttons to the right of the dropdown. To duplicate a template, make sure it is active and click the button.
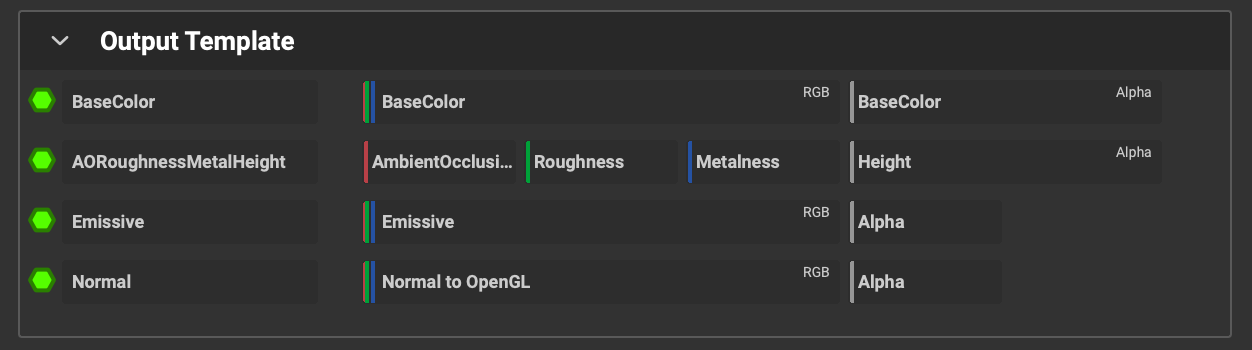 The
The Output Template table shows each custom output file in a row. The first column displays the output file's name. The second and third columns display how a particular project output is mapped to the channels of the custom output image.
 Options from the
 Output Templates and Output Converters lists can be dragged onto a custom output file's channels to map or pack the information.
To learn more about creating custom output templates, please read the Creating Output Templates section below.
¶ Export Template
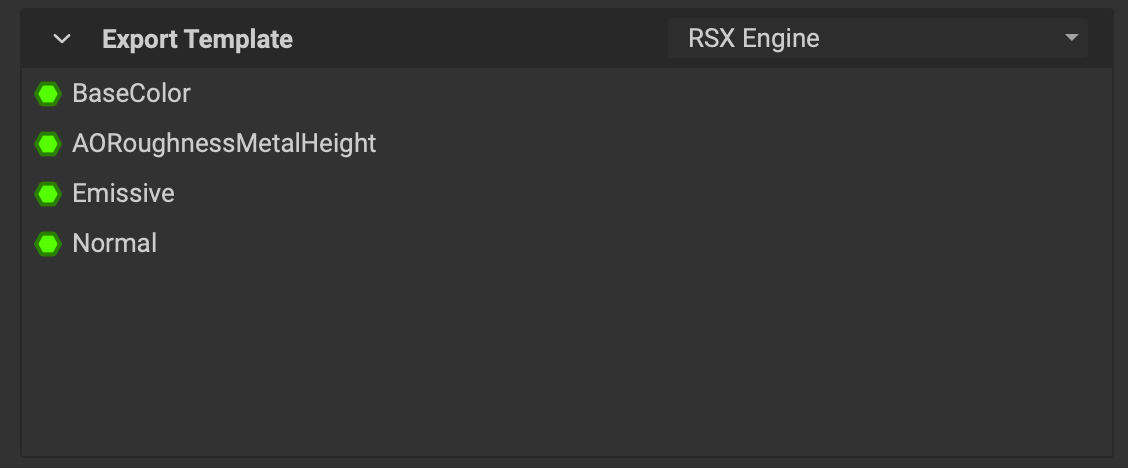 This section shows the active output template used for export. Each output file is listed along with its file type expressed as a dot with a corresponding type color. Use the dropdown menu to quickly select an output template.
¶ Creating Output Templates
Custom output templates can be created to dynamically export, map, and pack project outputs into a predefined set of output images. The following section illustrates how to create a custom output template.
¶ 1. Create a New Template
Click the button to create a new template. From the popup dialog, provide the template with a name and, if needed, a description. The template is now selected as the active template and can be found again from the large dropdown menu at the top of the window under the User Templates submenu.
Templates are stored in InstaMAT's home directory. This is typically found here:
~/Documents/InstaMAT/Output Templates.
¶ 2. Configure the Template
Now that the template has been created, custom outputs can be added and configured using the Output Template table. Click the Add Custom Output button and choose from an RGBA or Grayscale image.
Double Click the name of the custom output in the first column of the table to rename it.
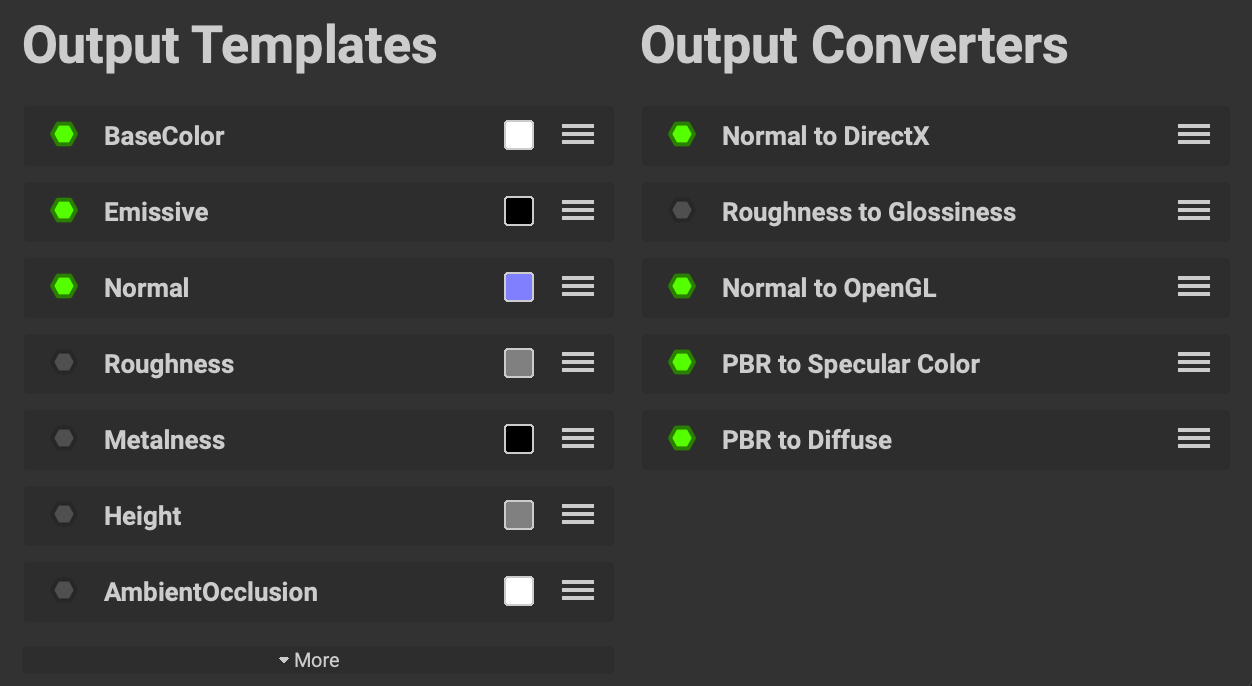
InstaMAT Studio ships with many common output template options. These options are populated in the Output Templates section below. Options can be mapped or packed into specific custom output channels by dragging and dropping them into their respective slots on the table. Project or graph outputs that have matching names to these options will automatically be assigned to their proper output channel upon export.
For example, to map a "Roughness" output to the red channel of a custom RGBA output called "RoughMetalAO", drag the Roughness option in the Output Templates area onto the Red column of the custom output. Additionally the "Metalness" and "AmbientOcclusion" channels from the Output Templates section can be dragged into the Green and Blue columns to pack the information into one custom output image file.
Clicking More at the bottom of the list will reveal additional options. If an output that you need is not listed, a custom option can be created by clicking the at the top of the list. You can then choose whether it is an RGBA or Grayscale option. InstaMAT Studio will then ask for a default color or value to be chosen. This value is used if the export output template is used, but a matching output from the project is not provided. To rename the option, double click it.
¶ Learn More!
To learn more about exporting textures and materials in InstaMAT Studio as images, please watch our dedicated video on our YouTube channel.